

Why is my KitchenAid dryer not drying?
If your KitchenAid dryer model KEYS750LT0 runs but clothes stay damp, the most common causes are restricted airflow (lint screen or vent), no heat from a failed heating circuit, or poor drum tumbling from a worn belt. Start with airflow checks, then test heat-related parts.
- Clean the lint screen completely (wash off fabric softener residue and dry it).
- Run a timed dry cycle and confirm strong airflow at the outside vent hood.
- Inspect the vent hose behind the dryer for kinks, crushing, or long runs.
- Avoid overloading; heavy loads can block airflow and slow drying.
- Try a higher heat setting on a timed cycle to rule out sensor-cycle confusion.
A dryer can “run” normally but still not dry if it cannot move air or cannot heat.
| What you notice | Most likely issue | What to check next |
|---|---|---|
| Little or no air at vent hood | Venting restriction | Duct, hood flap, lint buildup; see dryer takes a long time to dry |
| Strong airflow but no heat | Heating circuit problem | Dryer element 279838, thermal cut-off, thermostats |
| Heat seems OK but drum barely turns | Drive problem | Dryer drum belt 341241, idler, rollers (kit) |
If airflow is good, these parts are frequent culprits:
- Heating element: an open element stops heat; replace with dryer element 279838.
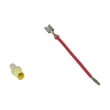
- Thermal cut-off fuse kit: can open if the dryer overheats (often from a clogged vent); consider dryer thermal cut-off fuse kit 279816.
- Operating or high-limit thermostat: can prevent proper heating control; check dryer operating thermostat WP3387134 and dryer high-limit thermostat WP3977767.
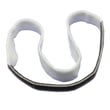
- Drum not tumbling well: a slipping or broken belt reduces drying performance; replace dryer drum belt 341241 or use dryer repair kit 4392065 if rollers and idler are worn.
Restricted venting is the #1 reason dryers take too long to dry; it also overheats the heater housing and can repeatedly blow thermal fuses. Fixing airflow first prevents repeat failures and restores normal dry times.
Last updated: February 2026
How do I know if my dryer heating element is blown?
If your KitchenAid dryer model KEYS750LT0 runs but produces little or no heat, the heating element is a top suspect. The most reliable confirmation is a continuity test with a multimeter after unplugging the dryer; an “open” reading indicates a blown element such as the dryer element 279838.
- Dryer tumbles normally but clothes stay cold or damp
- Cycle time gets much longer with little improvement
- No heat on any heat setting (not just one cycle)
- You smell a brief “hot metal” odor right before heat stops (sometimes)
- Breaker may trip if the element is shorted to the housing
- Unplug the dryer (electric shock hazard).
- Access the heater housing (typically from the rear or lower front panel, depending on design).
- Remove at least one wire from the element terminal.
- Set a multimeter to ohms (Ω) and test across the element terminals.
- Result:
- Open / OL / infinite resistance: element is blown
- Some resistance: element is not blown (look at airflow or thermostats next)
| Meter result | What it indicates | What to do next |
|---|---|---|
| OL / no continuity | Element is blown | Replace the element |
| Continuity present | Element likely OK | Check airflow, fuses, thermostats |
| Continuity to metal housing | Element shorted | Replace element; inspect wiring |
Restricted airflow and overheating can stop heat even with a good element.
- Dryer thermal cut-off fuse kit 279816 (opens if dryer overheats)
- Dryer high-limit thermostat WP3977767 (opens on high temperature)
- Dryer operating thermostat WP3387134 (regulates normal heat)
- Venting and lint buildup (lint screen, lint chute, vent duct)
A blown element is a straightforward fix, but if overheating from a clogged vent caused it, the new element can fail again quickly. Restoring proper airflow protects the heater, thermostats, and wiring.
Last updated: February 2026
How to tell if a dryer start switch is bad?
A bad start switch on your KitchenAid dryer model KEYS750LT0 typically shows up as a dryer that has power but will not start when you press the Start button. The most reliable check is a continuity test with a multimeter; the switch should change from open to closed when you press it.
- Dryer has power (lights work) but motor never runs when you press Start
- You have to press Start unusually hard, or it only works intermittently
- Start button feels loose, stuck, or does not “click” consistently
- You hear a hum but the drum does not turn (check belt and motor circuit too)
- Unplug the dryer (or switch off the breaker) before opening any panels.
- Access the switch terminals on the control console.
- Set your multimeter to ohms/continuity.
- With the switch not pressed, the meter should typically read OL/infinite (open).
- Press and hold Start; the meter should read 0 to a few ohms (closed).
If the reading does not change when you press the switch, the start switch is bad.
A start switch can test good and the dryer still will not run if another safety or drive part is failing.
| What you observe | More likely cause | Example part to check |
|---|---|---|
| Door must be slammed to start | Door switch not closing | Dryer door switch WP3406107 |
| Motor runs but drum does not turn | Broken belt or idler issue | Dryer drum belt 341241 |
| Loud squeal, thump, or binding | Worn rollers/idler/belt components | Dryer repair kit 4392065 |
The start switch is part of the motor start circuit. If it cannot close electrically when pressed, the motor never gets the “start” signal, so the dryer stays idle even though the unit has power.
Last updated: February 2026
Does KitchenAid sell replacement parts?
Yes. For your KitchenAid KEYS750LT0 dryer, we offer replacement parts that match this model, including common wear items and heating and airflow components. If you know the symptom (won’t start, no heat, noisy, long dry times), we can help you narrow to the right part fast.
These are the parts customers replace most often when performance drops:
- Dryer drum belt 341241 for a drum that won’t turn or slips
- Dryer element 279838 for no heat or weak heat (electric heat circuit)
- Dryer door switch WP3406107 for a dryer that won’t start when the door is closed
- Dryer thermal cut-off fuse kit 279816 for a dryer that runs but won’t heat or overheats
- Dryer blower wheel WP694089 for poor airflow, rattling, or thumping
- Idler pulley WP691366 for squealing or belt tension problems
We match parts to KEYS750LT0 and to the failure symptom so you don’t replace the wrong component.
- If the drum won’t spin: check the belt, idler pulley, and drum support components
- If it won’t heat: check the heating element and heat safety devices (thermal cut-off, thermostats)
- If it won’t start: check the door switch and start/switch components
- If it’s noisy: check the idler pulley, blower wheel, and drum support wear items
| Symptom | Most likely parts to check | What you’ll notice |
|---|---|---|
| Drum won’t turn | Dryer drum belt, idler pulley | Motor runs but drum stays still, or belt snapped |
| No heat | Dryer element, thermal cut-off fuse kit | Runs but clothes stay cool or barely warm |
| Won’t start | Dryer door switch | No response when pressing start, door must be “seen” as closed |
| Long dry times | Blower wheel, lint chute/venting | Clothes take multiple cycles, airflow feels weak |
Using model-matched replacement parts helps restore proper drum movement, safe heating, and strong airflow. That means shorter dry times, fewer shutdowns from overheating protection, and less wear on the motor and belt.
For dryer care that reduces part wear, use our guide: how to keep a dryer clean and economical.
Last updated: February 2026
What are the parts in a dryer?
A KitchenAid dryer like model KEYS750LT0 is built around an airflow system (blower wheel and venting), a tumbling system (drum, belt, idler), a drive system (motor), and safety and temperature controls (thermostats and thermal cut-off). These parts work together to heat, move, and exhaust moist air.
- Drum and supports: Holds clothes and tumbles them; supported by bearings, glides, or rollers.
- Drive system: Motor turns the drum using a belt and idler pulley.
- Airflow system: Blower wheel pulls air through the drum and pushes it out the exhaust.
- Heating system: Electric heating element (electric models) or burner assembly (gas models).
- Temperature and safety controls: Operating thermostat, high-limit thermostat, and thermal cut-off/fuse.
- Door and start controls: Door switch and timer/control switch allow safe operation.
These are frequently serviced items for this model:
- Dryer drum belt 341241
- Idler pulley WP691366
- Dryer blower wheel WP694089
- Dryer operating thermostat WP3387134
- Dryer thermal cut-off fuse kit 279816
- Dryer door switch WP3406107
| Symptom | Most likely system | Parts to check first |
|---|---|---|
| Drum will not turn | Drive | Belt, idler pulley, motor |
| Runs but no heat | Heating or safety | Heating element, thermal cut-off, thermostats |
| Long dry times | Airflow | Lint screen, venting, blower wheel |
| Stops when door moves | Door safety | Door switch, strike |
Knowing the main dryer parts helps you troubleshoot faster and avoid replacing the wrong component. For example, long dry times are often airflow-related, while “no heat” can be a heating element or a safety device reacting to overheating.
For deeper troubleshooting steps, use our dryer takes a long time to dry guide.
Last updated: February 2026
Does KitchenAid make gas dryers?
Yes. KitchenAid has produced gas dryers; your KitchenAid dryer model KEYS750LT0 is part of a product line where gas versions exist, and the best way to confirm what you own is to check the fuel type on the model and serial tag and the gas hookup at the rear of the dryer.
Use these quick checks before ordering parts or troubleshooting heat issues:
- Gas dryer: has a gas supply line (flex connector or rigid pipe) connected to a gas valve at the back
- Electric dryer: has a large 240V power cord and no gas line
- Look for wording like “Gas” or “Electric” on the model and serial label
- Gas models typically have an igniter and gas valve coils; electric models use a heating element
Some parts overlap (belt, rollers, door switch), but the heating system is different.
| System area | Electric dryer (common) | Gas dryer (common) |
|---|---|---|
| Heat source | Heating element | Burner assembly (igniter, coils) |
| No-heat suspects | Element, thermal cut-off, thermostats | Igniter, coils, thermal cut-off, thermostats |
| Shared wear items | Belt, idler pulley, drum support parts | Belt, idler pulley, drum support parts |
For example, if you have an electric version and it will not heat, the dryer element 279838 is a common heat-related replacement part for this model family.
Gas and electric dryers troubleshoot differently, and ordering the wrong heat-system parts can delay the repair. Confirming fuel type first helps you choose the right repair path and the right KitchenAid dryer parts.
If drying performance is poor regardless of fuel type, airflow restrictions are a top cause; follow the cleaning and venting steps in dryer takes a long time to dry.
Last updated: February 2026
How to take the front part of a dryer off?
To remove the front panel on your KitchenAid dryer model KEYS750LT0, we typically disconnect power, open the cabinet (top or lower access area depending on the build), unplug the door switch wiring, then lift the front panel off its mounting clips. This gives access to the drum, belt, and idler.
- Unplug the dryer (or switch off the breaker) before opening the cabinet.
- If it is a gas dryer, shut off the gas supply valve as well.
- Pull the dryer forward so you can reach the rear vent and sides.
- Wear gloves; cabinet edges can be sharp.
- Keep a small cup for screws so nothing gets lost.
- Remove the lint screen, then remove the screws in the lint screen housing (if present).
- Release the top panel: remove screws at the back of the top, or use a putty knife to release spring clips near the front corners.
- Disconnect the door switch harness: locate the connector near the top of the front panel and unplug it (do not pull on wires).
- Remove front panel mounting screws: usually inside the cabinet near the upper corners.
- Lift and remove the front panel: lift slightly to unhook from lower clips, then pull forward.
| Symptom | What to inspect | Common part for this model |
|---|---|---|
| Drum will not turn | Belt, idler, drum support | Dryer drum belt 341241 |
| Squealing or thumping | Rollers, idler, belt wear | Dryer repair kit 4392065 |
| Door will not start cycle | Door switch, strike alignment | Dryer door switch WP3406107 |
Removing the front panel the right way prevents broken plastic clips, pinched door switch wiring, and misalignment that can cause rubbing noises or poor drum support after reassembly.
Last updated: February 2026