- Kenmore refrigerator water filters
- Whirlpool refrigerator water filters
- Samsung refrigerator water filters
- GE refrigerator water filters
- LG refrigerator water filters
- Frigidaire refrigerator water filters
- KitchenAid refrigerator water filters
- Maytag refrigerator water filters
- Kenmore Elite refrigerator water filters
- Estate refrigerator water filters
- GE Profile refrigerator water filters
- Amana refrigerator water filters
- Bosch refrigerator water filters
- Dacor refrigerator water filters
- Electrolux refrigerator water filters
Top DIY repair help
View All Repair Categories
Appliances
Lawn & Garden
Power Tools
Home Improvement
Sports & Leisure
Heating & Cooling
Quick Links
How to replace a dryer thermistor
less than a minute readJul 28Lyle Weischwill
Repair time and Difficulty
30 minutes or less
Tools Required
- Socket wrench set
- Putty knife
- Work gloves
- Vacuum (optional)
This step-by-step dryer repair guide shows how to replace a dryer thermistor. The thermistor, which is usually attached to the blower housing, measures the temperature inside the dryer. If the thermistor fails completely and stops sensing the temperature, the control panel usually displays an error code, and the dryer stops. If you suspect that the dryer thermistor isn't accurately sensing the temperature, you can check it with a volt/ohm meter. Consult the tech sheet that came with your dryer for information about thermistor testing and, if the thermistor is the problem, replace it with a manufacturer-approved dryer part.
This repair procedure works for Kenmore and Whirlpool dryers with the vent screen housing located at the bottom of the door opening. The basic repair procedure also works for similar dryers such as Maytag, Amana and GE dryers with removable service panels on the front of the dryer.
Instructions
- 1. Shut off the power
Unplug the dryer. If it's a gas dryer, shut off the gas.
- 2. Remove the service panel
To release the clips that hold the service panel in place, push a putty knife into the gap above the service panel on each end.
Pull the top of the service panel forward and remove it.
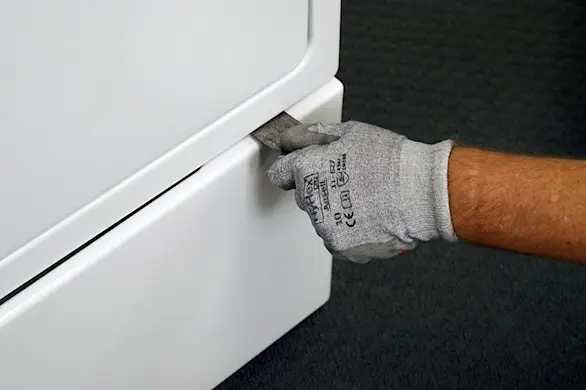
PHOTO: Release the service panel clips. 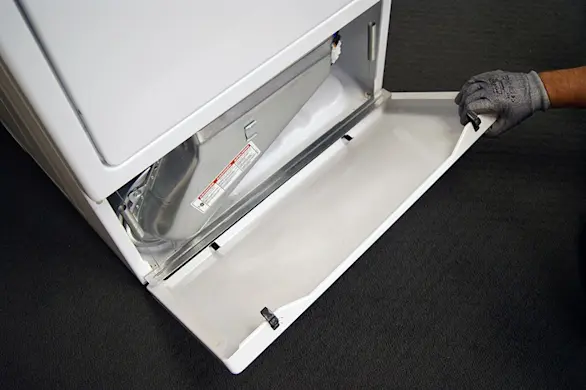
PHOTO: Pull off the service panel.
- 3. Remove the lint duct assembly
Pull out the lint screen.
Remove the screws that secure the lint duct assembly to the lint duct housing.
Pull the lint duct assembly out of the dryer and set it aside.
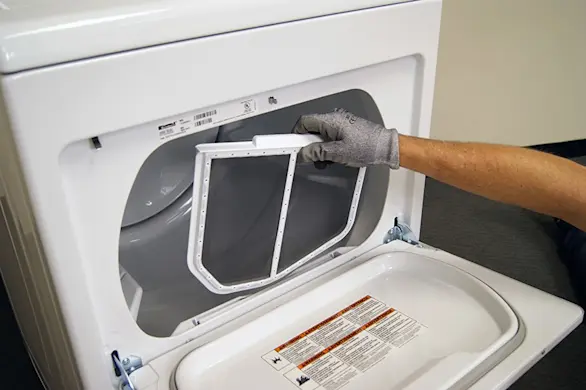
PHOTO: Pull out the lint screen. 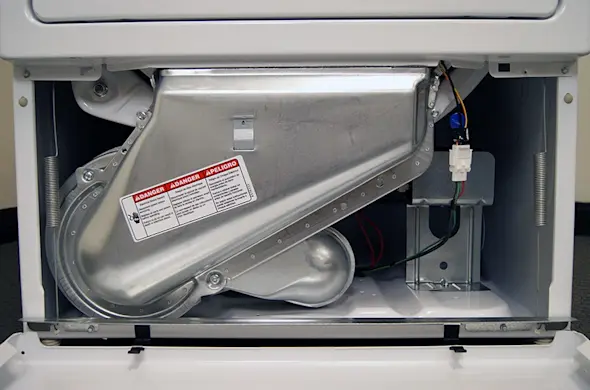
PHOTO: Locate the lint duct assembly below the drum. 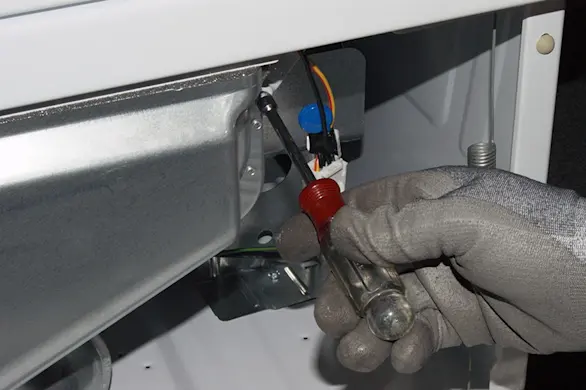
PHOTO: Remove the screws from the lint duct. 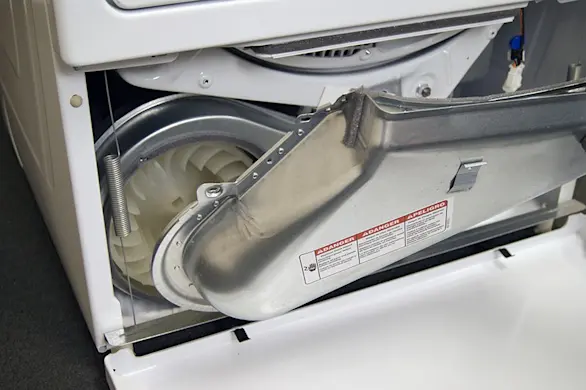
PHOTO: Remove the lint duct.
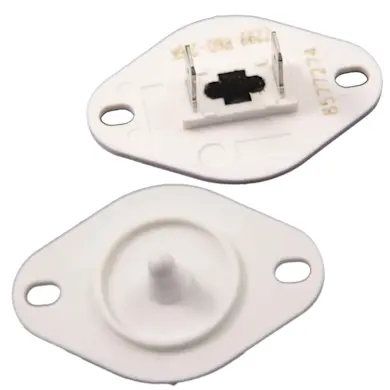
- 4. Detach the thermistor
Locate the thermistor atop of the blower housing. Carefully remove the wires from the thermistor.
Using a 1/4-inch wrench, remove the mounting screws that secure the thermistor to the top of the blower housing. Remove the thermistor and set it aside for disposal.

PHOTO: Disconnect the wires from the thermistor. 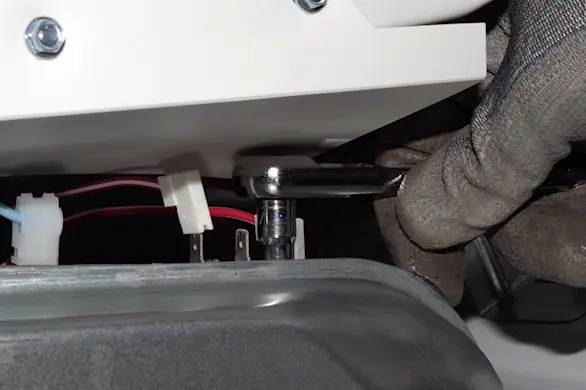
PHOTO: Remove the thermistor mounting screws. 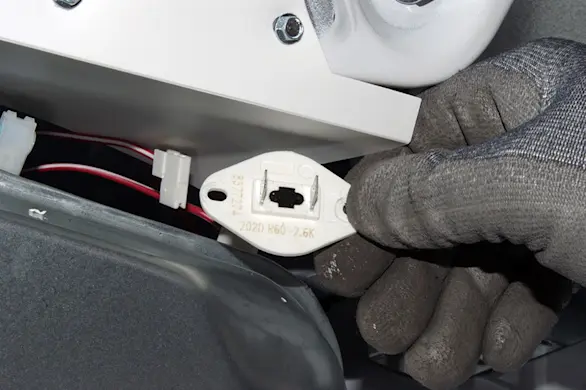
PHOTO: Remove the thermistor from the blower housing. Tip: While the dryer is open, vacuum dust and lint from the base inside the dryer.
- 5. Install the new thermistor
Position the new thermistor on the blower housing and fasten the mounting screws.
Connect the wires to the new thermistor—it doesn't matter which spade connectors you attach the wires to.
- 6. Replace the lint duct assembly
Place the lint duct assembly in its housing. Insert the mounting screws and tighten firmly.
Reinstall the lint screen.
- 7. Reinstall the service panel
Line up the bottom lip of the service panel with the base of the dryer.
Push the top of the service panel to engage the locking clips.
- 8. Restore power to the dryer
Plug the dryer into the wall outlet. If it's a gas dryer, turn on the gas supply to the dryer.