Dryer: Why does my dryer start then stop?
When your washing machine or dryer isn’t working, take steps to diagnose the issue. Oftentimes, you can make dryer repairs yourself, but it always starts with proper diagnostics. That’s where Sears PartsDirect can help. If your washer or dryer keeps shutting off, count on us to help you find the dryer parts you need and to answer any questions you have as you try to make DIY repairs.
Troubleshooting Your Dryer Problems
Check the power source
The first thing you need to do while troubleshooting dryer issues is rule out a problem with the power source. If your dryer has a light inside, check to see if it turns on when you open the door. You can also try resetting your breaker to make sure it’s not tripped. From there, troubleshoot the following functions to narrow down the cause of the problem.
Door switch
Set a timed drying cycle and listen for the sound of the timer motor running inside the console. If the timer motor runs, you know that the door switch is not the issue.
If not, disconnect the power source and check the door switch with a multimeter following this step-by-step process:
Remove the lint filter and the screws that secure the lint screen housing to the top panel
Release the clips and lift the front panel to access the door switch
Unplug the door switch from the wire harness
With the dryer door closed, put your meter leads on the door switch wires that connect to the blue and white wires on the other end of the plug. You should measure near 0 ohms of resistance.
If you measure no continuity, on this meter that’s an “OL,” then the door switch is broken and needs to be replaced.
Thermal fuse
If you blew a thermal fuse, keep in mind that it’s likely because your dryer vent is clogged with lint. As you troubleshoot to test the fuse, clean out any lint you find. With the appliance unplugged, check the thermal fuse following these steps:
Unscrew the back panel
Unplug the wires from the thermal fuse
Use the multimeter to measure the resistance between the spades on the thermal fuse. You should measure near 0 ohms of resistance through the thermal fuse.
If you measure no continuity, then replace the thermal fuse.
Push-to-start switch
Checking the start switch is a simple, manual process. With the appliance fully-assembled and plugged in, open the door and push the door switch in. While holding the door switch in, push the start switch. You should hear a click as the relay engages, and another click when you release signaling that it is disengaged. If you heard the clicks, the start switch is probably not the issue. If you didn’t hear the clicks, unplug the dryer and check its continuity.
Remove the console back panel
Unplug the wires from the start switch
Have someone hold the start switch in and check resistance on the spades for the light blue wires. You should measure near 0 ohms of resistance with the start button pressed in.
If you measure no continuity, then you’ll need to replace the push-to-start switch.
If all of the components have checked out okay, then the motor windings or internal centrifugal switch could be defective. Schedule an appointment with a qualified technician who can help with further diagnostics and repairs.
Common Reasons Why Your Dryer May Stop Mid-Cycle
There are many common reasons why your dryer might stop before it has completed its cycle. Some of the common issues include a clogged exhaust vent causing overheating, a failing timer or push-to-start switch, or a damaged motor relay. It can also be caused by a broken door strike, weak door catch, or a faulty electronic circuit board.
Once you’ve troubleshooted and attempted diagnostics, count on us to help you get the appliance repair parts you need.
Repairs to Help Solve Your Dryer Problem
Replace the dryer thermal fuse
The thermal fuse detects the temperature of the hot air venting from the dryer to the outdoors. It is usually mounted on the blower fan housing and trips if the air gets too hot. This can happen when the vent tube is clogged or the exterior damper is closed.
In an electric dryer, the thermal fuse on the dryer shuts off the dryer when it trips. In a gas dryer, the thermostat can prevent the appliance from heating, even if the dryer runs. The thermal fuse doesn't reset when the dryer cools and must be replaced if it trips.
Replace or repair the dryer drive motor
The dryer drive motor rotates the motor shaft, which in turn rotates the idler pulley, which rotates the drive belt that's wrapped around the dryer drum. The motion of these components causes the drum to rotate during the cycle. The drive motor also rotates the blower fan blade on most dryers.
A failing drive motor may shut off in the middle of a cycle. Some clothes dryers will restart automatically when the motor cools, but others require that you restart them. Replace the drive motor if it overheats.
The wire harness connections on the motor can be repaired, but the internal components on the motor cannot. If the drive motor doesn't run when voltage is applied to it, replace the drive motor.
Repair or replace the dryer electronic control board
The electronic control board governs the timing and execution of dryer functions. While the wiring connections can be repaired, the control board may need to be replaced.
Replace the electronic control board if it is receiving voltage but isn't transmitting it to the dryer components. The dryer may start, but then stop in the middle of the cycle if internal control board components, like the moisture sensor, don't detect sensor signals.
It can be difficult to determine if the electronic control board is the problem, and it is an expensive part; for that reason, you may decide to have a trained service technician perform advanced diagnostics before you replace it.
Replace the dryer timer
The timer on the control panel lets you set the drying time. Its internal cams open and close switches or contacts to operate the various electro-mechanical components in the dryer, such as the drive motor and the heating element. You may need to replace the timer if the dryer won't start, heat, or continue running, or if you find that the timer won't advance.
Replace the dryer door switch
The dryer door switch detects whether the dryer door is open or closed. The dryer won't start if the door switch senses that the door is open. It may also stop if the door switch fails during the cycle. If the switch reads the door as being open when it's shut, or if it allows the dryer to keep running when the door is open, replace it.
Replace the dryer motor relay
Some dryers have a motor relay, which is an electrically-operated switch. The motor relay stays closed as long it receives the proper voltage from the electronic control board. When the voltage supply to the relay stops, the relay opens electrically to halt the voltage supply to the drive motor. When a motor relay fails, the dryer motor stops running when you release the start button. If this happens, you’ll need a new motor relay.
Replace the dryer door catch and strike
The door catch is the part of the door latch assembly. When the door is closed, the spring-loaded door catch encloses and grips the door strike, which is mounted across from it.
The tension of the door catch keeps the door from opening until it's manually opened. If the door won't latch closed and the strike is intact, replace the catch. If the door strike is damaged, replace the strike.
If the strike and catch holds the door closed initially but loses connection during the cycle, you may need to replace both.
Prioritize regular dryer maintenance
Preventive maintenance helps reduce the likelihood of major issues with a dryer, including fire hazards. Prioritize the upkeep of your appliance to help ensure that it always works when you need it most.
Clean the vent tube that runs from the dryer to the outdoors. Trapped lint can clog the vent, which creates a fire hazard and can increase drying times. A clogged vent tube also can cause the dryer to overheat and trip the thermal fuse, causing the dryer to stop.
Check the power cord for damage and replace the cord if you see any break in the wiring insulation
Clean the outside dryer cabinet and the inside of the drum using a soapy washcloth
Wash the lint screen with water and a soft-bristle brush to remove fabric softener residue. Buildup leads to longer drying times and can cause overheating.

THESE REPAIRS MAY HELP SOLVE YOUR DRYER PROBLEM
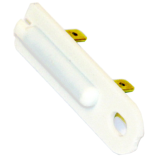
Replace the dryer thermal fuse
The thermal fuse is usually mounted on the blower fan housing. It detects the temperature of the air venting from the dryer to the outdoors and trips if the air becomes too hot. It typically trips if the vent tube is clogged or the exterior damper is closed. In an electric dryer, the thermal fuse shuts off the dryer when it trips. In a gas dryer, it prevents the dryer from heating, but the dryer still runs. The thermal fuse doesn't reset when the dryer cools and must be replaced if it trips.
Dryer thermal fuse
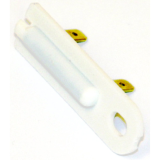
How to replace a thermal fuse in an electric dryer
If your electric dryer's won't start, but the control panel lights are working, it may be due to a blown thermal fuse. This DIY repair guide and video explain how to replace an electric dryer thermal fuse in 30 minutes or less.
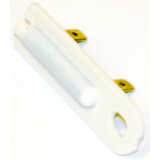
How to replace a thermal fuse in a gas dryer
Gas dryer not getting hot? The termal fuse might have blown. This repair guide and video show how to replace the gas dryer thermal fuse in 30 minutes.
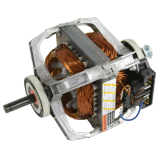
Replace or repair the dryer drive motor
The drive motor rotates the motor shaft, which in turn rotates the idler pulley, which rotates the drive belt that's wrapped around the dryer drum. The motion of these components causes the drum to rotate during the cycle. The drive motor also rotates the blower fan blade on most dryers.
A failing drive motor may shut off in the middle of a cycle. Some dryers will restart automatically when the motor cools, but others require that you restart them. Replace the drive motor if it overheats.
The wire harness connections on the motor can be repaired, but the internal components on the motor cannot. If the drive motor doesn't run when voltage is applied to it, replace the drive motor.
Replace or repair the dryer drive motor
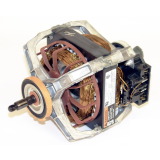
How to replace a dryer drive motor
If your dryer's drum won't turn, the problem could be the drive motor . This step-by-step repair guide and video show how to replace a dryer drive motor.
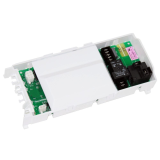
Repair or replace the dryer electronic control board
The electronic control board governs the timing and execution of dryer functions. The wiring connections on the control board can be repaired, but the control board itself cannot. Replace the electronic control board if it's receiving voltage but isn't transmitting it to the dryer components, causing the dryer to not work. The dryer may start but then stop in the middle of the cycle if internal control board components don't detect sensor signals accurately. It can be difficult to determine if the electronic control board is the problem (unless you see burn marks on it) and it's an expensive part that can't be returned once installed; for that reason, have a trained service technician perform advanced diagnostics on control board before you replace it.
Repair or replace the dryer electronic control board
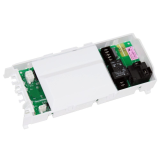
How to replace an electronic control board in a gas dryer
A dryer's electronic control board manages the dryer's operations, including drying time and temperature. If you or a service technician determine that the dryer electronic control board has failed, follow the steps in this repair guide and video to replace it.
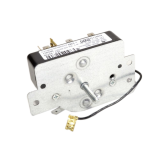
Replace the dryer timer
The timer on the control panel lets you set the drying time by turning the timer's control knob. A small motor on the back of the timer advances the timer during the cycle. The timer's internal cams open and close switches or contacts to operate the various electro-mechanical components in the dryer (mainly the drive motor and the heating element). Replace the timer if the contacts aren't working, the dryer won't start, heat or continue running, or the timer won't advance.
Dryer timer
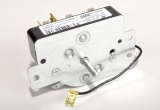
How to replace a dryer timer
If your dryer won't advance through the drying cycle, the timer might have failed. This step-by-step repair guide and video show how to replace a dryer timer in 30 minutes or less.
Replace the dryer door switch
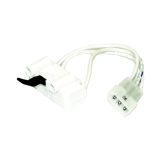
The dryer door switch detects whether the dryer door is open or closed. The dryer won't start if the door switch senses that the door is open. Or, the dryer might start then stop if the door switch fails during the cycle. If the switch reads the door as being open when it's shut, or if it allows the dryer to keep running when the door is open, replace it.
Dryer door switch

How to replace a dryer door switch
If your dryer won't start when you shut the door, it may mean the door switch has failed. This DIY repair guide and video explain how to replace the dryer door switch in 30 minutes or less.

Replace the dryer motor relay
Some dryers have a motor relay, which is an electrically operated switch. The motor relay stays electrically closed to keep the drive motor running as long it receives the proper voltage from the electronic control board. When the voltage supply to the relay stops, the relay opens electrically to halt the voltage supply to the drive motor, which then stops. When a motor relay fails, the dryer motor stops running when you release the start button.
Dryer motor relay
Replace the dryer door catch
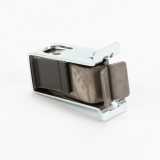
The door catch is the part of the door latch assembly that's usually attached to the front panel, but sometimes is attached to the door. When the door is closed, the spring-loaded door catch encloses and grips the door strike, which is mounted across from it. The tension of the door catch keeps the door from opening until it's manually opened. If the door won't latch closed and the strike is intact, replace the catch. If the door catch holds the door closed to start the cycle but can't continue to hold the door shut during the cycle to keep the dryer running, replace the door catch.
Dryer door catch
Replace the dryer door strike
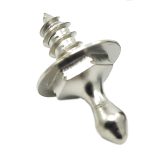
The dryer door strike is the part of the door latch assembly. It's usually attached to the door, but sometimes is attached to the front panel. When the door is closed, the door strike is pushed into the spring-loaded door catch mounted across from it. The tension of the catch keeps the door from opening until it's manually opened. If the door strike damaged, replace the strike. If the door won't latch closed and the strike is intact, replace the catch. If the door strike holds the door closed to start the cycle but can't continue holding the door shut during the cycle to keep the dryer running, replace the door strike.
Dryer door strike
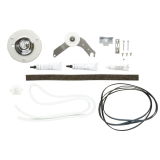
Regular dryer maintenance
Preventive maintenance for a dryer includes cleaning lint from the vent tube that runs from the dryer to the outdoors. Trapped lint can clog the vent, which creates a fire hazard and can increase drying times.
A clogged vent tube also can cause the dryer to overheat and trip the thermal fuse, causing the dryer to stop.
Check the power cord for damage and replace the cord if you see any break in the wiring insulation.
Clean the outside cabinet and the inside of the drum using a soapy washcloth. Wipe down the surfaces with plain water to remove soap residue.
Wash the lint screen with water and a soft-bristle brush to remove fabric softener residue following the instructions in this video.
Regular dryer maintenance
Most common symptoms to help you fix your dryers
Choose a symptom to see related dryer repairs.
Main causes: bad gas valve coils, broken heating element, tripped safety thermostat or fuse, bad operating thermostat, c…
Main causes: bad drum support roller, damaged idler pulley, broken blower fan blade, worn drum glide bearing, bad drive …
Main causes: damaged door strike, worn door catch…
Main causes: clogged exhaust vent, bad motor relay, loose dryer door catch, bad door switch, control system failure, fau…
Main causes: door switch failure, lack of power, broken belt, blown thermal fuse, bad drive motor, control system failur…
Main causes: clogged exhaust system, heating system failure, deposits on moisture sensor, control system failure…
Main causes: bad timer or electronic control board, door switch failure…
Main causes: lack of electrical power, bad power cord, wiring failure, bad control board, blown thermal fuse, bad door s…
Most common repair guides to help fix your dryers
These step-by-step repair guides will help you safely fix what’s broken on your dryer.
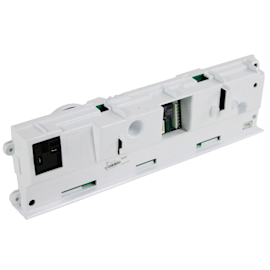
How to replace an electronic control board in an electric dryer
The electronic control board manages the components and controls the cycle times in your electric dryer. Follow these st…
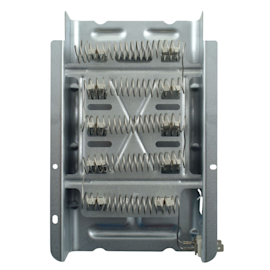
How to replace a heating element in an electric dryer
The heating element in an electric dryer generates the dryer's heat—it's one of the first things to check if the air in …
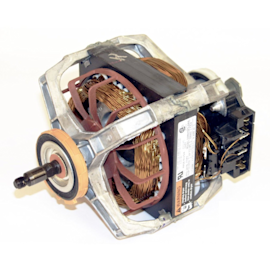
How to replace a dryer drive motor
A defective drive motor struggles to rotate the drum or might not turn the drum at all. Follow the steps in this dryer r…
Effective articles & videos to help repair your dryers
Use the advice and tips in these articles and videos to get the most out of your dryer.

Get expert tips on using your dryer efficiently to save energy.…

Learn about all the convenient features on our Sears PartsDirect website that make your parts purchases easier.…

Get answers to frequently asked questions about Sears and Sears PartsDirect.…
