- Kenmore refrigerator water filters
- Whirlpool refrigerator water filters
- Samsung refrigerator water filters
- GE refrigerator water filters
- LG refrigerator water filters
- Frigidaire refrigerator water filters
- KitchenAid refrigerator water filters
- Maytag refrigerator water filters
- Kenmore Elite refrigerator water filters
- Estate refrigerator water filters
- GE Profile refrigerator water filters
- Amana refrigerator water filters
- Bosch refrigerator water filters
- Dacor refrigerator water filters
- Electrolux refrigerator water filters
Top DIY repair help
View All Repair Categories
Appliances
Lawn & Garden
Power Tools
Home Improvement
Sports & Leisure
Heating & Cooling
Quick Links
How to replace a dryer timer
less than a minute readApr 05Lyle Weischwill
Repair time and Difficulty
15 minutes or less
Tools Required
- 1/4-inch nut driver
- Phillips screwdriver
- Slot screwdriver
- Work gloves
This DIY dryer repair guide has step-by-step instructions about how to replace a mechanical timer on a dryer without keypad controls. A small motor on the back of the timer advances the timer and dial during the cycle, controlling the drying time. If the timer won't advance through the cycle, or if it doesn't start or shut off the motor or heating element, replace the timer with the manufacturer-approved dryer part.
The video below shows a gas dryer, but the repair procedure is the same. These basic repair steps work for replacing the timer in many Kenmore, Whirlpool, KitchenAid, Maytag, Frigidaire, Amana and GE dryers.
Instructions
- 1. Shut off the power
Unplug the dryer. If it's a gas dryer, shut off the gas.
- 2. Remove the control knob
Pull the timer control knob off of the timer stem on the front of the control panel.
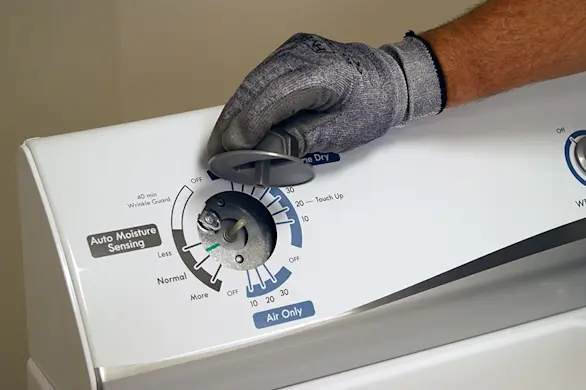
PHOTO: Pull the timer knob off the shaft.
- 3. Remove the back panel
Move the dryer forward and use a 1/4-inch nut driver to remove the screws from the back panel. Remove the back panel from the dryer and set it aside.
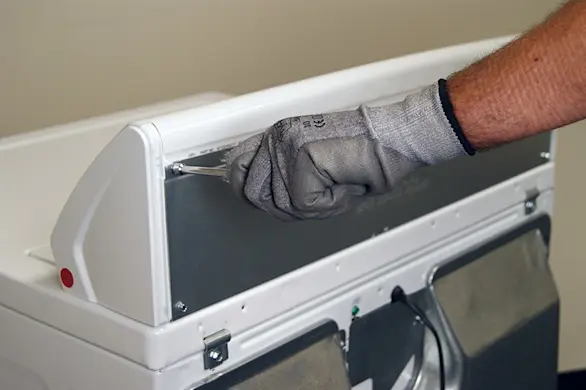
PHOTO: Remove the screws from the panel at the back of the dryer console. 
PHOTO: Remove the back panel and set it aside.
- 4. Remove the timer
Note the location of wires attached to the back of the timer before removing them. Label the wires or take a digital picture so you know how to reconnect them later. Remove the wires from the back of the timer. Remove the mounting screws and then remove the timer.

PHOTO: Remove the wires from the dryer timer. 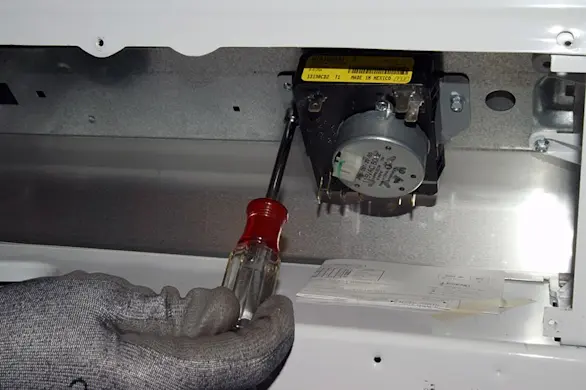
PHOTO: Remove the timer mounting screws. 
PHOTO: Remove the timer from the dryer control panel.
- 5. Install the new timer
Insert the new timer in the control panel and secure it with the mounting screws. Attach the wires to the new timer, following the labels or digital photograph.
Warning: For safety and to avoid damage to the new timer, the wires must be properly connected. If you are unsure how to connect the wires, have a service technician complete this repair.
- 6. Reattach the back panel
Position the panel on the back of the console. Line up the mounting screw holes, insert the mounting screws and tighten them firmly.
- 7. Reinstall the control knob
Push the control knob onto the stem of the new timer.
- 8. Restore power to the dryer
Plug the dryer into the wall outlet. If it's a gas dryer, turn on the gas supply to the dryer.