- Kenmore refrigerator water filters
- Whirlpool refrigerator water filters
- Samsung refrigerator water filters
- GE refrigerator water filters
- LG refrigerator water filters
- Frigidaire refrigerator water filters
- KitchenAid refrigerator water filters
- Maytag refrigerator water filters
- Kenmore Elite refrigerator water filters
- Estate refrigerator water filters
- GE Profile refrigerator water filters
- Amana refrigerator water filters
- Bosch refrigerator water filters
- Dacor refrigerator water filters
- Electrolux refrigerator water filters
Top DIY repair help
View All Repair Categories
Appliances
Lawn & Garden
Power Tools
Home Improvement
Sports & Leisure
Heating & Cooling
Quick Links
How to replace an electronic control board in an electric dryer
less than a minute readApr 05Lyle Weischwill
Repair time and Difficulty
45 minutes or less
Tools Required
- 1/4-inch nut wrench
- Small slot screwdriver
- Vacuum
- Work gloves
- Ground strap (optional)
This step-by-step dryer repair guide shows how to replace the electronic control board in an electric dryer.
You may need to replace the control board if the dryer won't power up even though you already checked the circuit breaker. You may also need to replace the electronic control board if the dryer powers up but won't start even though the door switch is working and the thermal fuse isn't blown.
Because the electronic control board manages all of the dryer's components and controls the dryer cycle times, it's difficult to pinpoint the control board as the source of a problem. Unless you see obvious damage to the control board or you've definitely determined that the control board failed, have a local dryer repair expert do advanced diagnostic tests before replacing the dryer control board with a manufacturer-approved dryer part.
Use this procedure to replace the electronic control board in many Kenmore, Frigidaire and Electrolux electric dryers. You also can use the same basic steps to replace the electronic control board in some Whirlpool, Maytag, Amana, Samsung, LG and GE dryers.
If you have a gas dryer, replace the electronic control board following this repair guide and video.
Instructions
- 1. Shut off the power
Unplug the dryer.
- 2. Remove the top panel
Slide the dryer away from the wall. On the back of the dryer, locate the two hex-head screws that secure the top panel to the frame. Remove the screws using a 1/4-inch nut driver.
Pull the top panel back slightly to release the tabs behind the console. Pull the top panel up and off of the dryer.
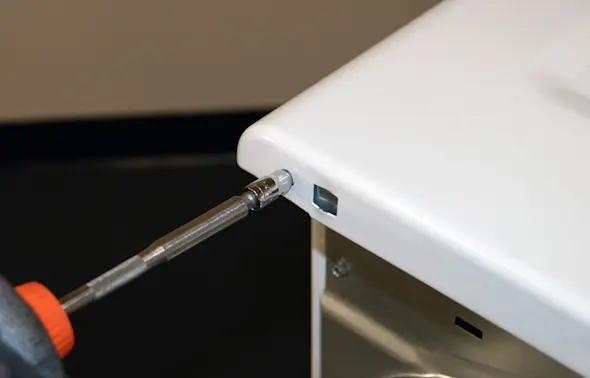
PHOTO: Remove the screws from the back of the dryer top panel. 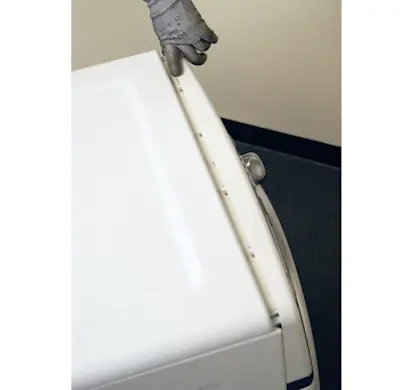
PHOTO: Release the tabs behind the front console. 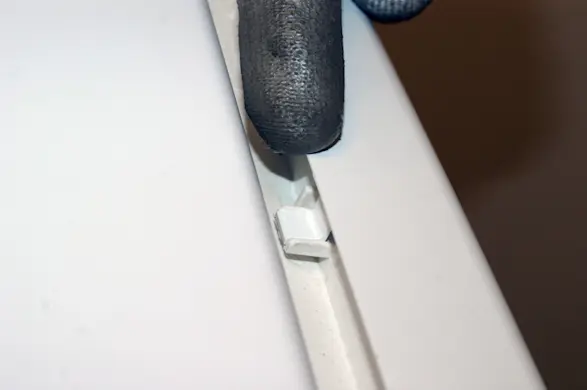
PHOTO: Pull the top panel up and off the dryer. Tip: While you have the dryer open, vacuum the dust and lint from inside the dryer.
- 3. Remove the electronic control board
Take a digital picture of the wiring connections so you can connect the new control board correctly.
Using a slot screwdriver, release the locking tabs from the wire connectors. Pull the wire harness plug from the connection receptacle on the electronic control board.
Remove the single hex head screw with a 1/4-inch nut driver. Slide the electronic control board to release it from the support bracket slots. Set the electronic control board aside for disposal.
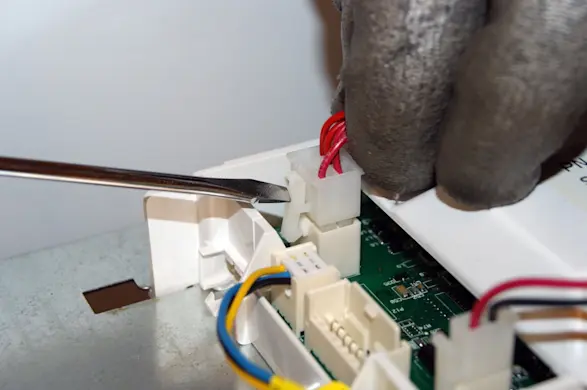
PHOTO: Release the locking tabs on the control board wire harness connectors. 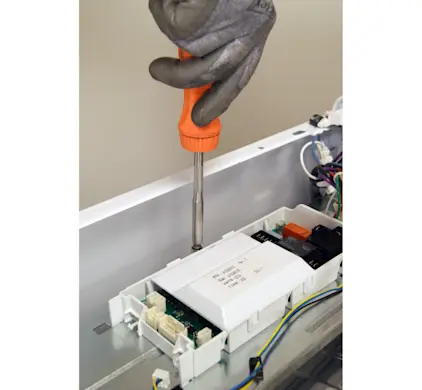
PHOTO: Remove the control board mounting screw. 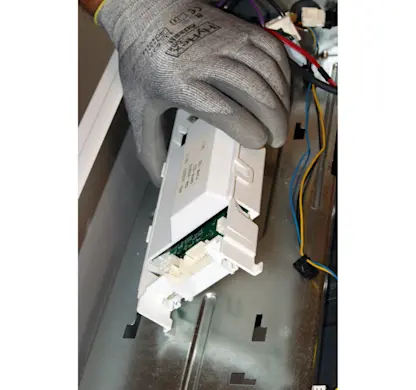
PHOTO: Remove the control board from the support bracket. Tip: With some units, the wire harness has enough slack to let you detach connections one at a time and immediately attach them to the new control board—a sure way to get the connections right.
- 4. Install the new electronic control board
Before removing the new control board from the package, touch metal on the dryer to dissipate static electricity.
Position the new control board on the support bracket and push it into the mounting slots. Lock it into place so it lines up the mounting screw hole. Replace the mounting screw. Avoid overtightening by turning the screw with the nut driver until it stops and then give the screw one firm twist to snug it in place.
Tip: If you have a grounding strap, put it on and clip the lead to metal on the dryer before touching the new control board.
- 5. Connect the wires
Using your digital photo as a guide, connect the wires to the new electronic control board. Push the wire harness plug until its locking tab snaps into place. The plugs fit together only one way; if they aren't fitting together easily, reorient them. Never force the plugs into place.
Warning: Connecting the wires incorrectly can damage dryer components. If you’re unsure about the connections, have a service technician complete the repair.
- 6. Reinstall the top panel
Place the panel on the top of the dryer and position it slightly away from the tabs behind the control panel. Push the panel forward to engage the tabs. Work the panel into place and replace the mounting screws at the back of the dryer.
- 7. Restore the power
Plug the dryer into the wall outlet.