- Kenmore refrigerator water filters
- Whirlpool refrigerator water filters
- Samsung refrigerator water filters
- GE refrigerator water filters
- LG refrigerator water filters
- Frigidaire refrigerator water filters
- KitchenAid refrigerator water filters
- Maytag refrigerator water filters
- Kenmore Elite refrigerator water filters
- Estate refrigerator water filters
- GE Profile refrigerator water filters
- Amana refrigerator water filters
- Bosch refrigerator water filters
- Dacor refrigerator water filters
- Electrolux refrigerator water filters
Top DIY repair help
View All Repair Categories
Appliances
Lawn & Garden
Power Tools
Home Improvement
Sports & Leisure
Heating & Cooling
Quick Links
How to replace an igniter in a gas dryer
less than a minute readJul 27Lyle Weischwill
Repair time and Difficulty
60 minutes or less
Tools Required
- Nut driver set
- Phillips screwdriver
- Putty knife
- Slot screwdriver
- Vacuum cleaner or shop vac
- 5/16-inch shallow socket and ratchet
- Work gloves
This step-by-step dryer repair guide explains how to replace an igniter in a gas dryer. The igniter, located on the side of the gas burner funnel, glows white hot during the ignition process to the light the gas. If the igniter breaks or burns out, it won't glow or get hot enough to light the burner gas, and the dryer won't heat. Replace a broken or failed igniter using the manufacturer-approved dryer part.
Use these steps to replace the igniter in Kenmore, Whirlpool, Maytag, Amana, Roper, Crosley and Estate gas dryers with a lint screen housing located in the top dryer panel.
Instructions
- 1. Shut off the power and gas supply
Unplug the dryer to disconnect electrical power. Shut off the gas supply to the dryer.
Wear work gloves to protect your hands.
- 2. Raise the dryer top panel
Pull the lint screen out of the housing in the top panel of the dryer.
Use a Phillips screwdriver to remove the 2 screws that secure the lint screen housing to the top panel. To release the clips that lock the top of the dryer in place, push a putty knife under the lid near the left and right edges of the front of the dryer.
Lift the top and prop it securely against the wall behind the dryer.
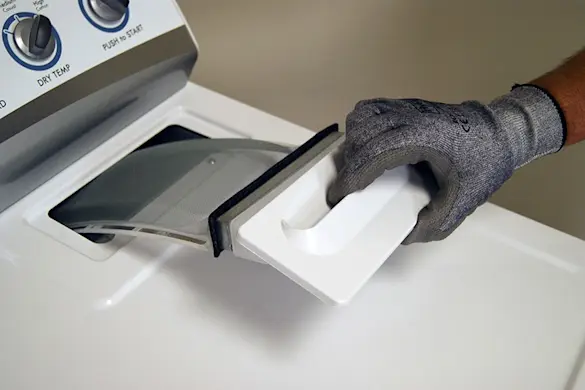
PHOTO: Remove the lint screen. 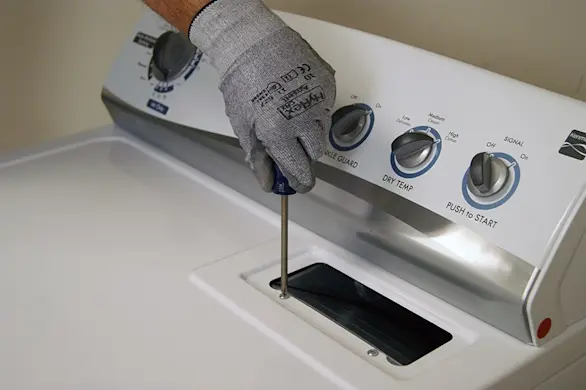
PHOTO: Remove the lint screen housing screws. 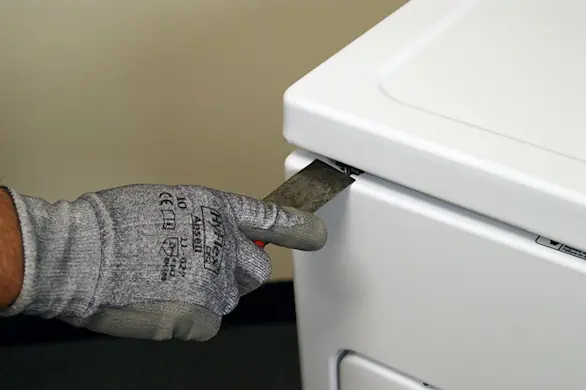
PHOTO: Release the panel locking clips. 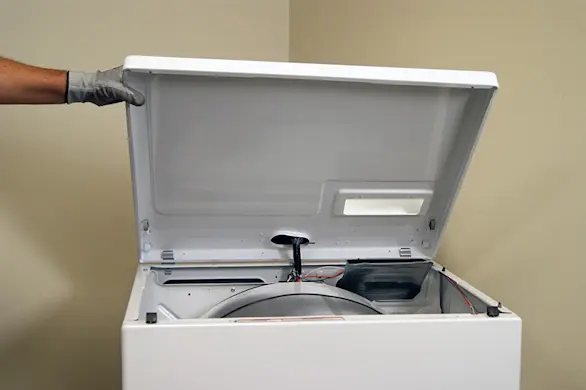
PHOTO: Lift the top panel.
- 3. Remove the front panel
Use a slot screwdriver to release the locking tab on the wire harness plug for the door switch. Disconnect the wire harness.
Use a 5/16-inch nut driver to remove the front panel mounting screws from the inside of the dryer.
Pull the front panel forward slightly, and then lift and unhook it from the 2 bottom hangers.
Pull the front panel off of the dryer and set it aside.
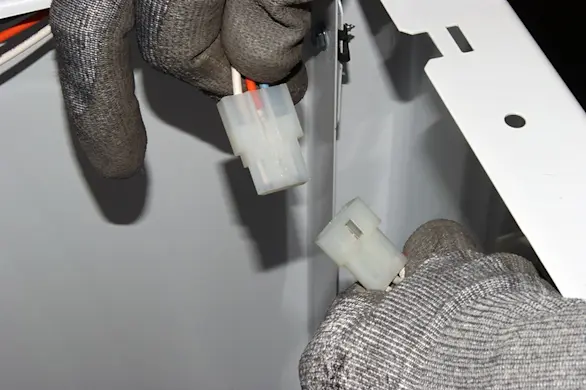
PHOTO: Disconnect the wire harness for the door switch. 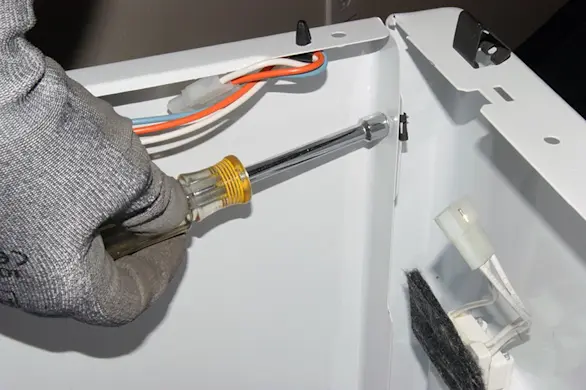
PHOTO: Remove the front panel mounting screws. 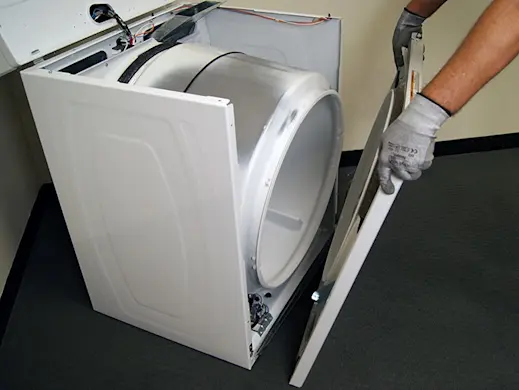
PHOTO: Remove the front panel.
- 4. Remove the drum
Note the configuration of the belt on the idler pulley and the motor pulley before removing it—take a digital picture of it so you know how to reinstall it.
Push the idler pulley to the right to release tension on the drive belt.
Pull the drive belt off of the idler pulley and the motor pulley.
Pull the drum out of the dryer and set it aside.
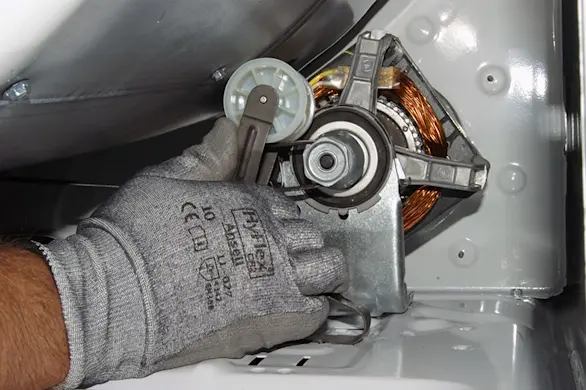
PHOTO: Release the drive belt. 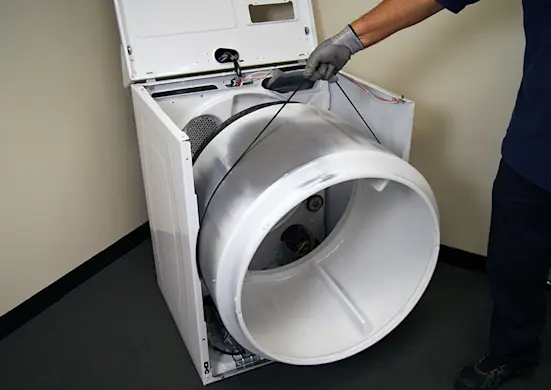
PHOTO: Remove the drum. Tip: Use the drive belt that you just released from the pulleys to lift the drum up and out of the dryer.
- 5. Remove the igniter
Release the locking tab on the wire harness plug for the igniter using a slot screwdriver. Disconnect the wire harness plug.
Note the position or take a digital picture of the igniter before removing it.
Remove the mounting screw from the igniter using the 5/16-inch shallow socket and ratchet.
Pull the igniter out of the dryer and set it aside for disposal.
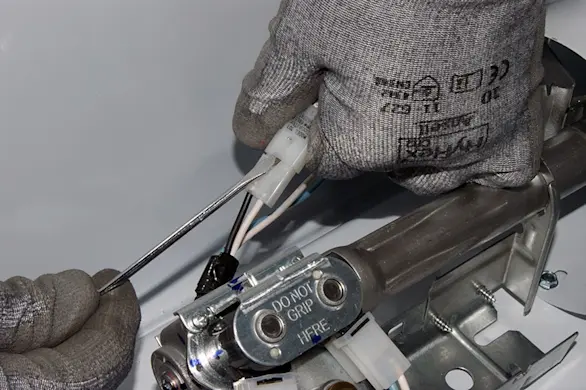
PHOTO: Release the igniter wire harness plug locking tab. 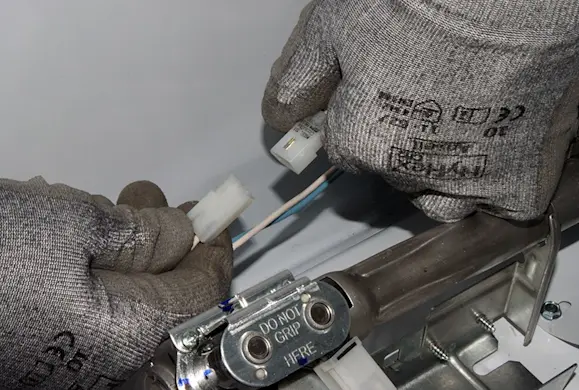
PHOTO: Remove the wire harness from the igniter. 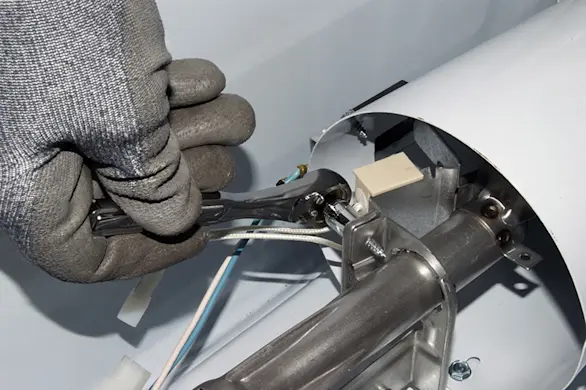
PHOTO: Remove the igniter mounting screws. 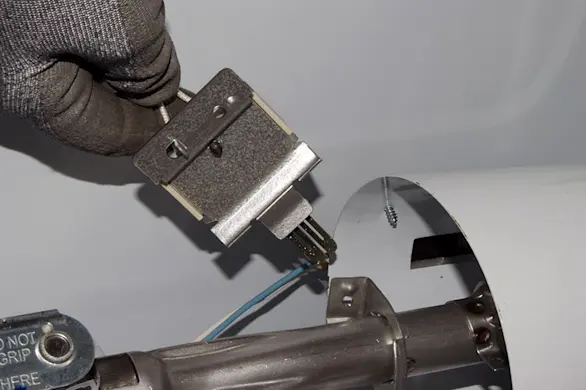
PHOTO: Remove the dryer igniter.
- 6. Install the new igniter
Position the new igniter on the bracket and secure it with the mounting screw.
Plug the wire harness back in. Make sure that the locking tab engages.
Warning: The igniter must be positioned exactly like the original igniter to achieve proper flame ignition.Tip: Don't touch the new igniter element with your fingers. Oil from your bare fingers can damage the igniter and cause premature failure.Tip: While the front dryer panel if off, vacuum the dust and lint from inside the dryer.
- 7. Reinstall the drum
Place the rear of the drum on top of the support roller that's on the rear panel inside the dryer.
Lift the front of the drum to access the drive motor and idler pulley.
Referring to the digital picture of the configuration, thread the drive belt through the idler pulley.
Push the idler pulley to the right and loop the drive belt over the motor pulley.
- 8. Reinstall the front panel
Position the front panel on the hangers at the bottom of the dryer.
Line up the mounting holes and reinstall the screws in the top of the front panel to secure it to the dryer.
Plug the wire harness back into the plug on the door switch. Make sure the locking tab engages properly.
- 9. Reassemble the top panel
Lower the top panel and snap it into place.
Reinstall the screws in the lint duct housing and reinstall the lint screen.
- 10. Restore power and the gas supply
Plug the dryer into the wall outlet. Turn on the gas supply to the dryer.