Installation guide
 Owner’s manual




How do I know if my Maytag dryer heating element is bad?
If your Maytag electric dryer model MEDC215EW0 runs but doesn’t heat, takes much longer to dry, or heats inconsistently, the heating element is a top suspect. We confirm it by safely disconnecting power and checking the element for continuity; an “open” (no continuity) reading typically means it’s bad. See the MEDC215EW0 use & care manual for model-specific troubleshooting basics.
Quick symptoms that point to the heating element
- Dryer tumbles normally but there’s no heat
- Clothes take too long to dry even on high heat
- Heat comes and goes (can also be airflow or thermostat related)
- A burning smell or overheating symptoms (often tied to restricted venting)
Rule out common look-alikes first (MEDC215EW0)
Before replacing parts, we recommend these checks because they can mimic a failed element:
- Power supply issue: many electric dryers can tumble on 120V but need full 240V to heat
- Tripped breaker or blown fuse: electric dryers often use two breakers/fuses
- Airflow restriction: clogged lint screen or venting can cause poor drying and overheating
- Safety cutout opened: a blown thermal fuse or thermal cut-off can stop heat
What to test (and what the results mean)
Disconnect power before accessing internal components.
| What you test | Typical “bad” result | What it suggests |
|---|---|---|
| Heating element | No continuity (open circuit) | Replace the element |
| Thermal fuse | No continuity | Fix venting issue, then replace fuse |
| High-limit thermostat / operating thermostat | No continuity when cool (often) | Replace the failed thermostat |
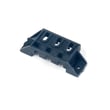
If you’re replacing the heater circuit parts on MEDC215EW0, the compatible heater is the dryer heating element 279838. If you find heat damage at the terminals, the dryer heating element wire kit 279457 can help restore safe connections.
Why it matters
A dryer that won’t heat is not always a bad element; venting problems and failed safety devices can shut heat down to prevent overheating. Fixing airflow issues helps protect the new part and restores normal drying times.
Helpful DIY guidance
For step-by-step repair visuals, use our how to replace a heating element in an electric dryer guide.
Last updated: January 2026
What is the capacity of the Maytag medc215ew0?
The Maytag MEDC215EW0 electric dryer has a 7.0 cu. ft. capacity, which is considered a full-size drum for everyday family laundry. For cycle and loading guidance specific to this model, use the MEDC215EW0 use & care manual.
What “7.0 cu. ft.” means in real use
A 7.0 cu. ft. drum is designed to handle typical mixed loads without overpacking, so clothes can tumble freely and dry evenly.
- Works well for most everyday loads (shirts, jeans, towels)
- Helps reduce wrinkles when you avoid tight packing
- Supports Sensor Dry/Automatic Dry cycles that stop when the load reaches the selected dryness
- Drying time still depends heavily on venting and lint buildup
Loading tips that help drying performance
We recommend these habits for the MEDC215EW0 to get the best airflow and most consistent results:
- Clean the lint screen before every load
- Do not pack the drum tightly; items should tumble freely
- Use Sensor Dry/Automatic Dry for most loads; use Timed Dry for small or special loads
- Keep the exhaust vent clear and use proper 4-inch heavy metal venting
Quick reference table
| Item | MEDC215EW0 detail |
|---|---|
| Dryer type | Electric dryer |
| Drum capacity | 7.0 cu. ft. |
| Best practice | Avoid overloading to maintain airflow |
Why it matters
Capacity affects how much you can dry at once, but airflow is what makes drying efficient. Overloading a 7.0 cu. ft. drum can increase dry times, cause uneven drying, and contribute to wrinkling.
Last updated: January 2026
What's the life expectancy of a Maytag dryer?
A Maytag electric dryer like model MEDC215EW0 typically lasts 10 to 15 years with normal household use. Consistent airflow maintenance (lint screen and venting) and fixing small wear items early can often push service life beyond that range; see the MEDC215EW0 use & care manual.
What affects lifespan the most
The biggest drivers of dryer life are heat management, airflow, and how hard the drive system has to work.
- Clean the lint screen before every load; a clogged screen increases heat and run time.
- Keep the exhaust vent clear and properly sized (4-inch metal venting is the standard).
- Avoid overloading; heavy loads strain the drum belt, rollers, and motor.
- Use Sensor Dry/Automatic cycles when available to reduce over-drying.
- Address new noises quickly; they often point to rollers, idler, or belt wear.
Quick maintenance schedule (practical)
| Task | How often | Why it helps |
|---|---|---|
| Clean lint screen | Every load | Improves airflow and drying time |
| Check outside vent hood airflow | Monthly | Prevents long dry times and overheating |
| Clean full vent run | Every 1 to 2 years | Reduces heat stress and lint buildup |
| Inspect drum support wear (noise) | As needed | Prevents secondary damage |
Common “wear parts” that can extend life
When a dryer is otherwise in good shape, replacing a few mechanical parts can be a cost-effective way to keep it running.
- Dryer drum belt WPW10198086: Worn belt can slip, squeal, or break.
- Dryer drum support roller WPW10314173: Worn rollers can cause thumping or rumbling.
- Dryer thermal fuse WP3392519: A blown fuse can stop the dryer from heating or running (often tied to venting issues).
Why it matters
A dryer that is taking longer to dry or running hotter than normal is not just inconvenient; it accelerates wear on the heating system, motor, and drum support components. Good venting and timely small repairs are the simplest ways to protect the lifespan of MEDC215EW0.
Last updated: January 2026
What is the most common problem with the Maytag dryer?
For the Maytag MEDC215EW0 electric dryer, the most common problem we see is long dry times caused by restricted airflow (lint screen buildup or a clogged, crushed, or overly long vent). The next most common issues are “no heat” and drum noise/tumbling problems.
What to check first (fast, no parts)
- Clean the lint screen before every load.
- Run the dryer and check for strong airflow at the outside exhaust hood.
- Inspect the vent for kinks, crushing, or too many elbows.
- Make sure the dryer is level; automatic cycles can act up if the cabinet is tilted.
- Confirm full power: electric dryers use two fuses/breaker legs; the drum can run with no heat if one leg is out.
For venting rules and airflow best practices for this model, follow the MEDC215EW0 installation guide.
Common symptoms and likely causes
| Symptom | Most common cause | What to do next |
|---|---|---|
| Clothes take too long to dry | Vent restriction or lint buildup | Clean lint screen, clear venting, verify hood airflow |
| Dryer runs but no heat | One power leg out, or a heat safety device opened | Check breakers/fuses; then test heat circuit parts |
| Dryer won’t start | Door not closed, start sequence not held, or door switch issue | Confirm door latch; test switch if needed |
| Thumping/squeal/grinding | Worn drum support parts or belt wear | Inspect drum support and belt system |
Parts that commonly fix the underlying issue
If airflow is good but MEDC215EW0 still won’t heat or shuts down from overheating protection, these model-compatible parts are common:
- Dryer thermal fuse WP3392519 (opens if the dryer overheats)
- Dryer thermal cut-off fuse kit 279816 (heat protection components often replaced together)
- Dryer drum belt WPW10198086 (broken or stretched belt can stop tumbling)
- Dryer drum support roller WPW10314173 (worn rollers can cause noise and drag)
Why it matters
Airflow restrictions do not just slow drying; they raise operating temperatures and can repeatedly trip heat safety devices until the vent system is corrected.
Last updated: January 2026