Owner’s manual



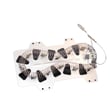
How do I know if my Samsung dryer heating element is bad?
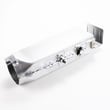
On a Samsung DV361EWBEWR dryer, a bad heating element usually shows up as no heat, weak heat, or a burning smell. The most reliable check is a multimeter test: the element should have continuity end-to-end, and it should not have continuity from either terminal to the metal heater housing (a short to ground). For safety, follow the disassembly and access steps in the DV361EWBEWR manual.
Quick symptoms that point to the heating element
- Dryer runs but clothes stay cold or take much longer to dry
- Heat starts, then stops (cycling off early)
- Burning odor or visible scorching near the heater area
- Breaker trips when heat turns on (possible short)
- Lint screen and vent are clean, but drying performance is still poor
How we test the heating element (safe, basic method)
- Unplug the dryer (electric shock hazard).
- Access the heater terminals using the cabinet access method shown in the DV361EWBEWR manual.
- Set your multimeter to ohms/continuity.
- Test terminal-to-terminal on the element.
- Test each terminal to the metal heater canister/housing.
What the meter results mean
| Test | What you should see | What it means if you do not |
|---|---|---|
| Terminal to terminal | Continuity (some resistance) | Open element (won’t heat) |
| Terminal to heater housing | No continuity | Shorted element (unsafe, can trip breaker) |
Why it matters
A shorted or open heating element can cause no-heat complaints, overheating, or power trips. Confirming the element condition first helps avoid replacing other common no-heat parts unnecessarily (thermal fuse, high-limit thermostat, thermistor, control board).
If the element tests good
Use a process-of-elimination approach on other heat circuit parts and airflow restrictions. For Samsung-specific fault displays, use Samsung dryer error codes.
Last updated: January 2026
What does E3 mean on a Samsung dryer?
On the Samsung dryer model DV361EWBEWR, an E3 code indicates the dryer detected an overload or out-of-balance condition in the drum. This commonly happens when the load is too large, too heavy (wet items), or unevenly distributed; see the DV361EWBEWR manual for model-specific display and cycle guidance.
How to clear E3 on DV361EWBEWR
- Press Power to stop the cycle.
- Open the door and remove some items if the drum is packed.
- Redistribute the load so heavy items are spread out.
- Restart using a cycle appropriate for the fabric type (for example, avoid mixing one heavy item with many light items).
- If the code returns immediately, unplug the dryer for 1 minute, then try again.
Load issues that commonly trigger E3
- One bulky item (comforter, blanket) tumbling by itself
- Too many towels or jeans in one load
- A load that is still very wet (extra-heavy)
- Small loads with one heavy item (creates imbalance)
- Items tangled into a tight ball (sheets, long garments)
Quick checks: overload vs. imbalance
| What you notice | Most likely cause | What to do |
|---|---|---|
| Drum is very full | Overload | Remove 25% to 50% of items |
| Loud thumping, drum “walking” feel | Imbalance | Pause and redistribute |
| Code appears early in cycle | Severe imbalance | Separate heavy items |
| Code appears with very wet load | Load too heavy | Increase spin in washer, dry smaller loads |
Why it matters
Running DV361EWBEWR overloaded can reduce airflow through the drum, increase vibration, and extend dry times. Correct loading helps protect key components such as the drum support rollers, belt, and motor, and it helps clothes dry more evenly.
For broader Samsung guidance across models, we also reference Samsung dryer error codes.
Last updated: January 2026
How do I find the model number on my DV361EWBEWR?
On your Samsung dryer, the model number is printed on the rating label (data plate). For DV361EWBEWR, check the door opening area first; the label is typically on the door frame or just inside the front panel. Use the exact model number to match parts and diagrams in the DV361EWBEWR owner's manual.
Where to look on the dryer
Check these common label locations in this order:
- Open the dryer door and look along the door frame (left or right side)
- Look on the inside edge of the door itself
- Check just inside the front panel near the door opening
- If needed, check the back panel of the dryer near the power cord area
What you should write down
We recommend copying the information exactly as shown on the label:
- Model number (example: DV361EWBEWR)
- Version or revision code (often shown after a slash, such as /A3-01)
- Serial number (helps confirm production run)
- Electrical rating (volts and amps), useful for heating and power issues
Why the full model matters (DV361EWBEWR vs. DV361EWBEWR/A3-01)
Samsung often uses a base model plus a version code. The version can affect which parts fit.
| What you see on the label | What it means | Why it matters |
|---|---|---|
| DV361EWBEWR | Base model | Identifies the dryer family |
| DV361EWBEWR/A3-01 | Model plus version | Ensures the correct part match |
| Serial number | Unique unit ID | Helps confirm the exact unit |
Why it matters
Using the exact model and version keeps you from ordering the wrong dryer parts (for example, a heating component or door switch that looks similar but mounts differently). It also helps you pull the right diagrams and troubleshooting steps.
Last updated: March 2026