Installation guide
 Owner’s manual


What model Kenmore dryer do I have?
Your Kenmore dryer’s model number is printed on the appliance’s ID label; once you match that number (for example, 11061402311) you can confidently look up the correct parts, wiring requirements, and installation specs for your exact dryer.
Where to find the model number label
On most Kenmore electric dryers, we see the model and serial tag in one of these spots:
- Inside the dryer door opening (on the cabinet frame)
- On the back panel
- Near the lint screen housing (depending on design)
- On the side of the door opening or the front frame
If you’re filling out installation paperwork, the installation instructions even include fields for “Model number” and “Serial number” so you can record them for future reference; see the 11061402311 installation guide.
How to read the number (what it tells you)
Kenmore model numbers are the key to getting the right fit and function.
- The full model number (all digits) identifies the exact design series
- The prefix (often 110 on many Kenmore dryers) commonly points to the manufacturing source family
- The model number helps match parts like the belt, heating element, and thermostats
- The serial number helps identify production run details when needed
Quick example
| What you see | What it means for parts and help |
|---|---|
| 11061402311 | Exact model to use for diagrams and part fit |
| Serial number | Useful for service history and production details |
Why it matters
Using the exact model number prevents ordering the wrong part and helps you follow the correct electrical and venting requirements for your dryer. For example, installation guidance can differ for 3-wire vs 4-wire electrical connections and grounding methods; details like that are covered in the 11061402311 installation guide.
Last updated: February 2026
What is the PF code on a Kenmore dryer?
PF on a Kenmore dryer means power failure; the dryer detected an interruption in electrical power during the cycle. On Kenmore model 11061402311, press Stop/Clear to remove the code, then restart the cycle once steady power is restored.
What to do right now
- Press Stop/Clear to clear PF.
- Open and close the door, then press Start to resume or restart.
- If the drum light or display flickers, stop using the dryer until power is stable.
- If PF returns immediately, check the home breaker and outlet before running another load.
Common causes of PF (and what to check)
PF is almost always an external power issue, not a “bad cycle” setting.
- Tripped breaker or weak breaker on the 240V dryer circuit
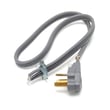
- Loose power cord connection at the terminal block (inside the rear access area)
- Loose wall receptacle or worn outlet contacts
- Power outage or brownout in the home
- Incorrect electrical supply (dryer needs a dedicated 30-amp, 120/240V circuit)
Electrical supply requirements (quick reference)
The installation instructions for this 29-inch electric dryer call for a dedicated 30-amp circuit and proper grounding.
| Item | Typical requirement for this electric dryer type | Why it matters |
|---|---|---|
| Voltage | 120/240V (some installs 120/208V if specified) | Low/unstable voltage can trigger PF |
| Circuit | Dedicated 30-amp, time-delay fuse or breaker | Prevents nuisance trips |
| Cord | 3-wire or 4-wire cord kit as required by code | Incorrect wiring can cause intermittent power |
For wiring and grounding details, follow the installation guide.
When a part is likely involved
If the outlet and breaker are solid but PF keeps appearing, the most common “part-related” issue is a failing start switch or timer contact that is dropping power to the motor circuit.
- If the dryer will not start after clearing PF, check the dryer push-to-start switch WP3977456.
- If the timer stalls or behaves inconsistently, the dryer timer WPW10185976 is a common suspect.
Why it matters
A repeated PF code can point to an unsafe, overheating, or loose electrical connection. Fixing the power supply issue helps prevent no-start problems, nuisance shutdowns, and damage to wiring or components.
Last updated: February 2026
How do I know if my Kenmore dryer thermal fuse is blown?
On Kenmore electric dryer model 11061402311, a blown thermal fuse commonly shows up as a dryer that will not start or runs but won’t heat. The sure way to confirm is a continuity test with a multimeter after disconnecting power; a blown fuse reads open (no continuity).
Quick symptoms to look for
- Dryer won’t start even though the door is closed and controls are set to run
- Drum tumbles but there’s no heat
- Cycle runs unusually long because heat is cutting out
- You recently had poor airflow (clogged lint screen or crushed/kinked vent)
Confirm it with a multimeter (best test)
- Unplug the dryer (electric shock hazard).
- Access the thermal fuse area (location varies by design; follow the access steps in the 11061402311 installation guide).
- Remove at least one wire from the fuse terminal.
- Set the meter to continuity or ohms and test across the fuse terminals.
How to read the result
| Meter result | What it means | What to do next |
|---|---|---|
| Beep or near 0 ohms | Fuse is good | Keep troubleshooting heat or start circuit |
| No beep or OL/infinite | Fuse is blown | Replace the fuse and fix the airflow problem |
Don’t skip the airflow checks (why fuses blow)
A thermal fuse usually opens because the dryer overheated from restricted airflow. Before running the dryer again, we recommend:
- Clean the lint screen and confirm it seats correctly
- Inspect the vent hose for kinks, crushing, or long runs
- Clean lint buildup from the exhaust duct to the outside hood
- Verify the outside damper opens freely
- Run a timed heat cycle and check for strong airflow at the outlet
Why it matters
The thermal fuse is a safety device; replacing it without correcting venting or lint buildup often leads to another no-heat or no-start failure.
Last updated: February 2026
How much does it cost to replace a heating element in a Kenmore dryer?
For Kenmore electric dryer model 11061402311, replacing the heating element typically costs $50 to $120 for the part plus $150 to $300 for professional labor, so most total repairs land around $200 to $420 depending on access, venting condition, and what else is replaced.
Typical cost breakdown
- Heating element part: usually the biggest parts cost (often replaced as an assembly)
- Service call and diagnosis: commonly billed even if you approve the repair
- Labor time: typically 1 to 2 hours for an electric dryer element job
- Optional related parts: thermal cut-off, thermostats, wiring kit (when heat damage is present)
| Item | Typical parts cost | Typical labor cost | Notes |
|---|---|---|---|
| Heating element only | $50 to $120 | $150 to $300 | Most common repair when there is no heat |
| Element + safety parts | $90 to $180 | $150 to $320 | Common if overheating caused a failure |
| DIY replacement | $50 to $180 | $0 | You still need safe electrical practices |
Parts that commonly get replaced with the element
If your dryer overheated or has restricted airflow, we often see additional heat-related parts fail. For this model, common matches include:
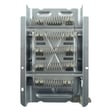
- Dryer element 279838 (the heater that produces heat)
- Dryer thermal cut-off fuse kit 279816 (opens if the heater area overheats)
- Dryer operating thermostat WP3387134 (helps regulate drum temperature)
- Dryer high-limit thermostat WP3977767 (backup overheat protection)
- Dryer heating element wire kit 279457 (useful if terminals are heat-damaged)
Why the price varies (and why it matters)
A dryer can lose heat because of the element, but poor venting can also cause overheating that repeatedly blows safety fuses. The installation instructions for this 29-inch Kenmore dryer emphasize proper exhaust setup and keeping lint buildup under control; restricted airflow increases drying time and can trigger heat cutoffs. See the 11061402311 installation guide for venting and safety notes.
Quick checks before you buy parts
- Confirm the dryer is on a dedicated 30-amp circuit
- Check for two fuses or two breakers (many electric dryers use both legs of 240V)
- Run for 5 minutes, then check for heat; if no heat, verify both breakers are on
- Clean the lint screen and inspect the vent for blockage
Last updated: February 2026