 Owner’s manual




Where can I find the model number on a Maytag dryer?
On your Maytag dryer model MEDB200VQ0, the model number is printed on the appliance identification label. Most often, we find it on the cabinet frame just inside the dryer door opening; some units also place it on the back of the dryer near the top.
Most common label locations to check
- Open the dryer door and look on the cabinet frame around the door opening
- Check the door opening area near the lint screen housing
- Look on the back panel near the top edge
- If your dryer is stacked or in a tight closet, use a flashlight and mirror to view the rear label
What the label looks like (and what to write down)
The identification label typically includes:
- Model number (example: MEDB200VQ0)
- Serial number (used to identify production date and version)
- Electrical ratings (volts/amps) and sometimes a wiring diagram reference
Why it matters
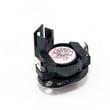
We use the exact model number to match the correct Maytag dryer parts and diagrams. Even small model-number differences can change which components fit, such as a dryer heating element WP8544771 or a dryer thermal fuse WP3390719.
Quick checklist: model number vs. serial number
| Item | What it’s used for | Example format |
|---|---|---|
| Model number | Choosing correct parts and diagrams | MEDB200VQ0 |
| Serial number | Identifying production run/version | Letters and numbers |
For more model-specific details and labeling references, check the MEDB200VQ0 owner's manual.
Last updated: February 2026
How many years should a Maytag dryer last?
A Maytag dryer typically lasts 13 years. With consistent maintenance and normal household use, many Maytag dryers, including model MEDB200VQ0, run 15 years before major repairs become common.
Typical lifespan and what changes it
Most dryers wear based on heat, airflow restriction, and drum support load. These factors have the biggest impact:
- Lint screen cleaning before every load (airflow stays strong)
- Exhaust vent cleaning on a regular schedule (reduces heat stress)
- Avoiding overloading (protects drum rollers, belt, and idler)
- Using the right cycle for the fabric (less overheating)
- Fixing squealing, thumping, or long dry times early (prevents cascade failures)
For model-specific care and cleaning intervals, follow the maintenance guidance in the MEDB200VQ0 owner's manual.
Maintenance schedule we recommend
The MEDB200VQ0 manual calls out lint removal from the cabinet and exhaust vent about every 2 years (more often with heavy use). Use this as a simple baseline:
| Task | Frequency | Why it matters |
|---|---|---|
| Clean lint screen | Every load | Improves drying and reduces overheating |
| Check vent airflow at outside hood | Monthly | Catches clogs and crushed venting |
| Clean exhaust vent duct | Every 1 to 2 years | Prevents long dry times and heat damage |
| Clean lint inside cabinet | Every ~2 years | Helps protect motor and heater area |
Parts that commonly determine “end of life”
If the dryer still heats and tumbles, it is usually worth repairing. These wear items often decide whether a dryer feels “worn out”:
- Drum support rollers (rumbling or thumping), such as support WPW10314173
- Belt and idler components (squeal, no tumble)
- Heating system parts (no heat, overheating), such as dryer heating element WP8544771
- Safety cutoffs (no heat or no run in some failures), such as dryer thermal fuse WP3390719
Why it matters
A dryer that is restricted by lint or venting runs hotter and longer, which shortens the life of the heating element, thermostats, and motor. Keeping airflow strong is the simplest way to reach the full expected lifespan.
Last updated: February 2026
How do you remove the front panel of a Maytag dryer?
On the Maytag MEDB200VQ0 dryer, we remove the front panel by disconnecting power first, then releasing the fasteners and clips that hold the panel to the cabinet. Once the panel is free, we disconnect the door switch wiring (if attached) and lift the panel away for interior access.
Safety first
- Unplug the dryer (or switch off the breaker) before servicing
- Wear cut-resistant gloves; cabinet edges can be sharp
- Support the front panel as you remove the last fastener
- Take a quick photo of wire connections before disconnecting anything
Step-by-step: removing the front panel
- Disconnect power at the outlet or breaker.
- Open the door and remove screws that secure the front panel area (locations vary by revision).
- If your model has a lower access/kick panel, remove the bottom screws and release the panel clips.
- Release the front panel clips (a putty knife helps if clips are tight), then pull the panel slightly forward.
- Disconnect the door switch harness (if the wiring is attached to the front panel).
- Lift and remove the front panel away from the cabinet.
If the door needs to come off first
The MEDB200VQ0 owner documentation includes door-hinge screw steps that are useful when you need extra clearance. Use the MEDB200VQ0 owner's manual for the exact hinge screw locations and door handling steps.
| Task | What you remove | Why you do it |
|---|---|---|
| Basic access | Front panel fasteners/clips | Reach drum, belt, rollers, blower area |
| Extra clearance | Door and hinges | Makes the front panel easier to handle |
What to check while you are in there
- Lint buildup around the blower housing and exhaust outlet
- Drum support wear (flat spots, wobble, squeal)
- Belt condition (cracks, glazing)
- Signs of overheating (scorched lint, brittle wiring)
If you are chasing squealing or thumping, the dryer repair kit 4392067 is commonly used to service wear items like rollers and the idler components.
Why it matters
Removing the front panel correctly prevents broken clips, damaged door switch wiring, and cabinet misalignment that can cause rubbing noises or poor door sealing.
Last updated: February 2026
How to hard reset Maytag dryer?
To hard reset your Maytag dryer model MEDB200VQ0, we recommend a simple power reset: unplug the dryer (or switch the breaker off) for 5 minutes, then restore power and start a cycle. This clears many control glitches and display issues.
Recommended reset methods (in order)
- Power reset (best first step): Unplug for 5 minutes, then plug back in.
- Breaker reset (if hardwired): Turn the dryer breaker OFF, wait 5 minutes, then turn it ON.
- Control cancel and restart: Press POWER/CANCEL, reselect the cycle, then press START/PAUSE (the manual notes POWER/CANCEL ends a cycle and START/PAUSE restarts). See the MEDB200VQ0 owner's manual.
- Wake the console if it looks “dead”: This model uses an Auto Wake-Up feature; press any button, turn the knob, or open the door to illuminate the display.
What a “hard reset” fixes most often
| Symptom | Reset helps when | Next step if it returns |
|---|---|---|
| Buttons unresponsive | Control is temporarily locked up | Check door closure, then retry START/PAUSE |
| Dryer won’t start after selecting a cycle | Dryer timed out after 5 minutes idle | Reselect cycle and press START/PAUSE |
| Diagnostic code on display | Code is informational and clears with a key press | Address the cause (power, airflow, etc.) |
| Cycle won’t change | Cycle needs to be canceled first | Press POWER/CANCEL, then choose a new cycle |
Why it matters
A reset restores normal control operation without replacing parts. If the dryer repeatedly shuts off, shows airflow or power-related messages, or won’t heat, the underlying issue is usually venting, power supply, or a failed safety component, not the control needing repeated resets.
If the problem comes back right away
- Confirm the dryer is getting full power (electric dryers typically need two breakers/fuses).
- Clean the lint screen and check the vent path for restrictions.
- If the dryer runs but won’t heat, a failed safety device such as the dryer thermal fuse WP3390719 can stop heating (and often indicates restricted airflow).
- For heating performance issues, the dryer heating element WP8544771 is a common wear item on electric dryers.
Last updated: February 2026








