Installation guide
 Owner’s manual
 Error Codes
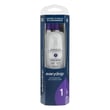


How to replace water filter on KitchenAid side by side refrigerator?
To replace the water filter on your KitchenAid KSC23C8EYY02 side-by-side refrigerator, remove the old filter, insert the new one fully, then push in and twist it to the right (clockwise) until it stops. After installation, flush the water system before using the dispenser.
- Dispense a few cups of water first to relieve pressure and reduce dripping.
- Remove the old filter (most filters release by turning left, counterclockwise, then pulling out).
- Insert the new filter straight in until it seats.
- Push in and twist right (clockwise) until it stops and feels locked.
- Check for leaks around the filter area.
- Flush the water system as described in the KSC23C8EYY02 owner’s manual.
Common causes are pressure in the line, a slightly misaligned filter, or a dry O-ring.
- Dispense water for 10 to 20 seconds, then try again.
- Reinsert the filter and start the twist only after it is fully seated.
- If it still binds, remove it and inspect the O-rings for nicks or twisting.
- Wipe the filter head clean; debris can prevent a proper seal.
If your home uses reverse osmosis, the installation instructions note the RO system typically needs 40 to 60 psi to work properly. A refrigerator water filter can further reduce pressure when used with RO; removing the refrigerator filter is a common test step when diagnosing low flow. See the KSC23C8EYY02 installation guide for water supply and pressure guidance.
| What to check | What “normal” looks like |
|---|---|
| Dispenser flow | Improves after flushing air out |
| Leaks | No dripping at the filter head |
| Ice maker | Ice production returns within 24 hours |
A correctly installed water filter helps protect the water inlet valve and ice maker from sediment, and it prevents leaks caused by a filter that is not fully seated or locked.
Last updated: February 2026
How to reset the replace filter light on a KitchenAid side by side refrigerator?
On KitchenAid model KSC23C8EYY02, you typically reset the “Replace Filter” light by pressing MAX ICE and MAX COOL at the same time and holding them for about 5 seconds until the indicator clears. For the exact button sequence for your control panel, use the KSC23C8EYY02 owner's manual.
- Replace the refrigerator water filter first (the light will not stay off if the filter is still restricted).
- Close the refrigerator doors so the control panel is active.
- Press MAX ICE and MAX COOL together.
- Keep holding for 5 seconds.
- Release the buttons and confirm the “Replace Filter” light is off.
- Dispense water for a minute or two to help clear air and stabilize flow.
- Make sure the filter is fully seated and locked in place.
- Try the reset again with a steady 5-second hold.
- Power-cycle the refrigerator: turn the control to OFF, unplug briefly, then restore power and reset controls (safety steps are outlined in the KSC23C8EYY02 installation guide).
- If water flow is weak after a new filter, check for a supply issue or a valve problem.
If you have no water to the dispenser or ice maker after replacing the filter, a failing inlet valve is a common cause. For this model, the matching valve options include the refrigerator water inlet valve WPW10341320 and the refrigerator inlet valve WPW10238100.
| Symptom | Most common cause | What to do next |
|---|---|---|
| Light stays on after reset | Buttons not held long enough, filter not seated | Re-seat filter; repeat 5-second hold |
| Light resets but returns quickly | Restricted filter or low water pressure | Flush dispenser; verify supply valve is fully open |
| No water/ice after filter change | Air in line or inlet valve issue | Purge dispenser; test inlet valve |
Resetting the indicator keeps your maintenance reminders accurate, and it helps you catch real water-flow problems early (filter restriction, low supply pressure, or inlet valve issues).
Last updated: February 2026
What is the 2025 KitchenAid color of the year?
KitchenAid’s “Color of the Year” is a brand marketing announcement that can vary by product line and region; it is not a specification for your KitchenAid KSC23C8EYY02 side-by-side refrigerator. For anything that affects operation, installation, or fit, use the KSC23C8EYY02 installation guide.
A color trend does not change how the sealed system, controls, ice maker, or water dispenser work. What matters for this model is correct cabinet opening size, door swing clearance, leveling, and water system setup.
- Does not change cooling performance or temperature settings
- Does not change ice production or dispenser operation
- Does not determine which replacement parts you need
- Does matter only if you are matching finishes, panels, or kitchen decor
- For fit and clearance, follow the model’s published dimensions
| Topic | Impacts your refrigerator? | Where to verify |
|---|---|---|
| KitchenAid Color of the Year | No (aesthetic only) | KitchenAid marketing materials |
| Opening width, height, depth, door swing | Yes (fit and usability) | KSC23C8EYY02 installation guide |
| Use and care settings (temps, features) | Yes (daily operation) | KSC23C8EYY02 owner’s manual |
We see shoppers assume a “Color of the Year” signals a new feature set or a required update. For KitchenAid KSC23C8EYY02, the practical details that prevent problems are installation clearances, proper leveling, and correct water line and filter setup.
Last updated: February 2026
What is the lifespan of a KitchenAid refrigerator?
A KitchenAid refrigerator typically lasts 14 to 17 years with normal household use. For your KitchenAid KSC23C8EYY02 side-by-side refrigerator, consistent maintenance (clean airflow, good door sealing, and correct installation clearances) is what most directly affects how long it runs reliably.
Most premium refrigerators, including KitchenAid side-by-side models, land in this range:
| Appliance type | Typical lifespan | What usually ends life first |
|---|---|---|
| Side-by-side refrigerator | 14 to 17 years | Sealed system wear, control issues, airflow problems |
| Basic top-freezer refrigerator | 10 to 15 years | Compressor start components, defrost failures |
We recommend these habits because they reduce compressor run time and prevent temperature swings:
- Keep condenser and ventilation areas clean and unobstructed.
- Confirm doors close fully and gaskets seal all the way around.
- Keep the refrigerator in a room-temperature range that supports efficient cooling.
- Replace consumables on schedule (air filter, water filter if equipped).
- Avoid overpacking; leave space for air circulation.
For model-specific care and cleaning intervals, follow the KSC23C8EYY02 owner’s manual.
Use this to judge whether your refrigerator is simply older or starting to fail:
- Normal aging: slightly longer run times, occasional louder fan noise, minor cosmetic wear.
- Needs attention soon: warm spots, frequent thawing/freezing cycles, heavy frost, water leaks, repeated clicking, or the unit running almost constantly.
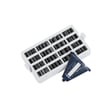
If odors are a recurring issue, replacing the refrigerator air filter W10311524 helps keep airflow fresh and can reduce strain from blocked filter media.
A refrigerator near the end of its expected lifespan is more sensitive to airflow restrictions, door seal leaks, and installation issues. Keeping clearances correct and airflow clean helps protect major components like the compressor and evaporator fan.
Last updated: February 2026
What is the most common problem with a KitchenAid refrigerator?
On the KitchenAid KSC23C8EYY02 side-by-side refrigerator, the most common service issues we see are ice maker and water dispenser problems, uneven cooling from restricted airflow, and water leaks. These symptoms often trace back to the water supply system, the evaporator fan, or a control component.
- No ice or small cubes: low water pressure, a restricted filter, or a failing inlet valve
- Warm refrigerator section but freezer seems OK: evaporator fan issue or blocked air passages
- Water under the refrigerator: clogged/iced drain system or a leaking water line/valve
- Loud humming, buzzing, or clicking: fan motor, fan blade, or compressor start/control issues
- Bad odors: overdue air filter or food spills trapped in liners and drawers
- Confirm the unit is on a dedicated 115V, 60 Hz, 15 or 20 amp grounded outlet and avoid extension cords.
- If the refrigerator is on a GFCI outlet, watch for nuisance trips that can cause cooling complaints.
- Verify water pressure is strong; if you use reverse osmosis, the supply typically needs 40 to 60 psi.
- Make sure the cabinet is level and doors close fully; poor sealing can mimic cooling problems.
- Review operating and care steps in the KSC23C8EYY02 owner's manual.
| Problem area | Common part involved | Example part for this model |
|---|---|---|
| Ice maker not filling | Water inlet valve | Refrigerator water inlet valve WPW10341320 |
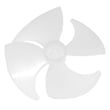
| Poor airflow, warm temps | Evaporator fan motor/blade | Refrigerator evaporator fan motor WP2315549 and refrigerator evaporator fan blade WP2169142 |
| Odors in fresh food section | Air filter | Refrigerator air filter W10311524 |
Ice maker, leak, and temperature complaints often share the same root causes: water pressure and airflow. Fixing the underlying cause protects food quality, prevents repeat leaks, and helps the refrigerator run efficiently.
Last updated: February 2026
Why is my KitchenAid side by side refrigerator leaking water?
Water leaking from your KitchenAid KSC23C8EYY02 side-by-side refrigerator is usually caused by a defrost drain problem (clogged or frozen), a loose or leaking water-line connection, or a water supply issue that makes fittings seep. We focus first on the drain and the water inlet connections.
- Look for water under the freezer side; that often points to a clogged defrost drain.
- Check the household shutoff valve and the tubing connection at the back for slow drips.
- Inspect the 1/4-inch water line for kinks, cracks, or a rubbed spot behind the unit.
- Confirm the refrigerator is level and stable; leveling legs should contact the floor.
- If you use reverse osmosis, confirm supply pressure is in the 40 to 60 psi range.
The installation instructions call out tightening any leaking connections and checking the valve inlet connection after turning the shutoff valve on. Use the steps in the KSC23C8EYY02 installation guide to verify the correct tubing, compression nut and sleeve setup, and the tube clamp that prevents the line from getting damaged when the refrigerator is pushed back.
| What you see | Likely cause | What we do next |
|---|---|---|
| Drip at back near tubing | Loose compression nut or damaged sleeve | Tighten gently; replace sleeve/nut if deformed |
| Water only when dispensing | Seeping inlet valve or fitting | Inspect valve and tubing; replace valve if it won’t seal |
| Puddle after door opens | Defrost drain backing up | Clear drain and melt any ice blockage |
If the leak is at the valve body or it will not stop seeping, replacing the refrigerator water inlet valve WPW10341320 is a common fix.
A clogged or frozen drain lets defrost water overflow into the freezer bottom and then onto the floor. Clearing the drain channel and flushing it with hot water (after unplugging the refrigerator) typically restores normal drainage.
Leaks can damage flooring and also create ice buildup that restricts airflow, which can lead to warm temperatures and extra compressor run time.
Last updated: February 2026