Installation guide
 Owner’s manual
 Error Codes



Does my Kenmore top load washer have a filter?
Yes. Your Kenmore top-load high efficiency washer model 11022242511 uses inlet valve screens (at the water inlet) to catch debris, and it also has a drain pump cleanout area on many builds. We use the 11022242511 owner's manual to confirm the correct cleaning and maintenance approach.
Most customers mean one of these:
- Inlet valve screens: tiny mesh screens inside the hot and cold water inlet ports
- Drain pump trap/cleanout (if equipped): catches coins, lint, and small items before the pump
- Tub self-cleaning maintenance: not a filter, but a routine that helps prevent odor and residue
- Unplug the washer.
- Turn off both water faucets.
- If you suspect slow fill or no fill, check the inlet screens.
- If you suspect no drain or standing water, check for a drain restriction.
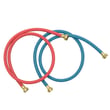
- Remove the inlet hoses from the back of the washer.
- Look inside the inlet ports for mesh screens.
- Rinse debris off the screens; reinstall hoses and turn water back on.
- If the washer still fills slowly, the issue can be the water inlet valve assembly W11210459.
- Confirm the drain hose is not kinked or pushed too far into the standpipe.
- If the washer hums but will not drain, the pump may be blocked or failing; a common replacement is the washer drain pump W10919003.
| Symptom | Most likely area to check | Typical cause |
|---|---|---|
| Slow fill / no fill | Inlet valve screens | Sediment, scale, debris |
| Poor rinse | Inlet valve screens, water supply | Restricted flow |
| Won’t drain / standing water | Drain hose, pump area | Small item blockage |
Keeping the inlet screens clear protects the water inlet valve, improves fill performance, and helps the washer rinse correctly. Regular maintenance also reduces detergent and soil buildup that can cause odor over time.
Last updated: February 2026
How to identify a Kenmore washer model?
Your Kenmore washer model number is printed on the appliance ID label; for Kenmore model 11022242511, it typically appears under the lid on the top-loading cabinet opening or on the rear panel. Using the exact model number ensures you get the correct washer parts and the right Use and Care information.
Check these common label locations first:
- Under the lid, around the tub opening (most common on top-loaders)
- On the back of the washer cabinet near the power cord
- Along the side or rear edge of the control console area
- Inside the cabinet on the rim, where the lid closes
For this Kenmore washer, the model number is a long numeric format (example: 11022242511). Record it exactly as shown, including all digits.
| What to capture | Example for this washer | Why it matters |
|---|---|---|
| Model number | 11022242511 | Matches the correct parts diagrams and fit |
| Serial number | (varies) | Helps date the unit and confirm production run |
| Type | Top-loading high efficiency washer | Helps narrow troubleshooting and maintenance steps |
Kenmore model numbers can look similar, but internal components can differ by revision. Matching 11022242511 helps us point you to the correct items such as a lid lock, actuator, drive belt, or water inlet valve.
If you are troubleshooting a symptom (won’t spin, won’t drain, lid won’t lock), the 11022242511 owner’s manual is the fastest way to confirm the correct model family and operating features before replacing parts.
- Lid won’t lock or the cycle won’t start: the lid lock system is commonly involved (example part: washer lid lock W11307244).
Last updated: February 2026
How to reset a Kenmore 11022242511 washer?
To reset your Kenmore 11022242511 washer, we recommend doing a simple power reset: cancel the cycle, unplug the washer for about 1 minute, then plug it back in and restart a cycle using START/PAUSE/Unlock Lid. This clears many “stuck” control states.
- Press START/PAUSE/Unlock Lid to pause the cycle.
- Wait for basket movement to stop; the lid unlock can take several seconds to a few minutes.
- Turn the washer OFF (if your control has a Power/Cancel function).
- Unplug the power cord for 60 seconds.
- Plug back in.
- Select a cycle and press START/PAUSE/Unlock Lid to run.
For model-specific control behavior and cycle status lights, use the 11022242511 owner's manual.
These checks fix the most common “won’t run/fill” complaints after a reset:
- Confirm the lid is fully closed; the washer will not run with the lid open.
- Verify the outlet has power; reset the breaker if needed.
- Avoid extension cords; plug into a grounded 3-prong outlet.
- If the load is tightly packed or off-balance, remove a few items, redistribute, then press START/PAUSE/Unlock Lid.
- If the washer will not drain or is stuck with water in the tub, a drain issue can prevent normal operation.
| Symptom you see | Common related part | What it affects |
|---|---|---|
| Lid won’t lock or unlock, won’t start | Washer lid lock W11307244 | Safety interlock for starting and spinning |
| Won’t drain, stops mid-cycle | Washer drain pump W10919003 | Water removal so the cycle can advance |
A reset clears temporary control logic issues, but the washer still has to meet safety and operation conditions (lid closed/locked, proper power, and the ability to drain and balance) before it will run and spin normally.
Last updated: February 2026
How to unclog drain hose on Kenmore washer?
To unclog the drain hose on your Kenmore washer model 11022242511, we recommend disconnecting the hose, draining any standing water into a pan, then flushing the hose to remove lint, coins, and detergent buildup. After clearing it, reinstall the hose using the correct standpipe depth and height from the 11022242511 installation guide.
- Unplug the washer (or switch off the breaker).
- Pull the washer forward and place towels and a shallow pan behind it.
- Disconnect the drain hose from the home drain (standpipe or laundry tub) and let it drain.
- Disconnect the drain hose from the back of the washer and drain remaining water into the pan.
- Flush the hose with hot water; for buildup, soak the clogged end in hot water plus vinegar for 20 to 30 minutes, then flush again.
- Check the black drain port on the washer for debris before reinstalling the hose.
Your installation setup matters as much as the cleaning.
| Setup item | What to do | Why it matters |
|---|---|---|
| Standpipe insertion depth | Keep about 4.5 in. (114 mm) of hose inside the standpipe | Too deep can cause siphoning or slow draining |
| Drain hose height | Keep the hose end below 96 in. (2.4 m) above the floor | Too high can prevent pumping out |
| Drain opening | Keep the drain opening clear; do not seal it with tape | Prevents backpressure and poor draining |
If the hose is clear but the washer still will not drain or spins poorly, these are the most common causes:
- Too much HE detergent creating suds that slow or stop draining
- Kinked or crushed drain hose behind the washer
- Clog in the household standpipe or laundry tub drain
- A weak or jammed drain pump (common symptom: humming with little or no water flow)
If you suspect the pump is not moving water after the hose is cleared, the model 11022242511 uses a replaceable pump such as the washer drain pump W10919003.
A partially clogged drain hose can keep the washer from pumping out water within the normal drain time, leaving loads wet and causing repeated drain and spin problems. Correct hose routing plus proper detergent use helps prevent the clog from coming back.
Last updated: February 2026
Is it worth repairing a Kenmore washing machine?
Yes; repairing a Kenmore washer is worth it when the fix restores reliable operation for less than the cost of replacement, especially for common wear items like a lid lock, drive belt, or drain pump. For model 11022242511, we also recommend checking the troubleshooting steps in the 11022242511 owner's manual before buying parts.
Use these practical checkpoints before you spend money:
- Age and condition: If the tub, cabinet, and wiring are in good shape, repairs usually pay off.
- Symptom type: No-drain, no-spin, or won’t-start problems are often part-related and repairable.
- Repair cost vs. replacement: If parts plus labor are well under a new washer, repair wins.
- Downtime: If you need a fast fix, replacing a single failed part is typically quicker than shopping and installing a new unit.
- Maintenance history: Regular cleaning and correct detergent use (HE detergent) supports longer life.
These are frequent “high impact” parts for performance and safety:
- Lid won’t lock or cycle won’t start: washer lid lock W11307244
- Won’t drain or leaves water in tub: washer drain pump W10919003
- Slips during spin or makes belt noise: drive belt W11239857
- Agitation/spin shifting issues: washer actuator W10913953
| Situation | Typical outcome | Usually worth repairing? |
|---|---|---|
| Single failed wear part (belt, lid lock, valve) | Predictable fix | Yes |
| Multiple major failures at once (motor + control + tub issues) | Higher total cost | Maybe |
| Repeated leaks, heavy rust, or severe vibration damage | Risk of more repairs | Often no |
A targeted repair keeps your 11022242511 running safely and efficiently. This model is designed for HE (low-sudsing) detergent; using non-HE detergent can cause poor rinsing, longer cycles, and performance problems over time.
Last updated: February 2026
What is the average lifespan of a Kenmore washer?
A Kenmore washer typically lasts 10 to 15 years. For the Kenmore 11022242511 top-loading high efficiency washer, regular maintenance, correct HE detergent use, and avoiding chronic overloading are the biggest factors in reaching the high end of that range; see the 11022242511 use and care guide for model-specific care steps.
Most washers fail from wear in moving parts, drainage components, or lid/lock and control issues. Usage patterns matter as much as age.
- Light use (1 to 3 loads/week): often closer to 15 years
- Average use (4 to 7 loads/week): commonly 10 to 13 years
- Heavy use (multiple loads/day): often 7 to 10 years
- Hard water and heavy detergent use: shortens life by increasing buildup
- Frequent unbalanced loads: increases stress on the drive system
These habits reduce strain on the motor, belt, and pump and help prevent odor and buildup.
- Use HE detergent only and measure carefully (too much causes residue and extra rinsing)
- Keep the lid closed during cycles so the washer can complete steps normally
- Do not overload; load loosely so items can circulate
- Run a monthly cleaning cycle (or hot wash) to reduce detergent and soil buildup
- Check and clean inlet hose screens if fill slows over time
- Inspect the drain path if you notice slow draining or leftover water
If performance changes, these parts are frequent culprits on top-load HE designs.
| Symptom | Common cause | Example part for 11022242511 |
|---|---|---|
| Won’t spin or shifts oddly | Drive system wear | Whirlpool washer drive pulley W10721967 |
| Won’t start or lid won’t lock | Lid lock failure | Washer lid lock (model-specific) |
| Slow drain or won’t drain | Pump restriction or failure | Washer drain pump (model-specific) |
Knowing the typical 10 to 15 year lifespan helps you decide when maintenance and a targeted repair (like a drive pulley or actuator) makes sense versus planning for replacement, especially once multiple wear symptoms show up at the same time.
Last updated: February 2026