Using a wiring schematic to trace a current video


This video shows how to follow a circuit on a wiring diagram, just like professional appliance repair technicians do. Tracing a circuit isn’t as complicated as you might think, and once you get the hang of it, you’ll be able to pinpoint which part you need to replace.
The video is the third in a series of videos on schematics, also called wiring diagrams.
In the first video, you’ll find explanations of the most common symbols in a wiring schematic.
In part two, you’ll learn where to find the wiring diagram on your appliance and how to decipher the lines and symbols.
When you're troubleshooting an electrical problem in an appliance, a multimeter is an essential tool. How to use a multimeter to test electrical parts video shows you how.
Once you’ve figured out which part needs replacing, look for step-by-step instructions for the appliance in our DIY repair help section.
Using a wiring diagram to determine an appliance problem
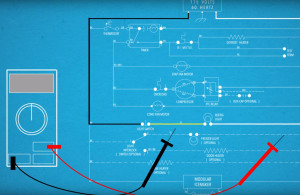
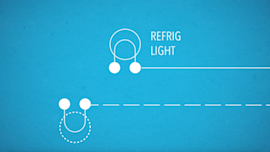
Here’s how to use a wiring schematic to trace a current to find the cause of an appliance problem. Let’s look at an actual circuit on a wiring schematic. Here’s the circuit that runs through the refrigerator light bulb. Electric current travels in a loop called a circuit. The circuit begins at the positive prong of the power cord and goes to the light switch through the black wire. The yellow wire connects the light switch to the refrigerator light socket. To complete the circuit, the white wire carries current to the neutral prong of the power cord.
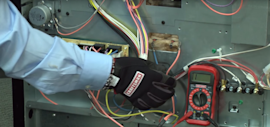
Any break in the circuit such as a broken wire or a failed component will interrupt the circuit and current won’t flow. Let’s say the refrigerator light won’t work and you already replaced the light bulb. Begin by unplugging the fridge, and checking the light switch for continuity using a multimeter. You should measure near 0 ohms of resistance (or continuity) through the switch with the switch plunger extended. If you measure infinite resistance through the switch, replace it. If the switch is OK, you can check for continuity through the black, yellow and white wires in a similar manner using a multimeter. Repair or replace any broken wires. If the wiring is okay, you’ll need to replace the light socket because you’ve eliminated all other possible causes of the failure.
Accurately diagnosing a failure will help you buy the right part so you can get the appliance working again. Other circuits in the refrigerator are more complicated, but you can use this basic method of tracing a circuit to understand possible causes of failures in your appliances.
Most common symptoms to help you fix your cooktops
Choose a symptom to see related cooktop repairs.
Main causes: lack of electrical power, gas supply failure, bad pressure regulator, control system failure…
Effective articles & videos to help repair your cooktops
Use the advice and tips in these articles and videos to get the most out of your cooktop.

Learn some of the most common symbols found in a wiring diagram and what they mean.…

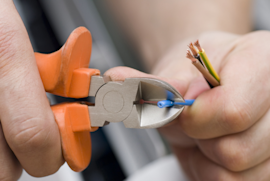
Learn how to repair broken, frayed or damaged wires in your appliances.…

Learn how to use a multimeter to check for wiring problems in an appliance that's not working…
