Get free shipping on your order, with any water filter subscription. Find my filter

Open Hamburger Menu
Sears Parts Direct
Tips to find your model number

Whirlpool DU1055XTPB3 dishwasher Parts

Here are the diagrams and repair parts for Whirlpool DU1055XTPB3 dishwasher, as well as links to manuals and error code tables, if available.

Whirlpool DU1055XTPB3 dishwasher
By Schematic
By Part
SELECT DIAGRAM
?

This is the number corresponding to the part on the diagram / schematic

Browse Parts for DU1055XTPB3 Dishwasher

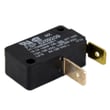
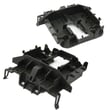
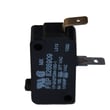
  • Dishwasher Thermal Fuse Kit for Whirlpool DU1055XTPB3 - Part 8193762

    Control panel diagram

    Fuse

    Part #8269213

    Replaced by #8193762

    Info Icon
    Manufacturer substitution
    This part replaces 8269213. Substitute parts can look different from the original.
    In Stock
    $31.13
    41% OFF Was : $52.56Info Icon
    Minus Item
    Qty
    Plus Item
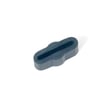
  • Dishwasher Door Latch for Whirlpool DU1055XTPB3 - Part 8193882

    Control panel diagram

    Latch Bolt

    Part #8524476

    Replaced by #8193882

    Info Icon
    Manufacturer substitution
    This part replaces 8524476. Substitute parts can look different from the original.
    In Stock
    $59.84
    9% OFF Phone Price : $65.84Info Icon
    Minus Item
    Qty
    Plus Item
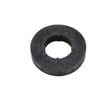
  • Dishwasher Water Feed Tube Spinner for Whirlpool DU1055XTPB3 - Part 8193983

    Upper wash/rinse diagram

    Spinner

    Part #8557720

    Replaced by #8193983

    Info Icon
    Manufacturer substitution
    This part replaces 8557720. Substitute parts can look different from the original.
    In Stock
    $21.77
    22% OFF Phone Price : $27.77Info Icon
    Minus Item
    Qty
    Plus Item
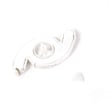
  • Dishwasher Water Inlet Port for Whirlpool DU1055XTPB3 - Part WPW10195536

    Fill/overfill diagram

    Water Inlet

    Part #8531325

    Replaced by #WPW10195536

    Info Icon
    Manufacturer substitution
    This part replaces 8531325. Substitute parts can look different from the original.
    In Stock
    $75.38
    7% OFF Phone Price : $81.38Info Icon
    Minus Item
    Qty
    Plus Item
  • Appliance Spray Paint (white) for Whirlpool DU1055XTPB3 - Part 350930

    #NI04

    All parts diagram

    Paint (white)

    Part #350930

    Replaced by #350930

    Info Icon
    Manufacturer substitution
    This part replaces 350930. Substitute parts can look different from the original.
    This item is not returnable
    In Stock
    $26.00
    19% OFF Phone Price : $32.00Info Icon
    Minus Item
    Qty
    Plus Item
  • Dishwasher Door Hinge Bushing for Whirlpool DU1055XTPB3 - Part WP8268990

    Tub/frame diagram

    Dishwasher Door Spring Bushing

    Part #8268990

    Replaced by #WP8268990

    Info Icon
    Manufacturer substitution
    This part replaces 8268990. Substitute parts can look different from the original.
    In Stock
    $62.46
    9% OFF Phone Price : $68.46Info Icon
    Minus Item
    Qty
    Plus Item
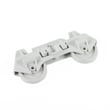
  • Dishwasher Dishrack Roller Assembly for Whirlpool DU1055XTPB3 - Part WP8268645

    Lower rack diagram

    Dishwasher Dishrack Roller Assembly, Lower

    Part #8268645

    Replaced by #WP8268645

    Info Icon
    Manufacturer substitution
    This part replaces 8268645. Substitute parts can look different from the original.
    In Stock
    $43.65
    12% OFF Phone Price : $49.65Info Icon
    Minus Item
    Qty
    Plus Item
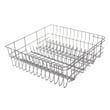
  • Whirlpool Dishwasher Silverware Basket for Whirlpool DU1055XTPB3 - Part W11158802

    Lower rack diagram

    Dishwasher Silverware Basket

    Part #8535075

    Replaced by #W11158802

    Info Icon
    Manufacturer substitution
    This part replaces 8535075. Substitute parts can look different from the original.
    In Stock
    $61.20
    9% OFF Phone Price : $67.20Info Icon
    Minus Item
    Qty
    Plus Item
  • Dishwasher Screw for Whirlpool DU1055XTPB3 - Part WPW10348409

    Dishwasher Screw

    Part #3369051

    Replaced by #WPW10348409

    Info Icon
    Manufacturer substitution
    This part replaces 3369051. Substitute parts can look different from the original.
    This item is not returnable
    In Stock
    $4.88
    17% OFF Phone Price : $5.88Info Icon
    Minus Item
    Qty
    Plus Item
  • Dishwasher Water Inlet Port Gasket for Whirlpool DU1055XTPB3 - Part WP8531323

    Fill/overfill diagram

    Dishwasher Water Inlet Port Gasket

    Part #8531323

    Replaced by #WP8531323

    Info Icon
    Manufacturer substitution
    This part replaces 8531323. Substitute parts can look different from the original.
    In Stock
    $25.47
    19% OFF Phone Price : $31.47Info Icon
    Minus Item
    Qty
    Plus Item

Whirlpool Dishwasher DU1055XTPB3 FAQs

For the Whirlpool DU1055XTPB3 dishwasher, the most common problems we see are drainage and wash-performance issues caused by clogs (food debris in the sump area, drain hose restrictions) or a weakening circulation/drain system. Leaks at the door seal and poor drying are also frequent.

Most common symptoms and what they usually point to

  • Water left in the bottom: restricted drain path, kinked hose, or a drain pump issue
  • Dishes still dirty or gritty: clogged chopper/sump area, blocked spray arm ports, or a weak wash motor
  • Not drying well: heater circuit issue, rinse-aid empty, or venting problem
  • Leaking at the door: worn or mis-seated door seal
  • Stops mid-cycle or seems dead: blown thermal fuse or control power interruption

Quick checks you can do first (no parts guessing)

  1. Cancel/drain the cycle and listen for a strong drain sound.
  2. Inspect the drain hose routing for kinks and high-loop/air-gap setup (per the DU1055XTPB3 installation guide).
  3. Clean out visible debris in the bottom of the tub and around the sump area.
  4. Confirm the door closes and latches firmly; a poor latch can mimic “won’t start” symptoms.
  5. Run hot water at the sink before starting a cycle to improve wash results.

Common parts involved (when symptoms match)

Symptom Likely area Example part for this model
Not drying, water stays cool Heating circuit Dishwasher heater W10518394
Leaks at the door Door sealing Dishwasher door seal W10542314
Not draining or slow drain Drain path Dishwasher drain hose 8269144A

Why it matters

Drain and wash issues often start as simple restrictions; clearing them early helps prevent repeat clogs, odor, and strain on the pump motor. If you are seeing flashing lights or a repeating pattern, use the Whirlpool dishwasher error codes guide to narrow the failure to a specific circuit or component.

Last updated: February 2026

For Whirlpool dishwasher model DU1055XTPB3, the model number is printed on the model and serial number label located on the inside edge of the tub opening when you open the door. We use that exact model number to match the correct parts and instructions.

Where to find the model and serial label

On Whirlpool dishwashers like DU1055XTPB3, the label is typically in one of these spots:

  • Along the left side of the tub opening (most common)
  • Along the right side of the tub opening
  • On the top edge of the tub opening, just under the countertop
  • Occasionally on the inner door edge near the latch area

The parts diagram in the DU1055XTPB3 owner's manual identifies this as the “model and serial number label.”

What to write down (and why)

Record these items exactly as shown on the label:

  • Model number (example: DU1055XTPB3)
  • Serial number (helps confirm production run)
  • Brand (Whirlpool)
  • Any suffix letters/numbers after the model (do not omit them)

Why it matters

Even small model-number differences can change the correct fit for parts like a door seal, drain hose, or heater. Using the full model number helps us match the right replacement the first time.

Quick check: model number vs. serial number

Item What it tells us Used for
Model number Exact dishwasher design Correct parts and manuals
Serial number Production date/run Compatibility cross-check

If the label is hard to read

  • Wipe it gently with a damp cloth and mild soap
  • Use a flashlight and take a close-up photo
  • Avoid abrasive pads or strong solvents that can remove the print

For installation-related identification (like confirming the unit is seated and secured correctly), use the DU1055XTPB3 installation guide.

Last updated: February 2026

Most Whirlpool dishwashers, including model DU1055XTPB3, typically last 10 to 12 years with normal household use. Consistent cleaning, correct detergent use, and fixing small problems early (leaks, poor draining, no-heat drying) are what most often push a dishwasher past the average.

What affects lifespan the most

  • Water quality: Hard water speeds up mineral buildup on the heater and inside the wash system.
  • Maintenance habits: Regular filter and spray-arm cleaning reduces pump strain.
  • Heat and drying performance: Weak heating can leave moisture behind and increase odor and residue.
  • Loading and detergent: Overloading and excess detergent can cause poor cleaning and extra wear.
  • Leak prevention: A small door leak can lead to bigger failures if ignored.

Quick maintenance checklist (high impact)

  • Run a monthly cleaning cycle; follow the steps in the DU1055XTPB3 owner's manual.
  • Keep the door sealing surfaces clean; replace a worn seal if you see drips.
  • Use rinse aid to improve drying and reduce spotting.
  • Scrape, do not pre-wash; heavy pre-washing can reduce detergent effectiveness.
  • Address draining issues quickly (standing water, slow drain, gurgling).

Common wear items and what they influence

Symptom Often related to What it can lead to if ignored
Dishes not drying Heating circuit Longer cycles, odor, residue
Water on floor at door Door sealing Cabinet damage, corrosion
Standing water Drain path Pump strain, odors

If drying is consistently weak, the dishwasher heater W10518394 is a common component in the heating system to check during diagnosis.

Why it matters

A dishwasher that is cleaned and sealed properly usually fails later and more predictably; that means fewer emergency breakdowns and better wash performance throughout its life.

Last updated: February 2026

On the Whirlpool DU1055XTPB3 dishwasher, changing the bottom (lower) door seal means removing the old seal from its channel, cleaning the seating surface, and pressing the new seal in evenly so the door closes with uniform contact. Use the DU1055XTPB3 installation guide for safe access, leveling, and alignment checks.

Before you start

  • Shut off power at the breaker.
  • Turn off the water supply under the sink.
  • Protect the floor with towels.
  • If you pull the unit forward, avoid kinking the drain hose and water line.
  • Keep the dishwasher upright; use two people if moving it.

Steps to replace the bottom seal

  1. Open the door and inspect the lower edge where the door meets the tub.
  2. Remove the toe panel if it blocks access to fasteners or the lower edge.
  3. Pull the old lower seal straight out of its channel (work end to end).
  4. Clean the channel and mating surfaces; remove grit and detergent buildup.
  5. Press the new seal into place evenly; fully seat corners and keep it untwisted.
  6. Close and latch the door; confirm the gap between the inner door and tub is even on both sides.

If it still leaks after replacement

  • Re-level and re-center the dishwasher in the cabinet; an out-of-level tub can leak at the bottom edge.
  • Check the main perimeter door gasket for wear; replace if needed with the dishwasher door seal W10542314.
  • Confirm the door latches firmly and the hinges are not loose.
Leak pattern Likely cause Fix
Bottom center Seal not fully seated Re-seat seal; press firmly along the channel
Bottom corners Door alignment or leveling Adjust alignment; level the unit
Sides/top too Perimeter gasket worn Replace the door seal

Why it matters

A correctly installed bottom seal prevents water damage at the toe-kick area and helps maintain proper wash pressure for better cleaning.

Last updated: February 2026

Most common symptoms to help you fix your dishwashers

Choose a symptom to see related dishwasher repairs.

Main causes: light switch beside the sink turned off, lack of power, bad dishwasher door switch, control system failure,…

Main causes: damaged or stuck spray arm, leaking door seal, damaged door hinge, leaky heating element water seal, cracke…

Main causes: improper loading, low water temperature, improper detergent dosage, detergent dispenser failure, spray arm …

Main causes: glass or popcorn kernel stuck in the chopper blade, drain line vibrating against the cabinet, debris in was…

Main causes: broken door latch, tripped circuit breaker, broken heating element, faulty vent fan, sensor failure, contro…

Main causes: not using rinse aid, rinse aid dispenser failure, broken heating element, malfunctioning vent, drying fan f…

Main cause: damaged rack height adjuster…

Main causes: clogged kitchen sink drain, clogged drain hose, drain check valve damaged, drain pump failure, control syst…

Main causes: water supply problem, stuck overfill float, clogged water inlet valve screen, water inlet valve failure…

Most common repair guides to help fix your dishwashers

These step-by-step repair guides will help you safely fix what’s broken on your dishwasher.

How to replace a dishwasher door latch assembly

How to replace a dishwasher door latch assembly

If the dishwasher door doesn't click shut, a broken door latch is a likely cause. Follow these instructions to replace i…

Repair time and Difficulty

 30 minutes or less
How to replace a dishwasher thermal fuse

How to replace a dishwasher thermal fuse

A completely dead control panel often indicates that the thermal fuse on the electronic control board is blown; follow t…

Repair time and Difficulty

 15 minutes or less
How to replace a dishwasher control panel

How to replace a dishwasher control panel

Learn how to replace a dishwasher control panel. Learn which tools and parts you need and get step-by-step instructions.…

Repair time and Difficulty

 15 minutes or less

Effective articles & videos to help repair your dishwashers

Use the advice and tips in these articles and videos to get the most out of your dishwasher.

What's a turbidity sensor, and how does it affect wash quality?

What's a turbidity sensor, and how does it affect wash quality?

Your dishwasher’s secret weapon? A turbidity sensor. Find out what it does, how it boosts wash quality, and what to do i…

Dishwasher not drying dishes video

Dishwasher not drying dishes video

Find out why your dishes are still wet even after the dishwasher cycle has finished.…

Replacing dishrack rollers on Kenmore 587-series and Frigidaire dishwashers video

Replacing dishrack rollers on Kenmore 587-series and Frigidaire dishwashers video

It only takes a few minutes to get your dishrack sliding easily again.…

Parts & More

Central Air Conditioner
Chainsaw
Chest Freezer
Dishwasher
Electric Range
Exercise Cycle
Front-Engine Lawn Tractor
Gas Chainsaw
Gas Snowblower
Miter Saw
Parts
Refrigerator
Top-Mount Refrigerator
Treadmill
Vhs Players & Vcrs
Washer