Owner’s manual
 Error Codes



How many cubic feet is a Kenmore Model 11047511700 washer?
The Kenmore washer model 11047511700 is a front-load design; most Kenmore front-load washers in this platform range around 3.0 to 4.0 cubic feet. For the exact capacity for your specific unit, we recommend checking the specifications section in the 11047511700 owner’s manual.
How to find the exact capacity for model 11047511700
Capacity is usually listed as “capacity,” “tub volume,” or “drum volume” in the specs.
- Look in the specifications pages of the 11047511700 owner’s manual
- Check the model and serial tag (often around the door opening) and match it to the manual
- If your washer is installed under a counter, confirm you are reading the correct model number (11047511700)
- If you are comparing to a replacement washer, use cubic feet (capacity) rather than exterior dimensions
Capacity vs. dimensions (why they get confused)
The installation guide section of the manual focuses on cabinet size and clearances, not tub volume. For example, the manual lists typical installation dimensions and spacing for this washer type.
| What you’re measuring | What it tells you | Where to find it |
|---|---|---|
| Capacity (cubic feet) | How much laundry the drum holds | Specs in the 11047511700 owner’s manual |
| Width/height/depth (inches) | Whether it fits your space | Installation dimensions section in the manual |
| Door swing clearance | Whether the door can open fully | Location requirements section |
Why it matters
Choosing cycles, load size, and detergent amount is easier when you know the washer’s true tub volume. It also helps when comparing Kenmore 110-series washers, since “110” covers multiple designs and capacities.
Last updated: January 2026
How to hard reset kenmore washer?
For Kenmore washer model 11047511700, a hard reset is simple: unplug the washer (or switch off the breaker) for 2 minutes, then restore power. If the control is still acting up, use the STOP and START button steps in the 11047511700 owner's manual to cancel a cycle and restart cleanly.
Hard reset steps (power reset)
- Press STOP twice to cancel any active cycle (the washer powers down and the door unlocks after draining if needed).
- Unplug the washer for 2 minutes.
- Plug the washer back in.
- Select a cycle (for example, Normal/Casual).
- Select and hold START for about 1 second to begin.
If you are trying to clear a stuck cycle or unlock the door
The control on this model is designed to cancel and drain before unlocking when water level or temperature is high.
- Press STOP twice to cancel.
- Wait for automatic draining if the washer needs to cool or lower the water level.
- If you need to drain manually: select RINSE/DRAIN & SPIN, turn 2ND RINSE off, then press and hold START for about 1 second.
| Goal | What to do | What you should see |
|---|---|---|
| Cancel and reset the cycle | STOP twice | Washer powers down; door unlocks (after drain if needed) |
| Restart after changes | STOP once, change options, START (hold 1 second) | Cycle continues with new settings |
| Drain water out | RINSE/DRAIN & SPIN, 2ND RINSE off, START (hold 1 second) | Drain and spin completes; door unlocks |
Why it matters
A true hard reset clears temporary control glitches (frozen buttons, odd beeping, cycle not responding) without replacing parts. If problems return quickly, the issue is usually power quality, a door lock problem, or a control-related fault.
When a reset is not enough
- The washer repeatedly will not start even after a reset
- The door stays locked with an empty tub
- You see recurring error codes or flashing cycle lights
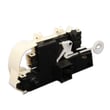
For recurring control symptoms, a common related component is the door lock/latch assembly; for this model, see the latch WPW10253483.
Last updated: January 2026
How to fix fe code kenmore washer?
On Kenmore washer model 11047511700, an FE code typically points to an overfill condition (the washer senses too much water). We fix it by stopping the cycle, shutting off the water, then checking whether the inlet valves are stuck open and whether the pressure-sensing system is working correctly; see the 11047511700 owner's manual.
What to do first (safe, quick checks)
- Press STOP/CANCEL to end the cycle.
- Turn OFF both hot and cold water faucets.
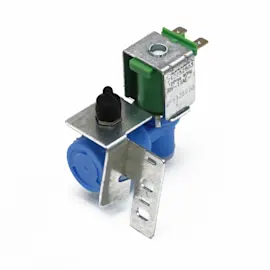
- If the tub continues filling with the washer off, the water inlet valve is stuck open and needs replacement.
- If the tub stops filling, check for siphoning (drain hose pushed too far down the standpipe).
- Unplug the washer for 1 minute, then restore power and try a rinse cycle.
Common causes of an FE code
| Likely cause | What you will notice | Typical fix |
|---|---|---|
| Inlet water valve stuck open | Water keeps entering even when paused/off | Replace inlet valve assembly |
| Pressure hose issue (air leak, kink, blockage) | Overfill or erratic fill levels | Inspect and correct hose routing/connection |
| Drain siphoning | Washer fills but level never stabilizes | Correct drain hose height and insertion |
| Control problem | Random FE, filling behavior inconsistent | Diagnose wiring/control after valve checks |
Parts that are often involved
These parts are not always the cause of FE, but they are commonly checked during fill and drain related troubleshooting:
- Filter WPW10730972 (a restricted filter can contribute to poor draining symptoms that confuse diagnosis)
- Wire harness WPW10204534 (loose connections can cause false sensing)
Why it matters
An FE overfill condition can lead to leaks, poor wash results, and repeated drain pump operation. Catching a stuck inlet valve early also helps prevent water damage and unnecessary wear on the drain system.
Last updated: January 2026
How to unclog drain hose on Kenmore washer?
For Kenmore washer model 11047511700, we unclog the drain hose by cutting power, removing the hose from the standpipe or laundry tub, then flushing and clearing debris (lint, coins, small socks). Reinstall the hose with a proper air gap to prevent siphoning; see the 11047511700 washer manual.
Safety and prep
- Unplug the washer.
- Turn off both water faucets.
- Put towels and a shallow pan under the hose connection.
- If the tub is full, try Drain & Spin first; if it will not drain, expect water when you open the drain path.
Steps to clear the clog
- Check the hose for kinks or crushing first; fix routing before disassembly.
- Pull the drain hose out of the home drain (standpipe or laundry tub) and inspect the end for buildup.
- If needed, disconnect the hose from the washer and take it to a sink or outdoors.
- Flush with hot tap water; work a flexible brush or small drain snake through the hose.
- Reconnect and run a Rinse/Drain & Spin to confirm strong flow.
Drain-hose routing rules (prevents repeat drain problems)
Use these routing basics from the manual to avoid siphoning and slow drains:
| Do | Do not |
|---|---|
| Leave an air gap at the standpipe | Seal the hose into the standpipe |
| Keep the hose secure but not stretched tight | Force excess hose into the standpipe |
| Route without sharp bends | Straighten the corrugated hose completely |
If it still will not drain
- Confirm the standpipe or laundry tub drain is not clogged.
- Check for a restriction at the pump filter area; clean it if accessible.
- If clamps will not reseal after removal, replace the clamp.
Parts commonly used during a drain repair
- Filter WPW10730972 (filter that catches debris before it reaches the drain path)
- Clamp WP596669 (hose clamp used to secure a leak-free connection)
Why it matters
A restricted drain hose can trigger drain errors, leave water in the drum, cause odors, and strain the drain pump. Correct routing also prevents siphoning, which can make the washer drain and refill unexpectedly.
Last updated: January 2026