- Kenmore refrigerator water filters
- Whirlpool refrigerator water filters
- Samsung refrigerator water filters
- GE refrigerator water filters
- LG refrigerator water filters
- Frigidaire refrigerator water filters
- KitchenAid refrigerator water filters
- Maytag refrigerator water filters
- Kenmore Elite refrigerator water filters
- Estate refrigerator water filters
- GE Profile refrigerator water filters
- Amana refrigerator water filters
- Bosch refrigerator water filters
- Dacor refrigerator water filters
- Electrolux refrigerator water filters
Top DIY repair help
View All Repair Categories
Appliances
Lawn & Garden
Power Tools
Home Improvement
Sports & Leisure
Heating & Cooling
Quick Links
How to replace the water inlet valve in a top-freezer refrigerator
less than a minute readJul 31Lyle Weischwill
Repair time and Difficulty
15 minutes or less
Tools Required
- Work gloves
- Nut driver set
- Wrench set
This DIY repair guide gives step-by-step instructions for replacing the water inlet valve in a top-freezer refrigerator. The water inlet valve is at the back of the refrigerator near the bottom and controls water flow to the ice maker. A coil on the water valve opens to allow water to flow into the refrigerator and closes to stop the water flow. If the valve fails to open, water stops flowing to the refrigerator. If it fails to close, water continuously flows into the ice maker. Replace a failed water valve using the manufacturer-approved replacement part.
These instructions work for replacing the water inlet valve on Kenmore, Whirlpool, GE, LG, Samsung, KitchenAid, Maytag, Amana, Frigidaire, Electrolux and Haier refrigerators.
Instructions
- 1. Shut off the power
Unplug the power cord from the wall outlet.
- 2. Disconnect the refrigerator water supply line
Close the water supply cut-off valve for the refrigerator.
Pull the refrigerator away from the wall.
Place a towel under the water valve assembly to catch water.
Loosen the compression nut on the supply water line until the water line is free.
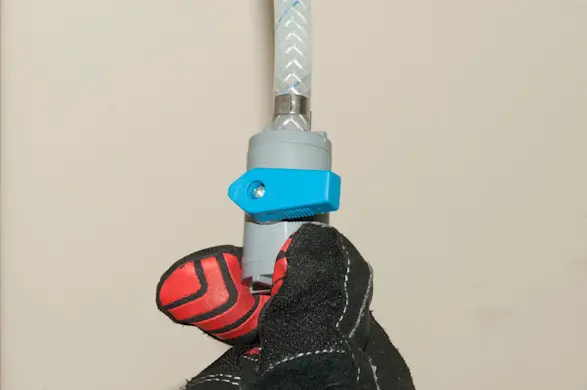
PHOTO: Shut off the water supply valve. 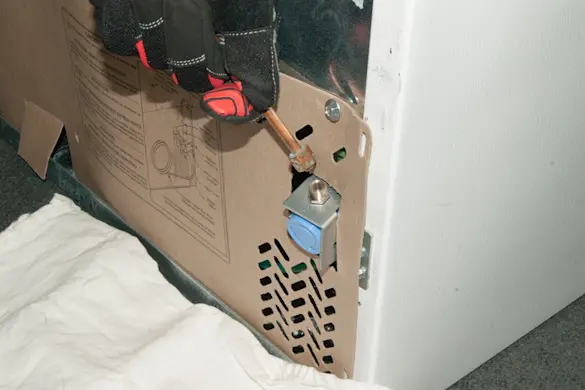
PHOTO: Disconnect the water supply line.
- 3. Remove the rear compartment cover
Remove the screws from the rear compartment cover and then remove the cover.
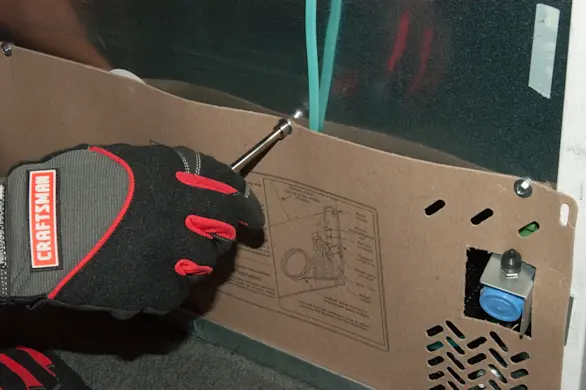
PHOTO: Remove the rear cover.
- 4. Remove the water inlet valve
Remove the screws from the mounting bracket and pull the water inlet valve out.
Unplug the wire harness from the water inlet valve.
Disconnect the ice maker water supply line by pressing in the fitting collar and pulling the water line out of the valve outlet.
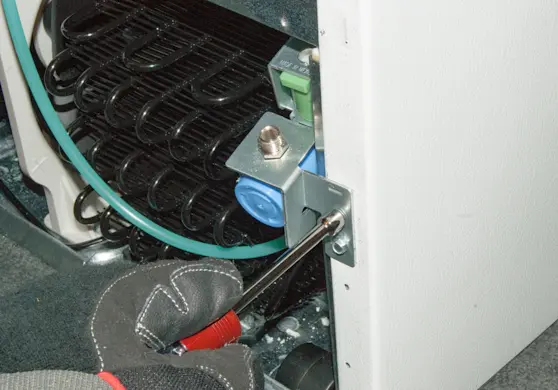
PHOTO: Remove the bracket screws. 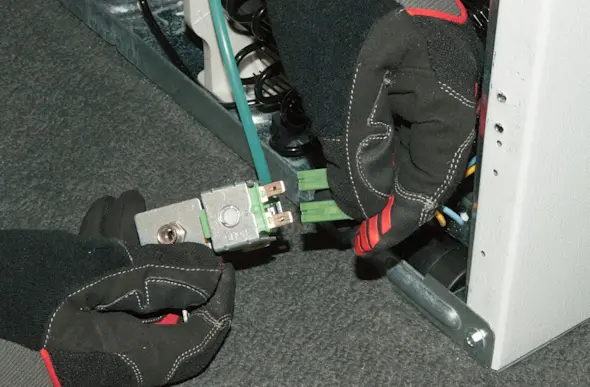
PHOTO: Unplug the valve wires. 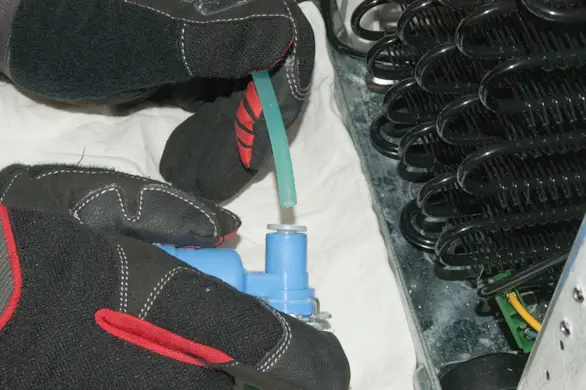
PHOTO: Disconnect the ice maker water supply line. Tip: Some fittings may have a C-clip on the valve outlet collar. Remove the C-clip before pressing the collar in.
- 5. Install the new water inlet valve
Push the ice maker water supply line into the valve outlet fitting.
Reconnect the wire harness on the new water inlet valve.
Position the new water inlet valve in the cabinet and install the screws in the mounting bracket.
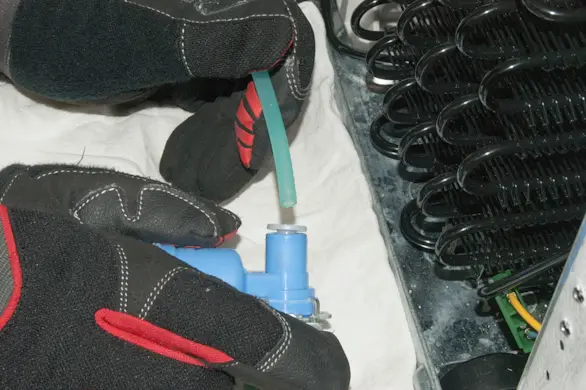
PHOTO: Connect the ice maker water supply line. 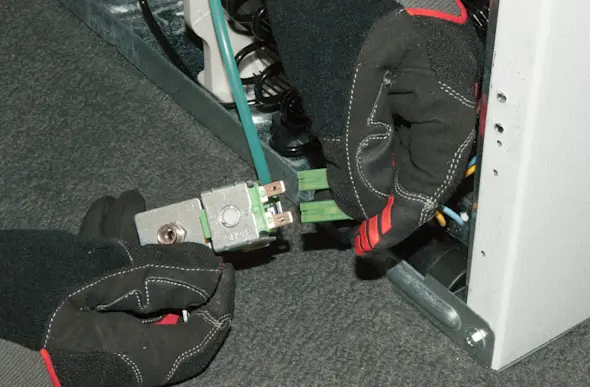
PHOTO: Connect the wires. 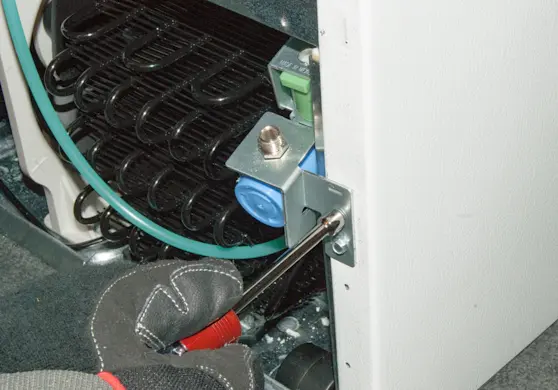
PHOTO: Attach the water inlet valve. Tip: Push the ice maker water supply line as far as possible into the fitting. Tug on the water line to make sure it’s seated correctly. Reinstall the C-clip if present.
- 6. Reinstall the rear compartment cover
Position the rear compartment cover on the back of the refrigerator and reinstall the mounting screws.
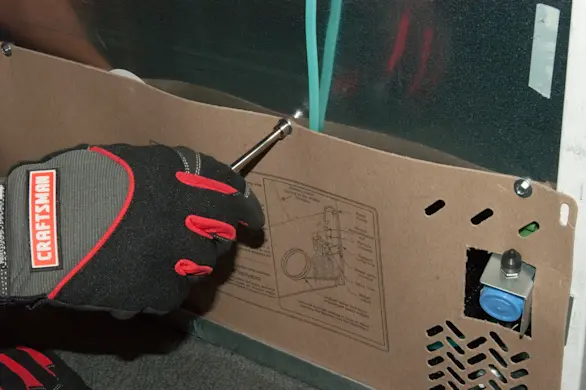
PHOTO: Reinstall the rear cover.
- 7. Reconnect the refrigerator water supply line
Connect the water line onto the water inlet valve fitting and tighten the compression nut firmly.
Open the water supply cut-off valve.
If the fitting leaks, tighten the compression nut and check again.
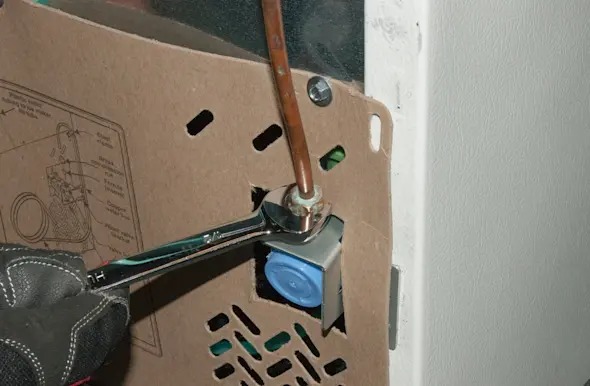
PHOTO: Connect the water supply line. 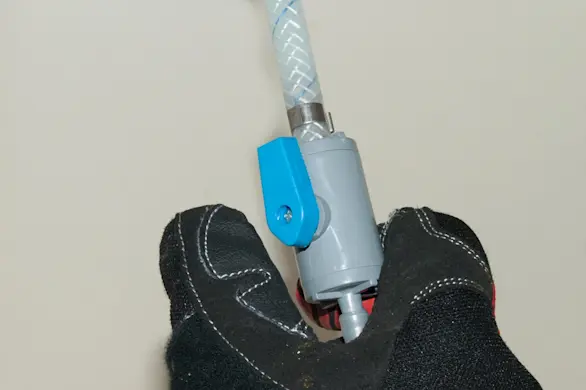
PHOTO: Open the water supply valve.
- 8. Restore electrical power
Plug in the refrigerator and push the refrigerator back into place.