Get free shipping on your order, with any water filter subscription. Find my filter

Open Hamburger Menu
Sears Parts Direct
Tips to find your model number

Kenmore 11062062101 electric dryer Parts

Here are the diagrams and repair parts for Kenmore 11062062101 electric dryer, as well as links to manuals and error code tables, if available.

Kenmore 11062062101 electric dryer
By Schematic
By Part
SELECT DIAGRAM
?

This is the number corresponding to the part on the diagram / schematic

Browse Parts for 11062062101 Electric Dryer

  • Terminal for Kenmore 11062062101 - Part WP94614

    Dryer top diagram

    Terminal

    Part #94614

    Replaced by #WP94614

    Info Icon
    Manufacturer substitution
    This part replaces 94614. Substitute parts can look different from the original.
    In Stock
    $28.49
    Minus Item
    Qty
    Plus Item
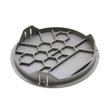
  • Dryer Side Vent Hole Cover (midnight Gray) for Kenmore 11062062101 - Part WPW10404617

    Cabinet diagram

    Plug

    Part #3388311

    Replaced by #WPW10404617

    Info Icon
    Manufacturer substitution
    This part replaces 3388311. Substitute parts can look different from the original.
    In Stock
    $55.70
    10% OFF Phone Price : $61.70Info Icon
    Minus Item
    Qty
    Plus Item
  • Screw for Kenmore 11062062101 - Part WP693995

    Console panel diagram

    Washer Screw

    Part #693995

    Replaced by #WP693995

    Info Icon
    Manufacturer substitution
    This part replaces 693995. Substitute parts can look different from the original.
    In Stock
    $38.58
    Minus Item
    Qty
    Plus Item
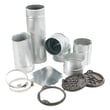
  • Whirlpool Dryer Repair Kit (4392067) for Kenmore 11062062101 - Part 4392067

    #NI01

    All parts diagram

    Dryer Repair Kit

    Part #80047

    Replaced by #4392067

    Info Icon
    Manufacturer substitution
    This part replaces 80047. Substitute parts can look different from the original.
    In Stock
    $20.39
    23% OFF Phone Price : $26.39Info Icon
    Minus Item
    Qty
    Plus Item
  • Whirlpool Dryer Lint Screen for Kenmore 11062062101 - Part W10120998

    Bulkhead diagram

    Screen

    Part #3390721

    Replaced by #W10120998

    Info Icon
    Manufacturer substitution
    This part replaces 3390721. Substitute parts can look different from the original.
    In Stock
    $60.22
    9% OFF Phone Price : $66.22Info Icon
    Minus Item
    Qty
    Plus Item
  • Dryer Bulkhead for Kenmore 11062062101 - Part W11299301

    Bulkhead diagram

    Dryer Bulkhead

    Part #8520836

    Replaced by #W11299301

    Info Icon
    Manufacturer substitution
    This part replaces 8520836. Substitute parts can look different from the original.
    In Stock
    $115.04
    9% OFF Phone Price : $127.04Info Icon
    Minus Item
    Qty
    Plus Item
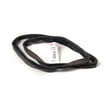
  • Whirlpool Dryer Drum Seal Kit for Kenmore 11062062101 - Part 280114

    Bulkhead diagram

    Dryer Drum Seal

    Part #697694

    Replaced by #280114

    Info Icon
    Manufacturer substitution
    This part replaces 697694. Substitute parts can look different from the original.
    In Stock
    $43.66
    12% OFF Phone Price : $49.66Info Icon
    Minus Item
    Qty
    Plus Item
  • Whirlpool Dryer Thermal Fuse, 195-degree F for Kenmore 11062062101 - Part WP3390719

    Bulkhead diagram

    Dryer Thermal Fuse

    Part #3390719

    Replaced by #WP3390719

    Info Icon
    Manufacturer substitution
    This part replaces 3390719. Substitute parts can look different from the original.
    In Stock
    $18.54
    10% OFF Phone Price : $20.54Info Icon
    Minus Item
    Qty
    Plus Item
  • Whirlpool Dryer Thermal Cut-off Fuse Kit for Kenmore 11062062101 - Part 279769

    Bulkhead diagram

    Cut-off Kit

    Part #3977394

    Replaced by #279769

    Info Icon
    Manufacturer substitution
    This part replaces 3977394. Substitute parts can look different from the original.
    In Stock
    $48.07
    11% OFF Phone Price : $54.07Info Icon
    Minus Item
    Qty
    Plus Item
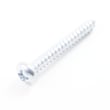
  • Washer Screw for Kenmore 11062062101 - Part WP90767

    Bulkhead diagram

    Tap Screw

    Part #90767

    Replaced by #WP90767

    Info Icon
    Manufacturer substitution
    This part replaces 90767. Substitute parts can look different from the original.
    This item is not returnable
    In Stock
    $4.88
    17% OFF Phone Price : $5.88Info Icon
    Minus Item
    Qty
    Plus Item

Kenmore Electric Dryer 11062062101 FAQs

Yes, you can replace the heating element in your Kenmore electric dryer model 11062062101 yourself if you’re comfortable working with wiring and panels. Unplug the dryer first, follow the steps in the owner's manual, and replace any heat-damage wiring so the new element heats safely.

Before you start (safety and prep)

Dryers combine high voltage and high heat, so preparation matters.

  • Unplug the dryer (do not rely on the control being off)
  • Let the dryer cool completely
  • Take a photo of wire locations before disconnecting anything
  • Wear work gloves; sheet metal edges are sharp
  • If you see burned terminals, replace the wiring with the dryer heating element wire kit 279457

Basic DIY replacement overview

Exact access varies by design, but most Kenmore electric dryers follow this general flow:

  • Remove the rear panel (or the heater housing access panel)
  • Label and disconnect the heating element wires
  • Remove mounting screws and pull out the element assembly
  • Install the new element and reattach wires firmly
  • Reassemble panels, then run a timed heat test

The manual’s heat-check method is a good final verification: run a full-heat cycle for about 5 minutes and confirm you feel heat when you open the door. (A brief “new heater” odor on first use is normal.)

Parts that are commonly replaced with the element

If the dryer still will not heat after an element swap, these are the most common related items to check.

Symptom Common part to check Example part for this model
Runs but no heat Thermal fuse Dryer thermal fuse WP3390719
Overheats or cycles heat oddly Thermistor Dryer thermistor WP8577274
Intermittent heat, heat shuts off Thermal cut-off kit Cut-off kit 279769
Burned wires at heater Heater wire kit Dryer heating element wire kit 279457

Why it matters

A failed heating element is a common cause of “tumbles but won’t heat,” but airflow problems (lint screen or vent restriction) can overheat the heater circuit and repeatedly blow safety fuses. Fixing the root cause helps the new element last.

Last updated: February 2026

On a Kenmore 11062062101 electric dryer, the start switch is bad when the dryer has power, a cycle is selected, the door is closed, you press START firmly, and the motor never runs (no hum or movement). Confirm with a continuity test.

Quick checks that mimic a bad start switch

Before you pull the console apart, check these common no-start causes listed in the owner's manual:

  • Dryer is plugged into a grounded outlet
  • Controls are set to a running or “On” position
  • Door is fully closed and latched
  • START is pressed firmly (not a quick tap)
  • House fuses are good or breaker is not tripped (many electric dryers use two)
  • A cycle is selected and you press START within 5 minutes (some models shut off)

How to test the start switch with a multimeter

Unplug the dryer before opening panels.

  • Remove the console cover to access the start switch
  • Label and remove the wires from the switch terminals
  • Set the meter to continuity (or lowest ohms)
  • Test the start contacts with the button not pressed, then pressed

Expected meter results

Button position Normal result Bad switch result
Not pressed Open (no continuity) Stuck closed or erratic reading
Pressed Closed (continuity) No change, stays open

If the switch tests good

These parts commonly cause a “won’t start” symptom:

Why it matters

A quick continuity test prevents replacing higher-cost parts when the real issue is a simple push-to-start switch or an interlock like the door switch.

Last updated: February 2026

On our Kenmore electric dryer model 11062062101, a bad heating element usually shows up as the dryer running but not heating, taking much longer to dry, or tripping heat-related safety parts. You can confirm it by safely testing the element for continuity and checking for obvious coil damage.

Quick signs the heating element is failing

  • Dryer tumbles normally but there is no heat after several minutes
  • Clothes stay damp; cycles seem to run forever
  • A burning smell that does not go away after the first use (a brief “new element” odor can be normal)
  • Dryer shuts off early or overheats (often tied to airflow restrictions)
  • Visible break, blistering, or burn marks on the element coil (if you can access it)

Confirm heat first (simple check from the manual)

Our owner's manual recommends running a full-heat cycle and checking for heat after about 5 minutes.

  1. Start a timed or high-heat cycle (not air fluff).
  2. Let it run about 5 minutes.
  3. Open the door and feel for heat.

If there is no heat, also check the home power supply: many electric dryers use two fuses or two breakers, and a half-tripped supply can let the motor run without heating.

How to test the element (best practice)

Safety first

  • Unplug the dryer (or switch off both breakers)
  • Access the heater housing per the owner's manual

Multimeter check (typical)

Test result What it usually means Next step
Continuity present; resistance often in the 10 to 50 ohms range Element coil is likely intact Check airflow, thermostats, and wiring
No continuity (open circuit) Element is failed Replace the element

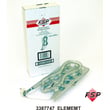
For this model, the correct replacement is the dryer heating element WP3387747.

Why it matters

A failed element is a common “runs but won’t heat” cause, but restricted venting can also overheat the dryer and blow safety devices like the dryer thermal fuse WP3390719. Fixing airflow issues helps prevent repeat failures.

Last updated: February 2026

Most common symptoms to help you fix your dryers

Choose a symptom to see related dryer repairs.

Main causes: bad gas valve coils, broken heating element, tripped safety thermostat or fuse, bad operating thermostat, c…

Main causes: clogged exhaust system, heating system failure, deposits on moisture sensor, control system failure…

Main causes: clogged exhaust vent, bad motor relay, loose dryer door catch, bad door switch, control system failure, fau…

Main causes: door switch failure, lack of power, broken belt, blown thermal fuse, bad drive motor, control system failur…

Main causes: damaged door strike, worn door catch…

Main causes: lack of electrical power, bad power cord, wiring failure, bad control board, blown thermal fuse, bad door s…

Main causes: bad timer or electronic control board, door switch failure…

Main causes: bad drum support roller, damaged idler pulley, broken blower fan blade, worn drum glide bearing, bad drive …

Most common repair guides to help fix your dryers

These step-by-step repair guides will help you safely fix what’s broken on your dryer.

How to replace an electronic control board in an electric dryer

How to replace an electronic control board in an electric dryer

The electronic control board manages the components and controls the cycle times in your electric dryer. Follow these st…

Repair time and Difficulty

 45 minutes or less
How to replace an igniter in a gas dryer

How to replace an igniter in a gas dryer

The igniter in a gas dryer glows white hot during the to light the gas that heats the air in the dryer. If the dryer air…

Repair time and Difficulty

 60 minutes or less
How to replace a dryer thermistor

How to replace a dryer thermistor

The thermistor senses the air temperature in the dryer. If your dryer overheats or doesn't heat at all, the thermistor …

Repair time and Difficulty

 30 minutes or less

Effective articles & videos to help repair your dryers

Use the advice and tips in these articles and videos to get the most out of your dryer.

How to use your clothes dryer efficiently

How to use your clothes dryer efficiently

Get expert tips on using your dryer efficiently to save energy.…

Are DIY appliance repairs safe?

Are DIY appliance repairs safe?

Find out how to stay safe when repairing your appliances.…

Keeping your smart appliances secure from hackers

Keeping your smart appliances secure from hackers

Find out how to protect your smart appliances from malevolent invasions by hackers.…

Parts & More

Bottom-Mount Refrigerator
Chest Freezer
Dishwasher
Furnace
Gas Pressure Washer
Gas Range
Gas Snowblower
Gas Water Heater
Ice Cream Maker
Microwave/Hood Combo
Parts
Refrigerator
Side-By-Side Refrigerator
Top-Mount Refrigerator
Washer