 Owner’s manual


Can I replace a dryer heating element myself?
Yes, you can replace the heating element in your Kenmore electric dryer model 11062062101 yourself if you’re comfortable working with wiring and panels. Unplug the dryer first, follow the steps in the owner's manual, and replace any heat-damage wiring so the new element heats safely.
Dryers combine high voltage and high heat, so preparation matters.
- Unplug the dryer (do not rely on the control being off)
- Let the dryer cool completely
- Take a photo of wire locations before disconnecting anything
- Wear work gloves; sheet metal edges are sharp
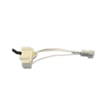
- If you see burned terminals, replace the wiring with the dryer heating element wire kit 279457
Exact access varies by design, but most Kenmore electric dryers follow this general flow:
- Remove the rear panel (or the heater housing access panel)
- Label and disconnect the heating element wires
- Remove mounting screws and pull out the element assembly
- Install the new element and reattach wires firmly
- Reassemble panels, then run a timed heat test
The manual’s heat-check method is a good final verification: run a full-heat cycle for about 5 minutes and confirm you feel heat when you open the door. (A brief “new heater” odor on first use is normal.)
If the dryer still will not heat after an element swap, these are the most common related items to check.
| Symptom | Common part to check | Example part for this model |
|---|---|---|
| Runs but no heat | Thermal fuse | Dryer thermal fuse WP3390719 |
| Overheats or cycles heat oddly | Thermistor | Dryer thermistor WP8577274 |
| Intermittent heat, heat shuts off | Thermal cut-off kit | Cut-off kit 279769 |
| Burned wires at heater | Heater wire kit | Dryer heating element wire kit 279457 |
A failed heating element is a common cause of “tumbles but won’t heat,” but airflow problems (lint screen or vent restriction) can overheat the heater circuit and repeatedly blow safety fuses. Fixing the root cause helps the new element last.
Last updated: February 2026
How to tell if a dryer start switch is bad?
On a Kenmore 11062062101 electric dryer, the start switch is bad when the dryer has power, a cycle is selected, the door is closed, you press START firmly, and the motor never runs (no hum or movement). Confirm with a continuity test.
Before you pull the console apart, check these common no-start causes listed in the owner's manual:
- Dryer is plugged into a grounded outlet
- Controls are set to a running or “On” position
- Door is fully closed and latched
- START is pressed firmly (not a quick tap)
- House fuses are good or breaker is not tripped (many electric dryers use two)
- A cycle is selected and you press START within 5 minutes (some models shut off)
Unplug the dryer before opening panels.
- Remove the console cover to access the start switch
- Label and remove the wires from the switch terminals
- Set the meter to continuity (or lowest ohms)
- Test the start contacts with the button not pressed, then pressed
| Button position | Normal result | Bad switch result |
|---|---|---|
| Not pressed | Open (no continuity) | Stuck closed or erratic reading |
| Pressed | Closed (continuity) | No change, stays open |
These parts commonly cause a “won’t start” symptom:
- Door switch: dryer door switch WP3406107
- Thermal fuse: dryer thermal fuse WP3390719
- Drive motor or wiring issue
A quick continuity test prevents replacing higher-cost parts when the real issue is a simple push-to-start switch or an interlock like the door switch.
Last updated: February 2026
How to tell if your dryer element is bad?
On our Kenmore electric dryer model 11062062101, a bad heating element usually shows up as the dryer running but not heating, taking much longer to dry, or tripping heat-related safety parts. You can confirm it by safely testing the element for continuity and checking for obvious coil damage.
- Dryer tumbles normally but there is no heat after several minutes
- Clothes stay damp; cycles seem to run forever
- A burning smell that does not go away after the first use (a brief “new element” odor can be normal)
- Dryer shuts off early or overheats (often tied to airflow restrictions)
- Visible break, blistering, or burn marks on the element coil (if you can access it)
Our owner's manual recommends running a full-heat cycle and checking for heat after about 5 minutes.
- Start a timed or high-heat cycle (not air fluff).
- Let it run about 5 minutes.
- Open the door and feel for heat.
If there is no heat, also check the home power supply: many electric dryers use two fuses or two breakers, and a half-tripped supply can let the motor run without heating.
- Unplug the dryer (or switch off both breakers)
- Access the heater housing per the owner's manual
| Test result | What it usually means | Next step |
|---|---|---|
| Continuity present; resistance often in the 10 to 50 ohms range | Element coil is likely intact | Check airflow, thermostats, and wiring |
| No continuity (open circuit) | Element is failed | Replace the element |
For this model, the correct replacement is the dryer heating element WP3387747.
A failed element is a common “runs but won’t heat” cause, but restricted venting can also overheat the dryer and blow safety devices like the dryer thermal fuse WP3390719. Fixing airflow issues helps prevent repeat failures.
Last updated: February 2026











