Owner’s manual


How do I reset my LG dryer flow sensor?
On the LG DLG2302R, the Flow Sense (airflow) indicator resets after you restore proper venting and run a cycle; start by cleaning the lint filter and checking the exhaust duct, then power-cycle the dryer by unplugging it for about 5 minutes before restarting.
- Turn the dryer off and unplug it.
- Remove and clean the lint screen; reinstall it fully.
- Check the vent path for restrictions (crushed flex duct, lint buildup, stuck damper).
- Plug the dryer back in after about 5 minutes.
- Run a normal cycle; after the first completed cycle, the Flow Sense bars typically clear.
For cycle and indicator details, follow the DLG2302R owner's manual.
The manual guidance is:
| Flow Sense display | What it usually means | What to do next |
|---|---|---|
| 1-2 bars | Airflow is starting to restrict | Clean/check venting soon |
| 3-4 bars | Significant restriction | Clean/check venting immediately |
| 4 bars after first use or outage | Normal on first cycle | Complete a cycle and recheck |
These checks fix most repeat Flow Sense warnings:
- Clean the entire vent run to the outside, not just the lint filter.
- Shorten and straighten the duct run where possible.
- Make sure the outside hood flap opens freely.
- Avoid long runs of thin foil duct; use rigid or semi-rigid metal duct where possible.
- If drying times are long even with good airflow, test the temperature-sensing circuit; a failed thermistor can cause control issues (see dryer thermistor AGM30045804 if you are diagnosing a thermistor fault).
Flow Sense is an airflow restriction warning; restricted venting increases dry time, wastes energy, and can overheat components such as thermostats and the burner system on gas dryers.
Last updated: January 2026
How do I reset the error code on my LG dryer?
For an LG DLG2302R dryer, most error codes clear after you correct the cause and power the dryer off, then back on. Press POWER to turn the dryer off, wait about 1 minute, then press POWER again and start a cycle; this resets many control glitches.
- Press POWER to turn the dryer OFF (this cancels the current cycle).
- Wait 60 seconds.
- Press POWER to turn the dryer ON.
- Select a cycle and press START/PAUSE.
- If the dryer was paused, press START/PAUSE to resume (the dryer can shut off automatically if left stopped too long).
For control-panel details and normal start/stop behavior, follow the DLG2302R owner's manual.
Many LG dryer codes are symptoms, not the root problem. Check these first:
- Airflow restriction: clean the lint screen and confirm strong airflow at the outside vent.
- Lint screen care: wash the lint filter with warm, soapy water, dry it fully, and reinstall.
- Power supply: make sure the cord is fully seated; reset the breaker if needed.
- Gas models: confirm the house gas shutoff and dryer gas shutoff are fully open.
- Overloading: reduce load size and retry a Sensor Dry cycle.
| What you see | What it usually means | What to do next |
|---|---|---|
| Code won’t clear | Condition still present | Correct airflow, power, or load issue; then do the reset steps above |
| tE1 / tE2 | Temperature sensing problem | Stop using heat cycles and replace the thermistor if needed (see dryer thermistor AGM30045804) |
Resetting the code without fixing the cause can lead to long dry times, overheating protection trips, or repeat shutdowns. Restoring proper airflow and sensor operation keeps temperatures stable and drying performance consistent.
For model-specific code definitions and troubleshooting paths, use LG dryer error codes.
Last updated: January 2026
What is the most common problem with LG dryers?
The most common issue we see with LG dryers like model DLG2302R is restricted airflow from lint buildup in the lint screen or exhaust venting; this causes long dry times, overheating, and sometimes airflow-related warnings. Fixing the vent path usually restores normal drying.
Airflow problems are the top driver behind “takes too long to dry” complaints. LG recommends using 4-inch rigid or semirigid metal ducting, keeping the run short with few elbows, and cleaning the ductwork at least yearly (or sooner if performance drops). Details and venting diagrams are in the DLG2302R owner’s manual.
- Clean the lint screen before every load; never run the dryer without it installed.
- Inspect the vent hood outside; confirm the flap opens strongly while drying.
- Check for crushed, kinked, or excessively long vent ducting.
- Remove lint buildup in the entire vent run (dryer outlet to exterior hood).
- Avoid foil or plastic vent; use 4-inch metal ducting.
Once venting is confirmed clear, the next most common issues are wear parts and sensors.
| Symptom | Common cause | Example part for DLG2302R |
|---|---|---|
| Squealing, thumping, rumbling | Worn drum support components | Dryer drum support roller 4581EL2002L |
| Drum not turning, burning rubber smell | Worn or broken belt | Dryer drum belt 4400EL2001F |
| Auto-dry ends early or clothes still damp | Dirty or failing moisture sensing circuit | Dryer moisture sensor 6500EL3001A |
Restricted venting does more than slow drying; it can overheat the dryer and trigger safety shutoffs. Keeping the lint screen and ductwork clean protects the motor, thermostats, and burner system, and helps the dryer run efficiently.
If your LG dryer is showing an error code, use our LG dryer error codes guide to match the code to the most likely cause and next checks.
Last updated: January 2026
What does energy saver mode do on an LG dryer?
On our LG DLG2302R dryer, Energy Saver mode reduces energy use by lowering heat and relying more on airflow and longer run time to dry clothes. You will typically see slightly longer drying times, especially with heavier loads; check the DLG2302R owner's manual for the exact option behavior on your control panel.
- Lower average drying temperature compared to a standard sensor cycle
- Longer cycle time, especially for towels, jeans, and mixed loads
- Better efficiency when the exhaust venting is clear and unrestricted
- More noticeable impact in cool laundry rooms or with large loads
- Best results when you avoid overloading and use the correct cycle
| Situation | Use Energy Saver? | Why |
|---|---|---|
| Small, lightweight loads | Yes | Airflow can finish drying efficiently |
| Heavy cottons (towels/denim) | Sometimes | May extend dry time significantly |
| You need fast turnaround | No | Standard settings dry faster |
| Dryer is taking too long already | No (until fixed) | Long dry times usually point to airflow issues |
Energy Saver depends heavily on good airflow. If drying times jump, focus on airflow first.
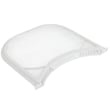
- Clean the lint screen before every load (replace if damaged) using the dryer lint filter 5231EL1003B
- Confirm the vent hood outside opens freely and is not clogged
- Keep the duct run short and avoid crushed or kinked venting
- If your model supports it, run the built-in duct condition test described in the DLG2302R owner's manual
Energy Saver can lower operating cost, but only when the dryer can move air properly. Restricted venting forces longer cycles, reduces efficiency, and can trigger airflow warnings such as Flow Sense.
Last updated: January 2026