Get free shipping on your order, with any water filter subscription. Find my filter

Open Hamburger Menu
Sears Parts Direct
Tips to find your model number

Whirlpool WED5300VW0 dryer Parts

Here are the diagrams and repair parts for Whirlpool WED5300VW0 dryer, as well as links to manuals and error code tables, if available.

Whirlpool WED5300VW0 dryer
By Schematic
By Part
SELECT DIAGRAM
?

This is the number corresponding to the part on the diagram / schematic

Browse Parts for WED5300VW0 Dryer

  • Dryer Drum Support Roller Shaft for Whirlpool WED5300VW0 - Part WPW10359269

    Bulkhead parts, optional parts (not included) diagram

    Shaft

    Part #3399507

    Replaced by #WPW10359269

    Info Icon
    Manufacturer substitution
    This part replaces 3399507. Substitute parts can look different from the original.
    In Stock
    $50.53
    11% OFF Phone Price : $56.53Info Icon
    Minus Item
    Qty
    Plus Item
  • Dryer Lint Chute Seal for Whirlpool WED5300VW0 - Part W11415783

    Bulkhead parts, optional parts (not included) diagram

    Dryer Lint Chute Seal

    Part #347139

    Replaced by #W11415783

    Info Icon
    Manufacturer substitution
    This part replaces 347139. Substitute parts can look different from the original.
    This item is not returnable
    In Stock
    $14.84
    12% OFF Phone Price : $16.84Info Icon
    Minus Item
    Qty
    Plus Item
  • Laundry Appliance Control Knob Clip for Whirlpool WED5300VW0 - Part WP8536939

    Top and console parts diagram

    Laundry Appliance Control Knob Clip

    Part #8536939

    Replaced by #WP8536939

    Info Icon
    Manufacturer substitution
    This part replaces 8536939. Substitute parts can look different from the original.
    In Stock
    $8.15
    11% OFF Phone Price : $9.15Info Icon
    Minus Item
    Qty
    Plus Item
  • Drum for Whirlpool WED5300VW0 - Part 695587

    Bulkhead parts, optional parts (not included) diagram

    Drum

    Part #695587

    The manufacturer no longer makes this part, and there's no substitute part

  • Dryer Terminal Block for Whirlpool WED5300VW0 - Part WP3397659

    Cabinet parts diagram

    Dryer Terminal Block

    Part #3397659

    Replaced by #WP3397659

    Info Icon
    Manufacturer substitution
    This part replaces 3397659. Substitute parts can look different from the original.
    In Stock
    $17.68
    10% OFF Phone Price : $19.68Info Icon
    Minus Item
    Qty
    Plus Item
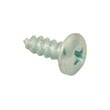
  • Whirlpool Appliance Screw for Whirlpool WED5300VW0 - Part WP488729

    Bulkhead parts, optional parts (not included) diagram

    Screw

    Part #3390647

    Replaced by #WP488729

    Info Icon
    Manufacturer substitution
    This part replaces 3390647. Substitute parts can look different from the original.
    This item is not returnable
    In Stock
    $4.93
    17% OFF Phone Price : $5.93Info Icon
    Minus Item
    Qty
    Plus Item
  • Whirlpool Appliance Screw for Whirlpool WED5300VW0 - Part WP488729

    Bulkhead parts, optional parts (not included) diagram

    Screw

    Part #487909

    Replaced by #WP488729

    Info Icon
    Manufacturer substitution
    This part replaces 487909. Substitute parts can look different from the original.
    This item is not returnable
    In Stock
    $4.93
    17% OFF Phone Price : $5.93Info Icon
    Minus Item
    Qty
    Plus Item
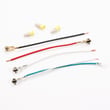
  • Dryer Terminal Block Wire Set for Whirlpool WED5300VW0 - Part 279318

    Cabinet parts diagram

    Dryer Terminal Block Wire Set

    In Stock
    $61.34
    9% OFF Phone Price : $67.34Info Icon
    Minus Item
    Qty
    Plus Item
  • Appliance Spray Paint (white) for Whirlpool WED5300VW0 - Part 350930

    Bulkhead parts, optional parts (not included) diagram

    Appliance Spray Paint (white)

    Part #350930
    This item is not returnable
    In Stock
    $26.00
    19% OFF Phone Price : $32.00Info Icon
    Minus Item
    Qty
    Plus Item
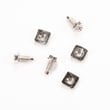
  • Dryer Terminal Block Screw And Nut Set for Whirlpool WED5300VW0 - Part 279393

    Cabinet parts diagram

    Dryer Terminal Block Screw And Nut Set

    In Stock
    $31.10
    16% OFF Phone Price : $37.10Info Icon
    Minus Item
    Qty
    Plus Item

Whirlpool Dryer WED5300VW0 FAQs

For the Whirlpool WED5300VW0 dryer, the most common real-world complaint we see is poor drying or no heat, and the #1 underlying cause is usually restricted airflow from lint buildup in the lint screen area or exhaust venting. Overheating from poor venting can also lead to a blown thermal fuse.

Quick checks first (fast, no parts)

  • Clean the lint screen before every load.
  • Check airflow at the outside vent hood; you should feel a strong, steady blast of air.
  • Make sure the vent is 4-inch heavy metal (not plastic or foil) and not crushed behind the dryer.
  • Confirm the cycle and temperature settings match the load.
  • Avoid overloading; heavy loads can trap moisture and extend dry time.

Most common “problem to part” matches on WED5300VW0

When airflow is restricted, heat-related safety parts can open to protect the dryer. If your dryer runs but won’t heat, these are common suspects:

Symptom Most likely area Common related part for this model
Runs but no heat Overheat protection opened Dryer thermal fuse WP3392519
Runs but heat cuts out Heater safety circuit Dryer thermal cut-off fuse kit 279816
Drum won’t spin Drive system Belt 341241
Won’t start when door closes Door interlock Dryer door switch WP3406107

Why venting matters (and why it keeps coming back)

Restricted venting makes the dryer run hotter and longer. That can:

  • Blow a thermal fuse
  • Trip a thermal cut-off
  • Cause clothes to take multiple cycles
  • Increase energy use
  • Create new problems that look like “bad heat” even when the heater is fine

For model-specific venting rules (vent length, elbows, hood styles), follow the WED5300VW0 installation guide. For operating and troubleshooting steps, use the WED5300VW0 dryer user manual.

Last updated: January 2026

A Whirlpool dryer like model WED5300VW0 typically lasts 10 to 15 years with normal household use. With good airflow (proper venting), routine lint cleaning, and timely replacement of wear parts, it’s common for this dryer to reach the upper end of that range.

What affects lifespan the most

The biggest drivers of longevity are heat management, airflow, and mechanical wear. We recommend focusing on these basics from the WED5300VW0 use & care manual.

  • Clean the lint screen before every load.
  • Keep the exhaust vent clear and properly routed (short, straight, heavy metal venting).
  • Avoid overloading; heavy loads strain the drum support system and drive belt.
  • Use the correct cycle and temperature for the fabric.
  • Address new noises, burning smells, or long dry times quickly.

Typical lifespan by component (what usually wears first)

These are the parts that most often determine whether a dryer is worth repairing as it ages.

Component What you may notice Common next step
Drum drive system Squealing, thumping, drum not turning Inspect belt, rollers, idler
Heating and safety circuit No heat, overheating, shuts off Check thermal fuse, thermostats
Door/start circuit Won’t start, stops when door moves Check door switch, start switch

If your drum stops turning or slips, the belt 341241 is a common wear item to inspect on this model.

Why it matters

A dryer that’s forced to run hot or run long (usually from restricted venting or lint buildup) wears out faster and can also cause repeated failures of heat-related safety parts. Keeping airflow strong is the simplest way to extend the life of your WED5300VW0.

Last updated: January 2026

Yes. A 7.4 cu. ft. dryer is considered a large-capacity dryer. For your Whirlpool WED5300VW0, the exact drum capacity is not identified in the model-specific information we have here, but 7.4 cu. ft. is generally sized for bulky items and fewer loads overall. See the WED5300VW0 use & care manual for cycle and loading guidance.

What “large capacity” means in real use

A 7.4 cu. ft. drum typically gives you more tumbling room, which helps airflow and can improve drying results when you avoid overloading.

Common loads that usually fit well in a large-capacity dryer:

  • King or queen comforters (depending on fill and fabric)
  • Large towel loads
  • Mixed family laundry loads
  • Bulky hoodies, blankets, and bedding

Quick size comparison

Dryer capacity Common label Best for
5.0 to 6.0 cu. ft. Standard Smaller households, lighter loads
6.1 to 7.0 cu. ft. Large Regular family loads
7.1 cu. ft. and up Large to extra-large Bulky items, fewer loads

Tips to get the best drying performance (any capacity)

Even a big dryer can take a long time if airflow is restricted or the load is packed too tightly.

  • Clean the lint screen before every load
  • Load loosely; do not pack the drum
  • Use the correct cycle (Auto/sensor cycles for most loads)
  • Use a 4-inch heavy metal vent and keep the vent run as straight as possible
  • Clean the exhaust vent periodically (at least every 2 years)

Why it matters

Choosing the right capacity helps prevent overdrying, reduces cycle time, and makes it easier to dry bulky items without stopping mid-cycle to rearrange the load. Proper venting and loading matter just as much as drum size for real-world performance.

Last updated: January 2026
Most common symptoms to help you fix your dryers

Choose a symptom to see related dryer repairs.

Main causes: bad gas valve coils, broken heating element, tripped safety thermostat or fuse, bad operating thermostat, c…

Main causes: clogged exhaust system, heating system failure, deposits on moisture sensor, control system failure…

Main causes: clogged exhaust vent, bad motor relay, loose dryer door catch, bad door switch, control system failure, fau…

Main causes: door switch failure, lack of power, broken belt, blown thermal fuse, bad drive motor, control system failur…

Main causes: damaged door strike, worn door catch…

Main causes: lack of electrical power, bad power cord, wiring failure, bad control board, blown thermal fuse, bad door s…

Main causes: bad timer or electronic control board, door switch failure…

Main causes: bad drum support roller, damaged idler pulley, broken blower fan blade, worn drum glide bearing, bad drive …

Most common repair guides to help fix your dryers

These step-by-step repair guides will help you safely fix what’s broken on your dryer.

How to replace an electronic control board in an electric dryer

How to replace an electronic control board in an electric dryer

The electronic control board manages the components and controls the cycle times in your electric dryer. Follow these st…

Repair time and Difficulty

 45 minutes or less
How to replace an igniter in a gas dryer

How to replace an igniter in a gas dryer

The igniter in a gas dryer glows white hot during the to light the gas that heats the air in the dryer. If the dryer air…

Repair time and Difficulty

 60 minutes or less
How to replace a dryer thermistor

How to replace a dryer thermistor

The thermistor senses the air temperature in the dryer. If your dryer overheats or doesn't heat at all, the thermistor …

Repair time and Difficulty

 30 minutes or less

Effective articles & videos to help repair your dryers

Use the advice and tips in these articles and videos to get the most out of your dryer.

How to use your clothes dryer efficiently

How to use your clothes dryer efficiently

Get expert tips on using your dryer efficiently to save energy.…

Are DIY appliance repairs safe?

Are DIY appliance repairs safe?

Find out how to stay safe when repairing your appliances.…

Keeping your smart appliances secure from hackers

Keeping your smart appliances secure from hackers

Find out how to protect your smart appliances from malevolent invasions by hackers.…

Parts & More

Bottom-Mount Refrigerator
Dishwasher
Dryer
Exercise Cycle
Front-Engine Lawn Tractor
Gas Chainsaw
Gas Walk-Behind Mower
Microwave
Microwave/Hood Combo
Parts
Range
Side-By-Side Refrigerator
Table Saw
Toaster Oven
Upright Freezer
Washer
Water Heater