Owner’s manual
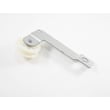


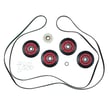
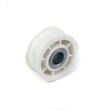
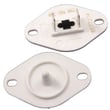
How to tell if an idler pulley is bad on a dryer?
On our Maytag MGDZ600TB2 dryer, a bad idler pulley usually shows up as loud squealing or grinding, a drum that will not turn smoothly, or a belt that slips, frays, or breaks because the pulley is not keeping proper belt tension.
- High-pitched squeal or chirp that changes as the drum turns
- Grinding or rumbling from the lower front of the dryer
- Drum stops turning but the motor hums, or the dryer shuts off quickly
- Belt dust, shredded belt edges, or a burning rubber smell
- Pulley wheel wobbles, binds, or does not spin freely by hand
- Unplug the dryer before inspecting anything internal.
- If the drum is hard to turn by hand, suspect a seized pulley, drum rollers, or a jammed blower wheel.
- If the dryer runs but makes noise, the pulley bearing or wheel surface is typically worn.
- If the belt keeps coming off, the pulley may be misaligned or the bracket may be bent.
For model-specific disassembly and access points, follow the MGDZ600TB2 manual.
When an idler pulley wears out, we often see other drum-support parts worn at the same time. Replacing them together reduces repeat tear-downs.
| Symptom | Most likely wear item | Example part for MGDZ600TB2 |
|---|---|---|
| Squeal or chirp | Idler pulley bearing/wheel | Dryer idler pulley 279640 |
| Thump or rumble | Drum support rollers | Support WPW10314173 |
| Rattling plus poor airflow | Loose or damaged blower wheel | Dryer blower wheel WP697772 |
The idler pulley keeps the drive belt tight. If it seizes or loses tension, the belt can overheat and fail, the drum can stop turning, and drying performance can drop even if the burner is heating normally.
Last updated: February 2026
How to remove the front panel of a Maytag dryer?
On the Maytag MGDZ600TB2 dryer, front-panel access typically starts by disconnecting power, then removing the door (hinge screws) so the front panel can be released and tilted forward. Our MGDZ600TB2 owner's manual confirms the door is fastened to the front panel with 4 screws.
- Unplug the dryer from the grounded outlet.
- If you need more room, pull the dryer forward so you can reach the top and bottom edges.
- Protect the finish with a towel if you will set the door down.
- Keep a small container for screws.
- Take a quick photo of any wire connections before disconnecting them.
- Unplug the dryer.
- Remove the door assembly: open the door and remove the 4 screws holding the door hinge to the front panel; lift the door off and set it on a protected surface (this matches the procedure shown in the manual).
- Disconnect the door switch wiring (if it is attached to the front panel and limits movement).
- Release the front panel fasteners:
- Many Maytag dryers use screws along the lower edge or inside the door opening, plus top clips.
- Remove any visible screws first.
- Pop the top clips (if present): slide a putty knife under the top corners of the front panel to release spring clips.
- Tilt the front panel forward and lift it up and off the bottom locating tabs.
| Item | Why you need it |
|---|---|
| Phillips screwdriver | Door hinge screws and common panel screws |
| 1/4-in. nut driver | Common dryer cabinet screws |
| Putty knife | Releasing top spring clips |
| Work gloves | Protect hands from sharp cabinet edges |
Removing the front panel correctly prevents bent cabinet edges, broken clips, and pinched door-switch wires. It also gives you safe access to wear parts like the belt path and drum support components.
If you are opening the cabinet to address squealing or thumping, the support WPW10314173 (drum support roller) is a common wear item on this platform.
Last updated: February 2026
Where to find part number on Maytag dryer?
On your Maytag dryer model MGDZ600TB2, the part number is usually printed on the part itself (stamped, molded, or on a small sticker). For ordering the correct replacement, we use the dryer’s model and serial number label first, then match the exact part number in the parts list in the MGDZ600TB2 owner's manual.
Check these common spots on Maytag gas dryers:
- Inside the door opening on the front panel
- On the door frame (around the opening)
- Behind the lint screen housing area (visible when you open/remove the screen)
- On the back panel of the cabinet
- On a side panel near the rear
Many dryer parts have their own identifiers. Look for:
- A stamped number on metal parts (brackets, supports)
- Molded-in numbers on plastic parts (blower wheel, lint duct)
- A small barcode sticker on motors, valves, and sensors
- A tag or label on wiring harnesses
| Part type | Where the number is usually found | Example part from this model |
|---|---|---|
| Drum support/roller | Stamped on bracket or roller hub | Support WPW10314173 |
| Idler pulley | Molded on pulley or printed on packaging | Dryer idler pulley 279640 |
| Gas ignition parts | Sticker on component or printed on kit bag | Igniter 279311 |
| Temperature sensor | Printed on sensor body | Dryer thermistor WP8577274 |
Maytag dryers often use multiple versions of similar-looking parts across different series. Using the MGDZ600TB2 model/serial label plus the parts list prevents ordering a look-alike part that does not fit, heats incorrectly, or causes noise.
Last updated: February 2026
What's the life expectancy of a Maytag dryer?
A Maytag dryer like model MGDZ600TB2 typically lasts 10 to 13 years. With consistent lint and vent maintenance and timely replacement of wear items (rollers, idler pulley, blower wheel), many Maytag gas dryers reach 15 years of service.
The biggest drivers of dryer life are heat management, airflow, and drum support wear.
- Vent restriction (long runs, crushed flex duct, clogged hood) overheats components
- Overloading strains the drive system and drum supports
- Skipped cleaning lets lint build up around the blower housing and burner area
- High-heat cycles only accelerate wear on sensors and seals
- Delayed repairs (squeals, thumps) can turn a small part into a bigger failure
On MGDZ600TB2, these are common wear points that are straightforward to service:
| Symptom | Likely wear area | Example part for this model |
|---|---|---|
| Squealing or rumbling | Drum support rollers | Support WPW10314173 |
| Thumping, belt slipping, poor tumbling | Idler and belt path | Dryer idler pulley 279640 |
| Weak airflow, longer dry times | Blower wheel | Dryer blower wheel WP697772 |
| No heat or intermittent heat (gas) | Ignition and gas valve coils | Dryer valve coil kit 279834 |
We recommend these habits to extend life expectancy and reduce drying time:
- Clean the lint screen every load; wash and dry it monthly to remove residue
- Check airflow at the outside vent hood; strong flow matters more than cycle time
- Clean the vent duct at least yearly (more often with pets or long vent runs)
- Keep loads medium-sized so clothes tumble freely
- If you hear squealing or grinding, service drum supports before they damage the drum
A dryer that is venting well runs cooler, dries faster, and puts less stress on the motor, drum supports, and gas burner system. That is the difference between a dryer that stops around 10 years and one that keeps going well past it.
For model-specific care and operating guidance, follow the MGDZ600TB2 owner’s manual.
Last updated: February 2026
How do I know if my Maytag dryer heating element is bad?
On the Maytag MGDZ600TB2 (a gas dryer), a “bad heating element” symptom usually shows up as no heat or weak heat even though the drum tumbles. A quick check is to run a heated Timed Dry cycle for about 5 minutes and feel for heat; if there’s still no heat, the issue is typically in the gas ignition or temperature-sensing circuit, not an electric heater. See the MGDZ600TB2 owner's manual.
- Use Timed Dry with heat (not Air Only) and let it run 5 minutes, then open the door and feel for heat.
- Confirm the gas shutoff valve is fully open.
- Make sure the vent is not crushed or kinked behind the dryer.
- Verify the dryer is on a proper grounded outlet and the breaker is not tripped.
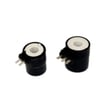
- If the dryer heats sometimes but not others, suspect ignition components such as the dryer valve coil kit 279834.
| Symptom on MGDZ600TB2 | Most common direction | Example parts for this model |
|---|---|---|
| Tumbles but never heats | Ignition or gas supply issue | Igniter 279311, dryer radiant sensor WP338906, dryer gas valve WPW10118347 |
| Heats once, then no heat until it cools | Gas valve coils failing when hot | Dryer valve coil kit 279834 |
| Long dry times but some heat | Airflow restriction or blower issue | Dryer blower wheel WP697772, venting/ducting checks |
| Overheats or shuts off early | Temperature sensing problem | Dryer thermistor WP8577274 |
We use continuity/ohms checks to pinpoint the failure:
- Igniter: typically shows continuity; if open, it will not glow.
- Radiant sensor: should change state with heat; a failed sensor can stop ignition.
- Thermistor: out-of-range readings can cause poor heat control.
- Gas valve coils: can test OK cold but fail hot; symptoms are often more reliable than a cold resistance check.
Replacing a “heater” on a gas dryer is a common misdiagnosis. On the MGDZ600TB2, airflow (venting) and gas ignition parts drive heating performance, so checking those first prevents repeat breakdowns and long dry times.
Last updated: February 2026