Owner’s manual



How to hard reset a Kenmore Elite washer?
To hard reset a Kenmore Elite washer model 79641782710, unplug it (or turn off the breaker) for 60 seconds, then restore power and try a cycle again. This clears many control glitches and matches the reset step in the 79641782710 owner's manual.
Hard reset steps (recommended)
- Press POWER to turn the washer off.
- Unplug the washer (or switch the laundry breaker off).
- Wait 60 seconds.
- Plug back in (or turn the breaker on).
- Press POWER, then start a normal cycle to test.
If the washer still will not run
A reset helps when the control is “stuck”, but it will not fix a real failure such as a door lock problem, fill problem, or drain problem.
- Confirm the door closes firmly; the washer will not operate unless the door locks.
- If you see an “open door” message with the door closed, the door lock circuit is a common suspect.
- If the tub will not fill, check both water faucets are fully open.
- If the tub will not drain, check the pump filter area for clogs.
| Symptom after reset | Most common area to check | Example part for this model |
|---|---|---|
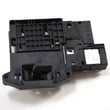
| Won’t start, door won’t lock | Door lock system | Lg washer door lock EBF61315802 |
| Stops with control-type error | Power reset, wiring, control | (diagnose per manual) |
| Won’t drain or drains slowly | Drain pump filter, hoses | Washer drain pump filter 383EER2001A |
Why it matters
A proper power reset is the fastest safe first step for control errors because it forces the electronic control board to reboot. If the same error returns right away, we treat it as a component or wiring issue, not a one-time glitch.
Last updated: January 2026
How to force a Kenmore Elite washer to drain?
To force-drain a Kenmore Elite washer model 79641782710, use the built-in drain routine: press POWER, then press SPIN SPEED (no cycle selected), then press START/PAUSE. This runs the drain pump to remove water so the door can unlock safely.
Fast steps to drain (no cycle selected)
- Press POWER to turn the washer on.
- Press SPIN SPEED to choose a setting.
- For drain only, select NO SPIN.
- Press START/PAUSE; the washer will drain and may tumble briefly.
- Wait for draining to finish; then open the door.
If the door will not unlock
A high water level keeps the door locked. Draining the tub using the steps above is the correct way to unlock it; forcing the door can damage the door and lock.
Quick checks that prevent repeat drain problems
- Make sure the drain hose is not pinched, crushed, or kinked.
- Confirm the standpipe height is not higher than 96 inches from the bottom of the washer.
- Insert the drain hose only 8 to 12 inches into the standpipe.
- Avoid extending the drain hose more than 6 feet (long extensions can cause poor draining).
- If you suspect a blockage at the pump area, inspect and clean the pump filter components as needed (common cause of slow drain).
Parts that commonly affect draining
If the washer still will not drain after hose checks, these model-matched parts are often involved:
| Symptom | Common cause | Example part for 79641782710 |
|---|---|---|
| Slow drain, debris found | Clogged or damaged filter | Washer drain pump filter 383EER2001A |
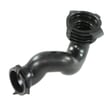
| Leaks or poor flow at tub outlet | Split or restricted hose | Washer tub-to-pump hose 4738ER1002A |
Why it matters
Draining the tub the correct way protects the door lock system, prevents water spills, and helps the washer complete spin properly (standing water can also trigger drain-related errors).
For control-panel steps and cycle options specific to this washer, use the 79641782710 owner's manual.
Last updated: January 2026
What size is a Kenmore Elite washer?
For Kenmore Elite washer model 79641782710, the cabinet measures 27 in. wide x 31 1/2 in. deep x 39 in. high. With the door open, the total depth is 53 3/4 in. These are the key fit dimensions for planning a laundry space.
Dimensions and clearance you should plan for
Use these measurements when checking doorway clearance, closet depth, and side-to-side fit.
- Width: 27 in.
- Depth (door closed): 31 1/2 in.
- Height: 39 in.
- Depth (door open): 53 3/4 in.
- Minimum side clearance: 1 in. each side
- Minimum rear clearance: 4 in.
For the full spec list (including electrical requirements and max water pressure), use the 79641782710 owner's manual.
Quick fit table
| Measurement | Door closed | Door open |
|---|---|---|
| Depth | 31 1/2 in. | 53 3/4 in. |
Why it matters
Correct sizing prevents common installation problems like a door that cannot swing fully, crushed fill hoses behind the washer, or vibration from tight side clearances. Planning for the door-open depth is especially important in narrow laundry rooms.
Related specs (helpful for planning)
These model-specific specs often come up during installation and troubleshooting:
- Electrical: 120 VAC, 60 Hz
- Water pressure range: 20 to 120 psi
- Net weight: 205 lbs
- Max spin speed: 1,300 RPM
Last updated: January 2026
Where is the drain filter on a Kenmore Elite top load washer?
On Kenmore Elite model 79641782710, the drain pump filter is behind the filter access panel on the lower front of the washer. Open that panel to reach the small drain hose and the twist-out pump filter; see the steps in the 79641782710 owner's manual.
How to access and clean the drain pump filter
Before you start, unplug the washer and let any hot water cool.
- Open the lower front filter access panel.
- Unclip the small drain hose and pull it out gently.
- Drain water into a shallow pan or floor drain.
- Remove the hose plug to empty the remaining water.
- Twist the pump filter counterclockwise to remove it.
- Rinse debris from the filter, reinstall it, then close the access panel.
What you will see behind the access panel
| Item | What it does | What to watch for |
|---|---|---|
| Drain hose with plug | Lets you drain water before removing the filter | Pull out only enough slack to drain properly |
| Pump filter | Catches lint and small items (coins, buttons) | Clean if slow drain, odor, or rattling occurs |
Why it matters
A clogged drain pump filter is a common cause of slow draining or no-drain symptoms. Keeping it clean helps protect the drain pump and can prevent drain-related error conditions.
Parts that are commonly involved
If the filter area is damaged or leaking after cleaning, these model-matched parts are often checked during diagnosis:
- Washer drain pump filter 383EER2001A (filter body)
- Washer tub-to-pump hose 4738ER1002A (hose feeding the pump)
- Washer hose clamp 4861FR3068A (clamp that can seep if loose)
Last updated: January 2026