- Kenmore refrigerator water filters
- Whirlpool refrigerator water filters
- Samsung refrigerator water filters
- GE refrigerator water filters
- LG refrigerator water filters
- Frigidaire refrigerator water filters
- KitchenAid refrigerator water filters
- Maytag refrigerator water filters
- Kenmore Elite refrigerator water filters
- Estate refrigerator water filters
- GE Profile refrigerator water filters
- Amana refrigerator water filters
- Bosch refrigerator water filters
- Dacor refrigerator water filters
- Electrolux refrigerator water filters
Top DIY repair help
View All Repair Categories
Appliances
Lawn & Garden
Power Tools
Home Improvement
Sports & Leisure
Heating & Cooling
Quick Links
How to rebuild a chainsaw carburetor
less than a minute readMay 20Lyle Weischwill
Repair time and Difficulty
15 minutes or less
Tools Required
- Allen wrench
- 7/16-inch socket driver
- Needle-nose pliers
- Torque wrench (optional)
- Approved fuel container
- Work gloves
- Paper towels or shop rags

This step-by-step chainsaw repair guide shows how to rebuild a chainsaw carburetor. The carburetor controls the air and fuel mixture that powers the engine. If the engine won’t start although the tank is full of fresh fuel, test the carburetor by following these steps:
Remove the air filter.
Pour about a teaspoon of fuel into the carburetor.
Pull the starter rope.
If the engine starts but quickly dies, the carburetor is likely the problem.
Rebuild the carburetor using a manufacturer-approved rebuild kit.
Use this procedure to rebuild the carburetor on Craftsman, MTD, Poulan, McCulloch, Troybilt and Husqvarna chainsaws. If your carburetor differs from the one shown below, check your service manual for directions specific to your model.
If you’d rather replace the carburetor, see How to Replace a Chainsaw Carburetor.
Instructions
- 1. Drain the fuel tank
Wear work gloves to protect your hands.
In a well-ventilated area, remove the fuel cap and drain the tank into an approved storage container.
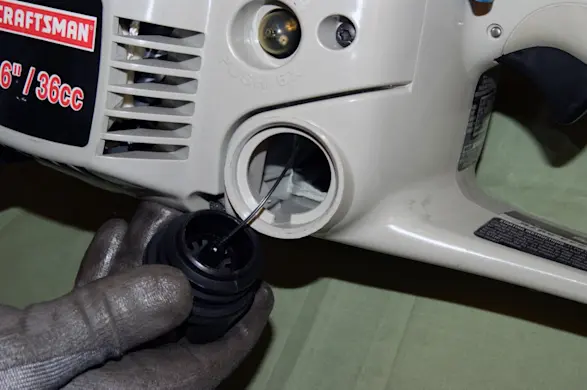
PHOTO: Open the fuel cap.
- 2. Remove the cylinder shield
Using an Allen wrench, remove the screws that hold the cylinder shield to the engine. Lift off the cylinder shield.
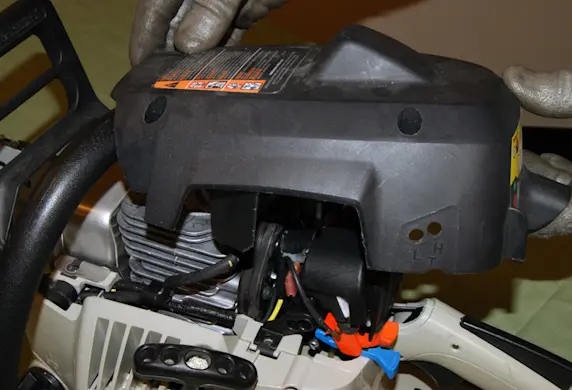
PHOTO: Remove the cylinder shield.
- 3. Disconnect the spark plug wire and remove the air filter
Disconnect the wire from the spark plug. Pull the cover off the air filter housing and remove the filter.
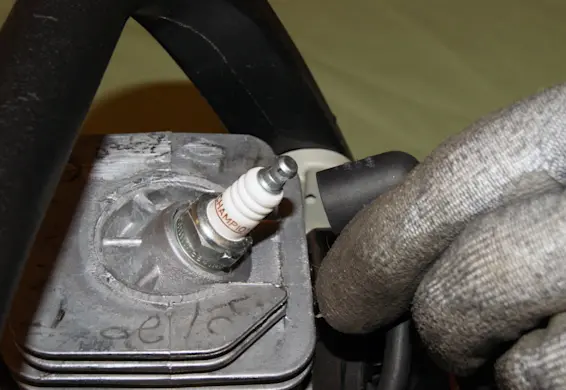
PHOTO: Disconnect the spark plug wire. 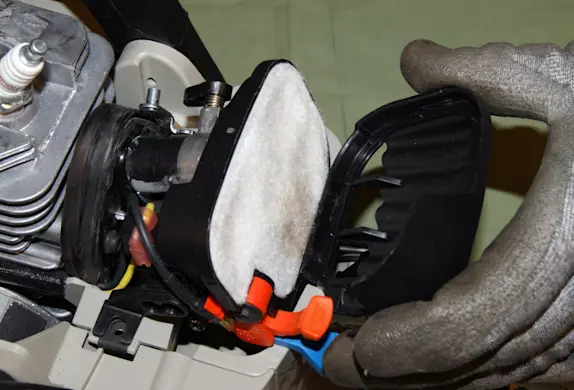
PHOTO: Remove the air filter cover. 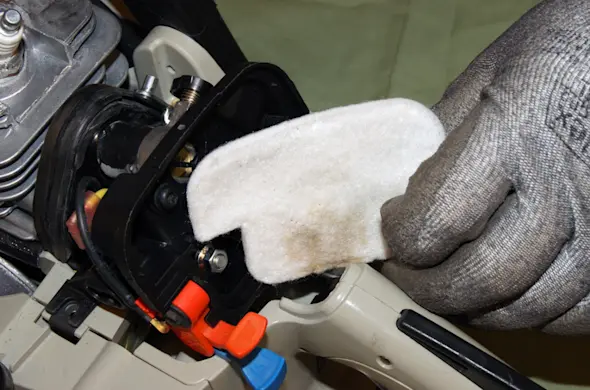
PHOTO: Remove the air filter.
- 4. Remove the carburetor
Using a 7/16-inch socket driver, remove the 2 mounting nuts that secure the carburetor to the engine.
Pull the air filter housing off the carburetor.
Pull the carburetor away from the engine block. Be careful not to bend the throttle linkage or damage the gas lines. Use needle-nose pliers to detach the gas lines from the carburetor.
Disconnect the throttle linkage. Pull the carburetor completely off the mounting studs.
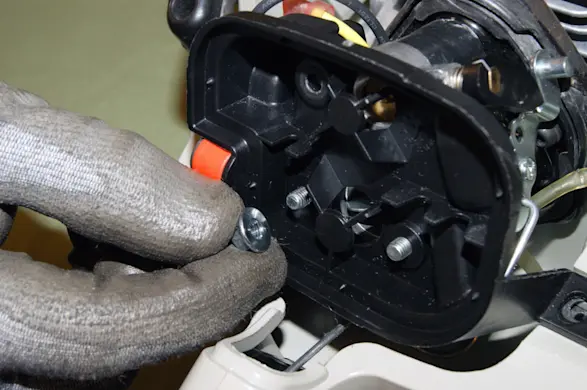
PHOTO: Remove the mounting nuts. 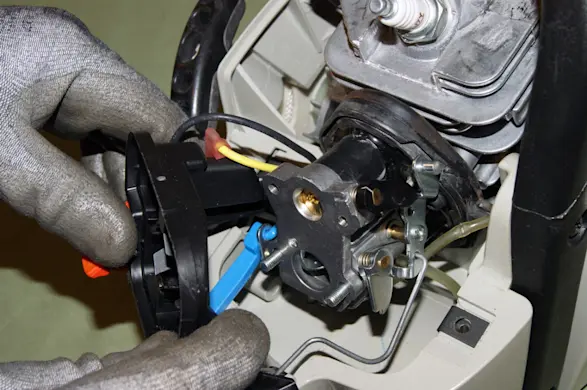
PHOTO: Remove the air filter housing. 
PHOTO: Carefully pull the carburetor forward on the mounting studs 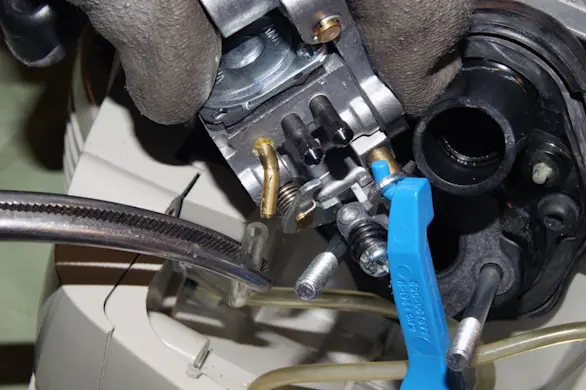
PHOTO: Pull the fuel lines off of the carburetor. 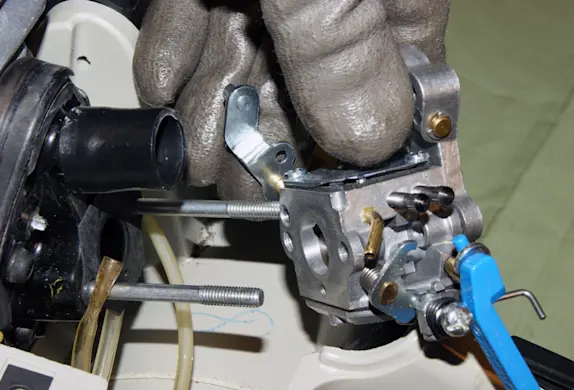
PHOTO: Pull the carburetor off the mounting studs. Tip: For accurate reassembly, take digital photos of the throttle linkage on the carburetor and of the gas line connections.
- 5. Rebuild the carburetor
Place the carburetor on a clean work surface and remove the screws from the bottom cover. Detach the cover.
Peel the metering diaphragm and gasket from the bottom of the carburetor. Line up the parts in order as you pull them off.
With the metering diaphragm removed, locate the lever on the hinge. Remove the mounting screw and detach the lever.
Remove the pump cover screw on the top of the carburetor.
Pull out the pump diaphragm.
Remove the screw securing the needle and fuel lever.
Remove the screw securing the needle and fuel lever.
Clean all ports and jets in the carburetor with carburetor cleaner and compressed air. Allow the carburetor to dry for at least 10 minutes.
Install the needle and lever to the bottom of the carburetor.
Install the metering diaphragm, gasket and bottom cover.
Install the pump diaphragm and the top cover.
Tip: To speed reassembly, take digital photos of the parts before removing them.
- 6. Reinstall the carburetor
Replace the carburetor-mounting gasket.
Connect the throttle linkage.
Slip the carburetor onto the mounting studs and push it into place.
Connect the fuel lines.
Reinstall the air filter housing.
Replace the mounting nuts and tighten them to seal the gasket between the engine and the carburetor.
Tip: To avoid damaging the gasket by over-tightening the mounting nuts, use a torque wrench to tighten them to 25 in./lbs. If you don't have a torque wrench, tighten the nuts reasonably tight.
- 7. Install the air filter cover and connect the spark plug
Position the air filter in the housing and replace the cover. Reattach the spark plug wire.
- 8. Reinstall the cylinder shield
Reinstall the cylinder shield on the chainsaw. Refill the fuel tank.