


How do I tell what model my Kenmore dryer is?
Your Kenmore dryer’s model number is printed on the appliance’s ID label; for Kenmore 11086340100, it’s the full number you’ll use to match the correct parts, diagrams, and electrical specifications when ordering or troubleshooting.
Where to find the model number label
Check these common locations on Kenmore electric dryers:
- Inside the door opening on the front panel (most common)
- On the back panel of the cabinet
- On the door frame area near the latch
- Near the lint screen housing (some designs)
- On the side panel edge just inside the door opening
What to write down (and why)
Record the information exactly as shown on the label.
| What to capture | Example | Why it matters |
|---|---|---|
| Model number | 11086340100 | Ensures parts fit your exact dryer |
| Serial number | (varies) | Helps identify production run details |
| Power details | 240V (typical) | Confirms correct electrical parts and connections |
Quick tips to avoid ordering the wrong part
Even one digit off can point to a different Kenmore design.
- Use the full model number, not just “110”
- Match letters and numbers exactly (no spaces added)
- If the label is worn, take a clear photo and zoom in
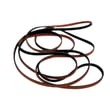
- When troubleshooting noises or no-start issues, confirm the model before replacing drive parts like the drum belt 341241
Why it matters
Kenmore model numbers often share prefixes across many dryers, but internal components (belt routing, motor style, thermal protection, door switch design) can differ. Using the exact model number keeps repairs accurate and prevents repeat failures.
Last updated: February 2026
What is the code F1 on a Kenmore dryer?
On Kenmore electric dryer model 11086340100, the F1 (or F01) error code points to a temperature-sensing problem, most often the thermistor circuit (the dryer is not reading temperature correctly). This can stop the cycle, trigger beeping, or prevent proper heating.
What to do first (quick checks)
- Unplug the dryer or switch off the breaker for 1 minute, then restore power and retry.
- Make sure the lint screen is clean and airflow is strong at the outside vent.
- Check that the exhaust duct is not crushed, kinked, or packed with lint.
- If the code returns immediately, plan on electrical testing of the temperature-sensing circuit.
- If the dryer also will not run at all, check the safety circuit (thermal fuse) as well.
Parts that commonly relate to F1 symptoms
F1 is usually sensor-related, but overheating and airflow restrictions can contribute to repeated faults. These model-matched parts are commonly involved in “won’t heat”, “stops mid-cycle”, or “beeps with error” complaints:
| Symptom you notice | Most likely area | Model-matched part to consider |
|---|---|---|
| Stops and beeps, inconsistent heat | Temperature sensing/control | Dryer thermostat WP694674 |
| Runs but then shuts down, no heat afterward | Overheat safety opened | Fuse WP3390719 |
| Long dry times, hot cabinet | Airflow restriction (not a part first) | Clean venting, then recheck |
Why it matters
When the dryer cannot read temperature correctly, it may shut down to protect the heater and wiring. Fixing airflow issues and confirming the safety devices (like the thermal fuse) prevents repeat failures and helps the dryer dry normally.
When replacement or service makes sense
- The code returns right after power reset.
- The dryer overheats, smells hot, or repeatedly trips the safety circuit.
- You have normal power but the dryer will not complete a cycle.
Last updated: February 2026
How do I know if my Kenmore dryer thermal fuse is blown?
On Kenmore electric dryer model 11086340100, a blown thermal fuse usually shows up as a dryer that won’t start at all, or a dryer that runs but has no heat (depending on how the motor circuit is routed). The sure way to know is a continuity test on the fuse with the dryer unplugged.
Quick symptoms to look for
- Dryer won’t start, even though the outlet has power
- Motor hums briefly, then stops (some setups)
- Runs but no heat (less common on many electric dryers, but possible)
- You recently had poor airflow: clogged lint screen, crushed vent, or long dry times
- The problem appeared suddenly after overheating
How we test the thermal fuse (simple continuity check)
- Unplug the dryer (or switch off the breaker).
- Access the thermal fuse on the blower housing or exhaust duct area.
- Remove at least one wire from the fuse terminal.
- Set a multimeter to continuity or ohms.
- Touch probes to the fuse terminals.
What the meter reading means
| Meter result | What it means | What to do next |
|---|---|---|
| Beep or ~0 to 1 ohm | Fuse is good | Keep troubleshooting door switch, start switch, motor, or power supply |
| No beep or OL/infinite | Fuse is blown | Replace the fuse and correct the airflow problem |
Parts that commonly relate to this issue
- Thermal fuse: Fuse WP3390719
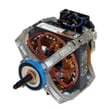
- If the dryer won’t start and the fuse tests good, a failed drive component can also stop operation: motor 279827
Why it matters
The thermal fuse is a one-time safety device. If it blows and we only replace it without fixing the venting restriction, the replacement fuse can blow again quickly. Restoring strong airflow also improves drying performance and helps protect the heater and thermostat.
Last updated: February 2026
How to open Kenmore dryer front panel?
To open the front panel on Kenmore electric dryer model 11086340100, we unplug the dryer first, then release the top, remove the front-panel mounting screws, and lift the panel off while supporting any connected wiring. This gives access to the drum, belt, idler pulley, and motor.
Safety first
- Unplug the dryer (or switch off the breaker) before starting.
- If the dryer was running, let it cool for 30 minutes.
- Wear cut-resistant gloves; cabinet edges can be sharp.
- Take a photo of wire connections before disconnecting anything.
- Keep screws sorted by location so reassembly is easy.
Steps to remove the front panel (typical for this Kenmore 110-series style)
- Remove the lint screen from the top opening.
- Pop the top panel: slide a putty knife under the front corners of the top (about 2 to 4 inches in from each side) to release the spring clips, then lift the top.
- Remove screws that secure the front panel (commonly at the inside top corners, and sometimes inside the door opening depending on the console/front design).
- Disconnect the door switch wiring if it prevents the panel from coming off.
- Lift the front panel up and off the lower retaining tabs/clips, then pull it forward.
What you can service once the front is off
| Area you can reach | Common reason to open the front | Example part for this model |
|---|---|---|
| Drum drive | Squealing, drum not turning | Drum belt 341241 |
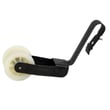
| Idler system | Thumping, belt slipping | Pulley WP691366 |
| Blower housing | Rattling, poor airflow noise | Dryer blower wheel WP694089 |
| Motor area | Humming, no start, weak tumble | Motor 279827 |
Why it matters
Removing the front panel the right way prevents bent cabinet panels, broken plastic clips, and pinched door-switch wires. It also lets us inspect wear items (belt, idler pulley, blower wheel) that commonly cause noise and no-tumble problems.
Last updated: February 2026








