Get free shipping on your order, with any water filter subscription. Find my filter

Open Hamburger Menu
Sears Parts Direct
Tips to find your model number

Kenmore 11028522700 washer Parts

Here are the diagrams and repair parts for Kenmore 11028522700 washer, as well as links to manuals and error code tables, if available.

Kenmore 11028522700 washer
By Schematic
By Part
SELECT DIAGRAM
?

This is the number corresponding to the part on the diagram / schematic

Browse Parts for 11028522700 Washer

  • Relief Stirrer for Kenmore 11028522700 - Part 3952821

    Rear panel parts diagram

    Relief Stirrer

    Part #3952821

    The manufacturer no longer makes this part, and there's no substitute part

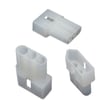
  • Washer Timer Wire Harness Connector for Kenmore 11028522700 - Part 3948614

    Wiring harness parts diagram

    Washer Timer Wire Harness Connector

    Part #3948614

    The manufacturer no longer makes this part, and there's no substitute part

  • Receptacle for Kenmore 11028522700 - Part 717252

    Wiring harness parts diagram

    Receptacle

    Part #717252

    The manufacturer no longer makes this part, and there's no substitute part

  • Harness Clip for Kenmore 11028522700 - Part 2219077

    Agitator, basket and tub parts diagram

    Harness Clip

    Part #2219077

    The manufacturer no longer makes this part, and there's no substitute part

  • Bumper, Lid Hinge for Kenmore 11028522700 - Part 19119

    Top and cabinet parts diagram

    Bumper, Lid Hinge

    Part #19119

    The manufacturer no longer makes this part, and there's no substitute part

  • Control Panel for Kenmore 11028522700 - Part W10025655

    Control panel parts diagram

    Control Panel

    Part #W10025655

    The manufacturer no longer makes this part, and there's no substitute part

  • Leveling Link Assembly for Kenmore 11028522700 - Part 63466

    Machine base parts diagram

    Leveling Link Assembly

    Part #63466

    The manufacturer no longer makes this part, and there's no substitute part

  • Support for Kenmore 11028522700 - Part 8575214

    Machine base parts diagram

    Support

    Part #8575214

    The manufacturer no longer makes this part, and there's no substitute part

  • Retainer Ring for Kenmore 11028522700 - Part 3362552

    Gearcase parts, optional parts (not included) diagram

    Retainer Ring

    Part #3362552

    The manufacturer no longer makes this part, and there's no substitute part

  • Washer Cold Water Inlet Valve Wire Connector for Kenmore 11028522700 - Part 3354925

    Wiring harness parts diagram

    Washer Cold Water Inlet Valve Wire Connector

    Part #3354925

    The manufacturer no longer makes this part, and there's no substitute part

Kenmore Washer 11028522700 FAQs

A Kenmore washer typically lasts 10 to 15 years under normal household use. For the Kenmore 11028522700, lifespan is driven less by the model number and more by load size, installation, and routine care outlined in the 11028522700 washer user manual.

What affects lifespan the most

A washer usually reaches the upper end of its life when wear items are managed and the machine is kept balanced and leak-free.

  • Avoid overloading; chronic overload strains the drive system and suspension
  • Use the correct water level and temperature settings for the load
  • Keep the washer level to reduce vibration and component wear
  • Inspect hoses regularly and replace them on schedule
  • Address small leaks or unusual noises early
Maintenance that extends life (model-relevant)

The Kenmore 11028522700 documentation calls out a key preventive step: replacing inlet hoses on a time schedule.

  • Replace water inlet hoses every 5 years (helps prevent hose failure and leaks)
  • Wipe up detergent and bleach spills on the cabinet to prevent corrosion
  • Periodically clean the washer interior using a hot cycle and a cleaning mixture as described in the manual
  • Keep loads evenly distributed to reduce off-balance spinning
Typical lifespan by usage pattern
Usage pattern Typical lifespan What usually shortens it
Light (1 to 3 loads/week) 12 to 15 years Long idle periods, hose aging
Average (4 to 7 loads/week) 10 to 13 years Overloading, vibration
Heavy (8+ loads/week) 8 to 11 years Wear on drive, pump, suspension
Why it matters

Knowing the expected lifespan helps you decide when preventive maintenance is worth it and when a repair is likely to restore reliable operation. For example, a leak caught early can prevent damage to the drive system and bearings.

Last updated: January 2026

For Kenmore washer model 11028522700, the model number is printed on the model and serial number label located under the washer lid. Open the lid and look around the rim/underside area for a sticker or metal tag with both the model and serial numbers; our 11028522700 washer user manual also points to this location.

Where to look on this Kenmore washer

On model 11028522700, check these common label spots first:

  • Under the lid on the top rim of the cabinet (most common)
  • Under the lid near the tub opening (front edge or side edge)
  • On the back of the washer cabinet (secondary label on some units)
  • Inside the lid itself (less common)
What the label should show

The label typically includes:

  • Model number (example format: 11028522700)
  • Serial number
  • Electrical rating information
  • Sometimes a manufacturing date code
Quick ID checklist
What you see on the label What it means What to do next
“110.28522700” or “11028522700” This is the model number Use it to match diagrams and parts
A longer mix of letters/numbers Usually the serial number Keep it for service records
Only “110.” plus more digits Partial model format Write down the full string shown
Why it matters

Using the exact model number ensures you get the right Kenmore washer parts, correct troubleshooting steps, and the right installation details (like hose and drain setup). Even small model-number differences can change compatible components.

Last updated: January 2026

To unclog the drain hose on your Kenmore washer model 11028522700, unplug the washer, shut off the water, then remove the drain hose from the standpipe or laundry tub and flush it out. If draining is still slow, check the pump inlet hose and drain pump for debris using the 11028522700 installation guide.

Step-by-step: clear the drain hose safely
  • Unplug the washer (avoid working around live power).
  • Turn off both water faucets.
  • Pull the drain hose out of the standpipe or off the laundry tub.
  • Place the hose end in a bucket or shallow pan to catch water.
  • Straighten any kinks and remove lint or buildup at the hose end.
  • Flush the hose with hot water; for stubborn residue, soak the end in hot water and vinegar, then flush again.
  • Reinstall the hose with an air gap (do not tape or seal it into the standpipe).
Also check these common clog points (model 11028522700)

A clog is often not only in the drain hose. On this direct-drive style washer, lint, coins, or small socks can lodge at the pump area.

  • Inspect the hose routing for pinches behind the cabinet.
  • Check the standpipe or laundry tub drain for slow household plumbing.
  • If the washer hums but will not drain, inspect the pump and pump hoses.
Parts that commonly relate to “won’t drain”
Symptom Most likely area What to do next
Water drains slowly Drain hose or standpipe Flush hose; clear plumbing; reinstall with air gap
Hums but no drain Pump inlet or pump Check for debris; replace pump if seized
Drains but leaks Hose connection or clamp Reseat hose; inspect clamps and hose ends

If you find the pump is jammed or leaking, the compatible replacement for this model is the washer drain pump WP3363394.

Why it matters

A restricted drain hose can cause the cycle to stall at drain/spin, leave water in the tub, and strain the drain pump. Clearing the restriction early helps prevent repeat clogs and reduces the chance of pump failure.

Last updated: January 2026

Most common symptoms to help you fix your washers

Choose a symptom to see related washer repairs.

Main causes: clogged drain hose, house drain clogged, bad drain pump, water-level pressure switch failure, bad control b…

Main causes: broken lid switch or lid lock, bad pressure switch, broken shifter assembly, faulty control system…

Main causes: worn agitator dogs, bad clutch, broken motor coupler, shifter assembly failure, broken door lock, suspensio…

Main causes: water heater failure, bad water temperature switch, faulty control board, bad water valve, faulty water tem…

Main causes: lack of electrical power, wiring failure, bad power cord, electronic control board failure, bad user interf…

Main causes: no water supply, bad water valves, water-level pressure switch failure, control system failure, bad door lo…

Main causes: unbalanced load, loose spanner nut, worn drive block, broken shock absorber or suspension spring, debris in…

Main causes: leaky water inlet valve, faulty water-level pressure switch, bad electronic control board…

Main causes: bad lid switch or door lock, bad timer or electronic control board, wiring failure, bad water inlet valve a…

Repair guides for side-by-side refrigerators

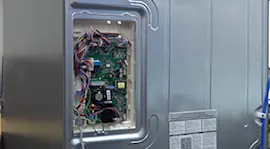
How to replace an electronic control board on the back of a refrigerator

How to replace an electronic control board on the back of a refrigerator

If your refrigerator isn't running, an electronic control board failure could be the problem. A service technician can d…

Repair time and Difficulty

 15 minutes or less
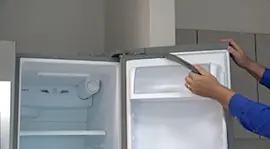
How to replace a press-in door gasket in a side-by-side refrigerator

How to replace a press-in door gasket in a side-by-side refrigerator

The door gasket seals the gap around the door to keep the cold air in and the warm air out. Replace a worn or damaged do…

Repair time and Difficulty

 15 minutes or less
How to replace an ice maker in a side-by-side refrigerator

How to replace an ice maker in a side-by-side refrigerator

Learn how to replace the ice maker in a side-by-side refrigerator with these step-by-step instructions.…

Repair time and Difficulty

 30 minutes or less

Effective articles & videos to help repair your washers

Use the advice and tips in these articles and videos to get the most out of your washer.

How auto-load sensing washers work (and when they don't)

How auto-load sensing washers work (and when they don't)

Your washer barely fills or seems stuck in sensing mode? Find out how auto-load sensing and Precise Fill features work, …

How to remove the main control board and user interface from a Maytag Epic Z front-load washer

How to remove the main control board and user interface from a Maytag Epic Z front-load washer

Get step-by-step instructions for removing the main electronic control board and the control panel from a Maytage Epic Z…

Using a wiring schematic to trace a current video

Using a wiring schematic to trace a current video

Find out what’s wrong with your appliance by following a circuit.…

Parts & More

Bottom-Mount Refrigerator
Front-Engine Lawn Tractor
Furnace
Gas Chainsaw
Gas Range
Ice Cream Maker
Lawn & Garden Engine
Lawn Edger
Microwave
Microwave/Hood Combo
Parts
Range Hood
Television
Washer
Water Heater
Wine & Beverage Cooler