Installation guide
 Owner’s manual
 Error Codes





Can you replace the heating element in a GE oven?
Yes. On a GE electric wall oven like model JT5000SF5SS, replacing a failed heating element is a common repair when the oven will not heat properly or heats unevenly. The key is shutting off power at the breaker first, then swapping the element and reconnecting the wires securely.
Before you start (safety and prep)
We recommend following the safety guidance in the JT5000SF5SS owner's manual and turning power off at the household distribution panel (breaker or fuse) before any service.
- Switch OFF the oven circuit breaker (240V) and confirm the display is dark
- Let the oven cool completely
- Use gloves; sheet metal edges can be sharp
- Support the element when removing screws so it does not drop and stress the wires
- Never place foil, liners, or baking stones on the oven floor; they can trap heat and damage components
Which “heating element” are you replacing?
Most electric ovens have two main heating elements:
| Element | What it does | Common symptom when bad |
|---|---|---|
| Bake element | Primary heat for baking | No/low heat in Bake, slow preheat |
| Broil element | Top heat for broiling | Weak broil, uneven browning |
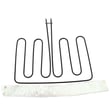
For this model, common replacements include the wall oven bake element WB44X21667 and the wall oven broil element WB44X48685.
Basic replacement steps (typical GE wall oven)
These steps match how most GE wall ovens are built; use your manual for access details.
- Remove oven racks for working room
- Remove the element mounting screws inside the oven cavity
- Gently pull the element forward a few inches
- Hold the wires so they do not slip back through the insulation
- Transfer wires to the new element terminals (tight, fully seated connections)
- Reinstall screws, restore power, then test Bake or Broil
Why it matters
A weak or open element can cause undercooking, long preheat times, and inconsistent temperatures. Replacing the correct element restores normal heating performance and helps the oven maintain tighter temperature control.
Last updated: February 2026
How much does it cost to replace a GE oven control panel?
For the GE JT5000SF5SS electric wall oven, the control panel part itself is typically the biggest cost; on this model, the control panel WB07T10745 is a premium-priced part, and total replacement cost is usually the part price plus labor if you hire service. Check the owner's manual for safety and service guidance before any repair.
Typical cost breakdown (parts vs. labor)
Here is a practical way to estimate your total:
- Part cost: the control panel price for JT5000SF5SS can be several hundred dollars (model-specific pricing varies by part ID).
- Labor cost: commonly $150 to $400 depending on access, local rates, and whether the oven must be partially removed from the cabinet.
- Service call/diagnostic: often $75 to $150 if a technician visits to confirm the failure.
- Extra parts: sometimes needed if wiring is damaged or connectors are heat-stressed.
- DIY vs. pro: DIY can reduce cost significantly, but only if you are comfortable working safely around 240V wiring.
| Scenario | What you pay for | Typical total |
|---|---|---|
| DIY replacement | Part only | Several hundred dollars (part-dependent) |
| Technician replacement | Part + labor + possible service call | Often several hundred to over $900 |
What “control panel” means on this model
On JT5000SF5SS, the “control panel” is the user interface assembly you press to select bake, broil, timer, and settings. If your display is dead, buttons do not respond, or settings change on their own, the control panel is a common suspect.
Model-matched part to price and order:
Before you replace it: quick checks that can save money
Because wall ovens use high voltage, we recommend these checks first:
- Confirm the oven has power at the breaker (a tripped breaker can mimic a dead panel).
- Look for a stuck key or unresponsive touch area (sometimes cleaning residue causes issues).
- If the oven overheats or bakes erratically, test the temperature sensor first.
- Inspect for heat damage at connectors (only with power disconnected).
- If you see wiring damage, repair the wiring before installing a new panel.
Helpful related parts for symptoms that look like “bad controls”:
Why it matters
A failing control panel can prevent safe operation (no reliable temperature control, no clear status, or no response). Replacing the correct model-specific part helps restore normal cooking modes and avoids repeat failures caused by an underlying sensor or wiring issue.
Last updated: February 2026
How to order GE appliance parts?
For your GE JT5000SF5SS electric wall oven, we recommend ordering replacement parts by matching your exact model number to the parts list, then selecting the exact part ID you need. This helps ensure fit and electrical compatibility for items like elements, sensors, and door hardware.
How we recommend ordering parts for model JT5000SF5SS
- Confirm the full model number (JT5000SF5SS) from the oven’s model tag.
- Use the parts list for this model to find the exact part name and part ID.
- Compare your symptom to common part categories (heating, lighting, door, cooling).
- Order the exact match; avoid “close” substitutions for electrical parts.
- Keep your serial number handy for reference during installation and troubleshooting.
Common JT5000SF5SS parts customers order
| What’s not working | Part to check first | What it affects |
|---|---|---|
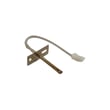
| Oven temperature seems off | Wall oven temperature sensor WB21X10165 | Temperature sensing and bake accuracy |
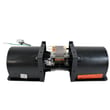
| Oven runs hot, cabinet feels too warm, fan issues | Wall oven cooling fan assembly WB26X31060 | Cooling airflow after and during cooking |
| Bake not heating properly | Wall oven bake element WB44X21667 | Primary baking heat |
| Broil not heating properly | Wall oven broil element WB44X48685 | Top heat for broiling |
| Door won’t unlock after self-clean | Wall oven door lock assembly WB10X23814 | Locking and unlocking the door |
Use the manual and installation guide to avoid ordering the wrong item
Your owner's manual helps you identify features, care guidance (including protecting the door gasket), and basic operating details. Your installation guide is useful when ordering electrical connection items you may need during install, such as an appropriate strain relief clamp for the junction box connection.
Why it matters
Wall ovens use model-specific electrical components (elements, sensors, harnesses, control parts). Ordering by the exact JT5000SF5SS part ID reduces returns and helps restore safe, reliable heating and door operation.
Last updated: February 2026
What are the parts of an electric oven?
An electric oven like the GE JT5000SF5SS is built around heating, temperature control, airflow, lighting, and door-sealing parts. The most common components you will see are the bake and broil elements, oven racks, temperature sensor, cooling fan parts, and the door gasket and hinges (all of which work together for safe, even cooking).
Core parts you will find in most electric wall ovens
- Bake element (primary heat source for baking)
- Broil element (high heat from the top for broiling)
- Oven temperature sensor (tells the control how hot the oven is)
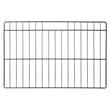
- Oven racks (support cookware at different rack positions)
- Oven light and lamp assembly (visibility while cooking)
- Cooling fan and fan blade (moves air to protect controls and manage heat)
- Door system parts (gasket, hinges, handle, window, and sometimes a door lock)
Common JT5000SF5SS parts customers replace
These are examples of parts we commonly see tied to performance or usability issues:
| Symptom | Often-related part | Example part for this model |
|---|---|---|
| Oven temperature seems off | Temperature sensing | Wall oven temperature sensor WB21X10165 |
| Oven not heating evenly or not heating | Heating circuit | Wall oven bake element WB44X21667 |
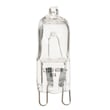
| No interior light | Lighting | Wall oven light bulb WB25T10102 |
| Excess heat around controls or noisy airflow | Cooling airflow | Wall oven cooling fan assembly WB26X31060 |
| Heat leaking, long preheat, uneven browning | Door sealing | Gasket WB35X32825 |
Why these parts matter
When any one of these components is weak or failed, you can get slow preheat, uneven baking, inaccurate temperatures, or heat escaping around the door. Keeping the heating, sensing, and sealing parts in good shape helps your GE wall oven cook more consistently.
Before you service or replace parts
We follow the same safety basics called out in the documentation:
- Shut off power at the circuit breaker before servicing.
- Let the oven cool completely before touching interior parts.
- Avoid using abrasive cleaners on the control panel and exterior finishes.
- Use the wiring and installation guidance for safe electrical connections.
For model-specific diagrams, part locations, and safe-use guidance, use the owner's manual.
Last updated: February 2026