- Kenmore refrigerator water filters
- Whirlpool refrigerator water filters
- Samsung refrigerator water filters
- GE refrigerator water filters
- LG refrigerator water filters
- Frigidaire refrigerator water filters
- KitchenAid refrigerator water filters
- Maytag refrigerator water filters
- Kenmore Elite refrigerator water filters
- Estate refrigerator water filters
- GE Profile refrigerator water filters
- Amana refrigerator water filters
- Bosch refrigerator water filters
- Dacor refrigerator water filters
- Electrolux refrigerator water filters
Top DIY repair help
View All Repair Categories
Appliances
Lawn & Garden
Power Tools
Home Improvement
Sports & Leisure
Heating & Cooling
Quick Links
How to replace a wall oven thermal fuse
less than a minute readNov 02Lyle Weischwill
Repair time and Difficulty
60 minutes or less
Tools Required
- 1/4-inch nut driver
- Phillips screwdriver
- Work gloves
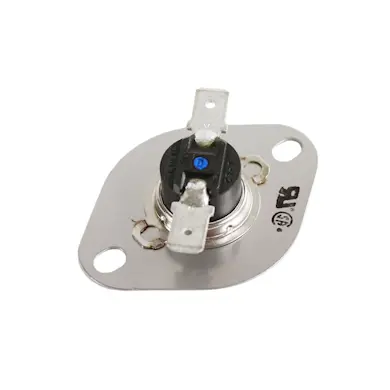
This wall oven repair guide explains how to replace a wall oven thermal fuse. The fuse trips to protect the wall oven from excessive heating. If the wall oven thermal fuse blows, the oven won't heat. You can reset some fuses with the press of a button; this guide explains how to replace one that can't be reset. Replace the oven thermal fuse using a manufacturer-approved replacement part.
The self-cleaning cycle sometimes causes the wall oven thermal fuse to trip; if it trips when the oven isn't self-cleaning, investigate what caused the oven to overheat before using the oven again.
Follow these basic repair steps to replace the thermal fuse in Kenmore, Frigidaire, Whirlpool, KitchenAid, Electrolux, Maytag and Amana wall ovens.
Instructions
- 1. Disconnect electrical power
Shut off the house circuit breakers for the wall oven to completely disconnect electrical power.
- 2. Remove the wall oven from the cabinet
Set a sturdy work table or platform just in front of the oven and pad the surface of the table with a towel or cardboard to protect the table.
Open the oven door and remove the mounting screws that secure the oven to the sides of the oven cabinet. Slide the oven forward in the cabinet. You should have enough slack in the electrical conduit of the power supply; if not disconnect the power supply wiring from the junction box for the wall oven.
With someone's help, carefully lift the oven out of the cabinet and set it on the table in front of the cabinet.
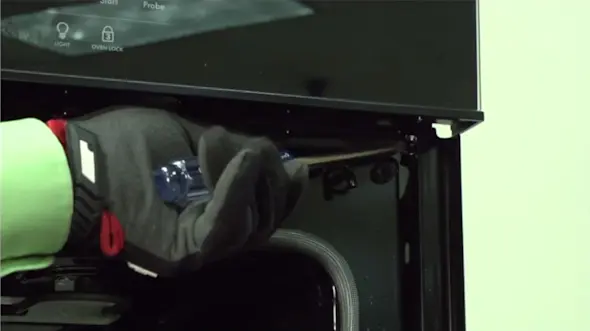
PHOTO: Remove the wall oven mounting screws. Tip: Use the installation manual for your wall oven to guide you in this step.
- 3. Remove the outer back panel
Starting with the bottom screws, remove the mounting screws that secure the outer back panel to the oven frame. Press on the outer panel as you remove the last of the top screws to prevent the outer panel from falling.
Remove the outer back panel and set it aside.
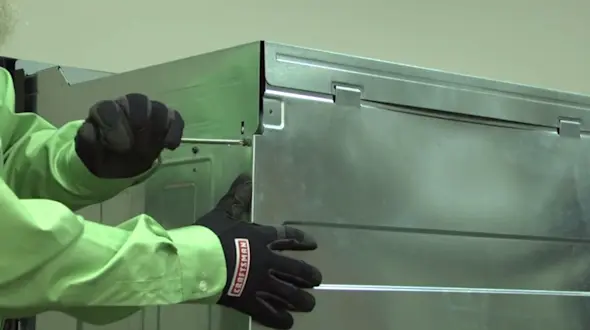
PHOTO: Remove the back panel screws. 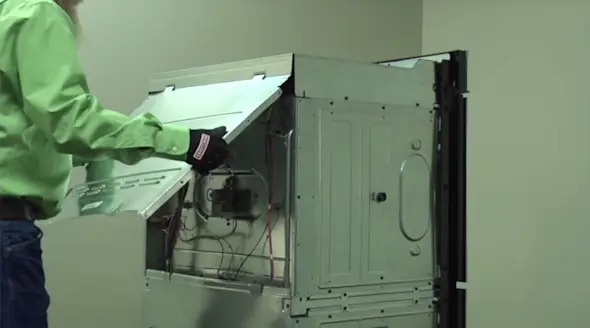
PHOTO: Remove the wall oven back panel.
- 4. Remove the thermal fuse
Disconnect the wires from the thermal fuse.
Remove the mounting screws from the thermal fuse. Remove the existing thermal fuse and set it aside for disposal.
- 5. Install the new thermal fuse
Position the new thermal fuse on the back of the oven and line up the mounting screw holes. Insert the mounting screws and tighten them firmly.
Position the wires on the ends of the thermal fuse terminals and push them onto the terminals. Push the female spade connectors all of the way down so that they seat properly.
- 6. Reattach the back panel
Position the outer back panel on the oven so that the mounting screw holes line up. Starting at the top of the panel, insert the mounting screws and tighten them firmly.
- 7. Reinstall the oven
With someone's help, lift the oven into the cabinet. Reinstall the mounting screws on the sides of the oven cabinet that hold the oven in place.
- 8. Turn on power to the oven
Reset the house circuit breakers for the oven to restore electrical power.