 Installation guide
 Owner’s manual
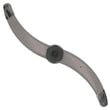



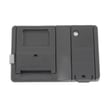
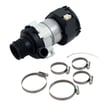

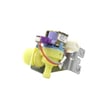
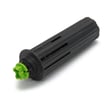
How to fix leaking GE Cafe dishwasher corner baffle replacement?
On the GE GDF520PGJ2BB dishwasher, a leaking lower corner is often caused by a dirty, mis-seated, or damaged corner baffle area. We fix it by cleaning the corner thoroughly, seating the replacement baffle fully, then running a wet test to confirm the leak is gone using the steps in the installation guide.
Before you start (safety and setup)
- Turn off power at the breaker before working around the door or tub edge.
- Pull the lower rack out for access and visibility.
- Wipe the corner area dry so you can see the leak path clearly.
- Use a non-abrasive sponge; avoid gouging the tub edge.
- Keep detergent and rinse aid away from the sealing surfaces.
Corner baffle replacement steps (what works most often)
- Remove the old corner baffle (if it is loose or torn) and any trapped debris.
- Clean the tub corner and mating surfaces; remove soap film, grease, and grit.
- Dry the area completely.
- Slide the new baffle into position and press it firmly until it sits flat and even.
- Reinstall the rack and check that nothing rubs the door when closing.
Confirm the repair with a wet test
The install procedure calls for a wet test and leak check after work is completed.
- Latch the door and start a cycle.
- Verify water enters the dishwasher.
- Check for leaks under the dishwasher.
- Check for leaks around the door; reposition the dishwasher if the door is rubbing adjacent cabinets.
- Cancel the cycle (press and hold Start/Reset for 3 seconds) and confirm proper draining.
Quick leak-location guide
| Where you see water | Most common cause | What to do next |
|---|---|---|
| Lower corner of door opening | Corner baffle not seated, debris on sealing surface | Re-clean and reseat baffle |
| Along full bottom of door | Door not latching evenly, door rubbing cabinet | Check latch alignment and cabinet clearance |
| Under unit (front center) | Water connection seep, drain routing issue | Tighten connections; recheck hose routing |
Why it matters
A small corner leak can drip into the toe-kick area, swell flooring, and create repeated cycle interruptions. Cleaning the sealing surface and verifying with a wet test prevents repeat leaks.
Last updated: February 2026
What is the average lifespan of a GE dishwasher?
Most GE dishwashers, including model GDF520PGJ2BB, typically last 10 to 12 years with normal household use. Consistent cleaning, correct loading, and fixing small issues early (like poor draining or weak wash action) helps you reach the high end of that range.
Typical lifespan range (what to expect)
In real-world use, we see this pattern most often:
- 8 to 10 years: heavy use, hard water buildup, infrequent cleaning
- 10 to 12 years: average use with basic maintenance
- 12 to 15 years: lighter use, good water quality, proactive upkeep
Quick reference
| Usage and care level | Common lifespan | What usually limits life |
|---|---|---|
| Heavy use, minimal maintenance | 8 to 10 years | mineral buildup, pump wear, leaks |
| Average use, routine care | 10 to 12 years | normal wear on pumps, heater, seals |
| Light use, proactive care | 12 to 15 years | age-related electrical and motor wear |
Maintenance that extends life
We recommend these habits for GE dishwashers like GDF520PGJ2BB:
- Clean the interior regularly to reduce odor and mineral film (see the GDF520PGJ2BB owner’s manual).
- Keep spray paths clear; remove labels, seeds, and broken glass from the tub bottom.
- Use the right detergent amount for your water hardness to prevent residue.
- Check for early leak signs around the door and tub seal; replace worn seals promptly.
- Address performance symptoms early (not draining, not cleaning, not drying) before they strain the pump and heater.
When repairs make sense vs. replacement
A dishwasher near the 10 to 12 year mark is often worth repairing when the fix is straightforward.
| Symptom | Common fix | Example model-matched part |
|---|---|---|
| Not drying well | heater circuit or heater issue | Dishwasher heating element WD05X30818 |
| Not cleaning well | clogged or worn spray arm | Dishwasher spray arm, lower WD22X33499 |
| Won’t start or stops mid-cycle | door latch not closing reliably | GE dishwasher door latch lock WD21X10490 |
Why it matters
Knowing the expected lifespan helps you decide whether to invest in a repair (often cheaper) or plan for replacement. It also helps you prioritize maintenance that protects high-wear parts like the circulation pump, heating system, and door seals.
Last updated: February 2026
What is the most common problem with GE dishwashers?
On the GE GDF520PGJ2BB dishwasher, the most common issues we see are “won’t start/won’t run,” not draining, and poor cleaning or drying. These problems are often tied to door-latch closure, power/control settings, drainage restrictions, or wash system parts that need cleaning or replacement.
Most common GE dishwasher problems (and what to check first)
- Dishwasher won’t run: confirm power is on (breaker or wall switch), then check for a locked control panel and proper door closure.
- Not draining: check for a kinked drain hose, a clogged air gap (if used), or a blockage in the sump area.
- Not cleaning well: make sure spray arms spin freely and their holes are not clogged.
- Suds/foam in the tub: use only automatic dishwasher detergent (hand dish soap causes heavy suds and poor wash results).
- Hard water film or odors: run a cleaner cycle and keep up with routine interior cleaning.
Quick symptom-to-part guide for GDF520PGJ2BB
| Symptom | Common cause | Part to consider (if checks fail) |
|---|---|---|
| Won’t start or stops when door moves | Door not latching consistently | GE dishwasher door latch lock WD21X10490 |
| Standing water after cycle | Drain restriction or weak drain pump | Dishwasher drain pump kit WD19X25187 or dishwasher drain hose WD24X10062 |
| Dishes gritty or lower rack not washing | Low spray pressure or clogged spray arm | Dishwasher spray arm, lower WD22X33499 |
| Poor drying | Heater not heating water properly | Dishwasher heating element WD05X30818 |
Why it matters
A dishwasher that does not heat, drain, or latch correctly can leave detergent undissolved, cause suds and residue, and shorten cycle performance. Fixing the root cause (power, latch, drainage, or heating) restores normal wash action and helps prevent repeat failures.
Best next steps (fast, safe checks)
- Turn off power at the breaker before inspecting wiring or components.
- Verify the door closes firmly and the latch engages every time.
- Check the drain hose routing for kinks and proper high-loop installation.
- Clean the interior and remove mineral buildup as recommended.
- Use the troubleshooting and care steps in the GDF520PGJ2BB owner’s manual.
Optional: If you’re seeing a code or flashing lights, use GE electronic dishwasher error codes to narrow the failure to a specific system.
Last updated: February 2026
Can I replace dishwasher parts myself?
Yes. On the GE GDF520PGJ2BB dishwasher, we see many customers successfully replace straightforward parts (spray arms, door latch pieces, hoses) with basic tools after shutting off power and water; repairs involving wiring, grounding, or major disassembly are better handled by a qualified technician per the GDF520PGJ2BB owner’s manual.
What you can usually replace yourself
- Spray arms and related wash components (common for poor cleaning)
- Door latch parts if the door will not close or the unit will not start
- Drain hose if it is split, kinked, or leaking
- Rack parts (rollers, brackets) if racks are falling off track
- Simple leak points like a tub gasket (when the leak is at the door opening)
DIY safety checklist (do this first)
- Disconnect electrical power at the breaker (reduce shock risk)
- Shut off the dishwasher water supply
- Let the heater cool at least 20 minutes after a cycle before reaching inside
- Pull the unit carefully; avoid damaging the power cord and hoses
- Keep the dishwasher level and stable when reinstalling
Parts that commonly solve the problem
| Symptom | Likely area | Example part for this model |
|---|---|---|
| Not cleaning well | Clogged or damaged spray arm | Dishwasher spray arm, lower WD22X33499 |
| Won’t start, won’t latch | Door latch/strike | GE dishwasher door latch lock WD21X10490 or dishwasher door latch strike WD13X10071 |
| Not draining | Drain path or pump | Dishwasher drain hose WD24X10062 |
| Not drying | Heater circuit | Dishwasher heating element WD05X30818 |
When to stop and call a technician
- You need to test live voltage, grounding, or hard-wired connections
- You see burned wiring, melted connectors, or repeated breaker trips
- The dishwasher must be removed and re-secured to the cabinet/countertop; follow the GDF520PGJ2BB installation guide to avoid fit and leveling issues
Why it matters
DIY repairs can restore cleaning, draining, and starting performance quickly, but dishwashers combine water, heat, and electricity. Using the correct shutdown steps and reinstall checks prevents leaks, poor washing from mis-leveling, and electrical hazards.
Last updated: February 2026





