Owner’s manual
 Error Codes




Where is the model number on a Kenmore 79691573210 dryer?
On Kenmore Elite model 79691573210, the model number is typically printed on a rating label inside the dryer door opening. Open the door and check the cabinet frame around the opening (usually along the top edge or one of the side rails) for the sticker.
Where to look first
Check these common label locations on Kenmore 796 dryers:
- Inside the door opening on the front cabinet frame (top rail)
- Inside the door opening on the left or right cabinet side rail
- On the inner door area (less common)
- Behind the lower front access panel area (occasionally)
What the label looks like
The rating label usually includes more than just the model number:
- Model number (for example, 79691573210)
- Serial number
- Electrical ratings (volts/amps)
- Gas information (on gas models)
| If you see this | Use it for |
|---|---|
| Model number | Finding the correct parts list and diagrams |
| Serial number | Determining production date and version breaks |
| Electrical/gas ratings | Confirming compatibility for certain parts |
Why it matters
Using the exact model number helps us match the correct Kenmore Elite dryer parts for your unit, such as the lint filter ADQ56656401 or the dryer drum belt 4400EL2001F. Small model variations can change which control board, thermostat, or belt fits.
Quick tip if the label is hard to read
- Wipe the label gently with a damp cloth and mild soap
- Take a close-up photo and zoom in
- Compare the characters carefully (for example, 0 vs O)
For more model identification details and diagrams, use the owner's manual.
Last updated: February 2026
What is the lifespan of a Kenmore dryer?
A Kenmore dryer typically lasts 10 to 13 years. With consistent airflow maintenance (lint screen, lint housing, and venting) and prompt repair of wear items like belts and rollers, many Kenmore Elite dryers such as model 79691573210 reach the upper end of that range.
Typical lifespan and what changes it
Most dryers fail early due to restricted airflow, overheating, or drum-drive wear. These factors have the biggest impact on lifespan:
- Vent restriction (long dry times, higher heat stress)
- Lint buildup in the lint screen housing and blower area
- Overloading (extra strain on the drum belt, idler pulley, and rollers)
- High-heat cycles used constantly instead of sensor/normal cycles
- Delayed repairs when you hear squealing, thumping, or grinding
Maintenance that extends dryer life
Use these habits to keep your Kenmore Elite dryer running longer:
- Clean the lint screen every load and wash it occasionally to remove residue
- Inspect and clean the lint duct and venting regularly (more often with pets)
- Keep loads medium-sized so the drum turns freely
- Stop using the dryer if you smell burning or notice repeated overheating
- Follow the care and cleaning schedule in the owner's manual
Parts that commonly limit lifespan (and what they do)
Wear parts are normal on a dryer; replacing them on time prevents bigger damage.
| Symptom | Common wear area | Example part for this model |
|---|---|---|
| Squealing or chirping | Idler pulley or rollers | Dryer idler pulley 4560EL3001A |
| Thumping or rumbling | Drum support rollers | Dryer drum support roller 4581EL2002H |
| Drum not turning | Drum belt | Dryer drum belt 4400EL2001F |
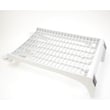
| Long dry times | Lint screen or airflow path | Lint filter ADQ56656401 |
Why it matters
A dryer that is maintained for airflow and repaired when drum-drive parts start wearing out dries faster, runs cooler, and puts less stress on the motor, thermostats, and control board. That is the difference between replacing a belt and replacing a dryer.
Last updated: February 2026
Where is the reset button on a Kenmore 79691573210 dryer?
Your Kenmore Elite dryer model 79691573210 does not use a dedicated reset button for normal operation. To reset the electronic control, we recommend doing a power reset: unplug the dryer (or switch the breaker off) for 2 minutes, then restore power to reboot the control.
How to reset it (safe, quick steps)
- Turn the dryer OFF.
- Unplug the power cord (preferred), or turn the circuit breaker OFF.
- Wait 2 full minutes (this lets the control board fully power down).
- Restore power.
- Start a cycle and confirm the display and buttons respond normally.
If the dryer still will not start after a reset
A power reset helps with a “frozen” control, but it will not fix a mechanical or airflow problem. Check these common causes next:
- Door not fully closed or door switch not engaging
- Clogged lint screen or restricted venting (overheating can stop a cycle)
- Drum not turning due to a worn belt or idler issue
- Overheating protection opening because airflow is blocked
- Control not sensing temperature correctly
Parts that commonly relate to “won’t start” or shutdown symptoms
If you find a specific failure during troubleshooting, these model-matched parts are commonly involved:
| Symptom you notice | What to inspect | Example part for 79691573210 |
|---|---|---|
| Dryer runs but drum will not turn | Belt and idler pulley | Dryer drum belt 4400EL2001F |
| Dryer stops mid-cycle, hot cabinet | Airflow and thermostats | Dryer high-limit thermostat 6931EL3003C |
| Poor airflow, lint bypassing screen | Lint screen and housing | Lint filter - dryer part by lg ADQ56656401 |
Why it matters
A “reset” clears temporary control glitches, but repeated shutdowns usually point to airflow restriction, overheating protection, or a drum drive problem. Fixing the root cause prevents repeat failures and helps drying performance.
For model-specific control behavior and indicator meanings, use the owner's manual.
Last updated: February 2026
What are common problems with Kenmore dryers?
Common problems with Kenmore dryers (including Kenmore Elite model 79691573210) are no heat or long dry times (airflow restriction or heat-system failure), drum not turning (belt or idler issue), loud thumping/squealing (rollers or belt wear), and stopping mid-cycle (overheating protection). For model-specific operating checks and error displays, use the owner's manual.
Most common symptoms and likely causes
- Clothes take too long to dry: lint buildup, crushed/blocked vent, restricted lint screen housing
- Dryer runs but won’t heat (gas models): igniter, thermostats, thermistor, gas valve issues
- Drum won’t turn: worn/broken belt, failed idler pulley, worn drum support rollers
- Loud noise (squeal, rumble, thump): worn rollers, belt wear, debris near blower wheel
- Stops mid-cycle or shuts off: overheating from poor airflow, high-limit thermostat opening
Parts that commonly fix these issues on model 79691573210
If your symptom matches, these are frequently replaced wear or heat-control parts for this model:
| Symptom | Common part to check | Example part on this model |
|---|---|---|
| Drum not turning | Drum belt | Dryer drum belt 4400EL2001F |
| Squealing or rumbling | Drum support rollers | Dryer drum support roller 4581EL2002H |
| No heat or overheating behavior | High-limit thermostat | Dryer high-limit thermostat 6931EL3003C |
| Poor drying and lint leaks | Lint filter | Lint filter - dryer part by lg ADQ56656401 |
Quick checks we recommend before replacing parts
- Clean the lint screen and confirm it seats correctly in the housing
- Inspect the vent path for kinks, crushing, or heavy lint buildup
- Run a timed dry cycle and confirm strong airflow at the outside vent hood
- Listen for belt slip (motor runs, drum does not) or roller rumble (low growl)
- If the dryer is gas, stop and contact a qualified technician if you smell gas
Why it matters
Most “dryer problems” start as airflow problems. Restricted airflow makes drying slow, triggers overheating protection, and can shorten the life of thermostats, the thermistor, and the motor.
Last updated: February 2026
Why is my Kenmore 79691573210 dryer not heating but runs?
If your Kenmore Elite dryer model 79691573210 tumbles but does not heat, the most common causes are restricted airflow (lint buildup or a clogged vent), a failed temperature-sensing part (thermistor/thermostat), or a gas-ignition problem on gas models. Start with airflow checks, then test heat components.
Quick checks we recommend first
- Clean the lint screen and confirm it seats correctly in the housing.
- Inspect and clear the entire vent path (dryer outlet, vent hose, wall duct, exterior hood).
- Run a timed dry cycle and verify the heat setting is not “air fluff” or “no heat.”
- If the load takes longer than normal to dry, treat that as a strong vent restriction clue.
- If you smell gas but get no heat (gas model), stop and have the burner system checked.
Parts that commonly cause “runs but no heat”
On this Kenmore 79691573210 platform, these parts are frequent suspects when airflow is good:
| Symptom | Most likely area | Example part on this model |
|---|---|---|
| No heat, cycles seem normal | Temperature sensing | Dryer thermistor AGM30045804 |
| Overheats then stops heating | Safety temperature limit | Dryer high-limit thermostat 6931EL3003C or dryer high-limit thermostat 6931EL3004B |
| Weak airflow, long dry times | Lint path restriction | Lint filter - dryer part by lg ADQ56656401 or lg dryer lint screen housing MCK49049101 |
| Gas model: igniter never glows | Ignition system | Lg dryer burner igniter 5318EL3001A |
Why airflow matters (even when the dryer runs)
Dryers are designed to shut down heat when temperatures rise too fast. A clogged vent or lint restriction traps heat, which can trip safety devices and leave you with a dryer that tumbles but will not heat consistently.
Where to find model-specific guidance
For cycle settings, diagnostic hints, and maintenance steps specific to model 79691573210, use the owner's manual. For Kenmore Elite fault code help, use our Kenmore elite dryer error codes guide.
Last updated: February 2026