Owner’s manual
 Error Codes
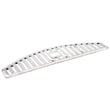

How to remove bottom grill from KitchenAid refrigerator?
To remove the bottom grille (base grille) on your KitchenAid KFIS25XVMS1 bottom-mount refrigerator, grasp the grille firmly and pull it straight toward you until it releases from the clips. Line it back up and press it in to reinstall; it snaps into place. See the owner's manual for the exact grille location and illustrations.
- Unplug the refrigerator if you will be cleaning or working near wiring.
- Stand in front of the unit and locate the base grille at the very bottom.
- Place both hands near the ends of the grille for even pressure.
- Pull the grille straight toward you (do not pry outward from one corner).
- If it feels stuck, wiggle gently side-to-side while pulling forward.
- To reinstall, align the tabs/clips and push until it snaps in.
Removing the base grille is common for routine maintenance and access.
| Task | Why remove the grille | What to do next |
|---|---|---|
| Clean condenser area | Helps cooling efficiency | Vacuum dust behind the grille |
| Level the refrigerator | Helps doors close properly | Adjust front leveling screws |
| Door removal service | Access step in the procedure | Follow hinge and wiring steps |
A properly installed base grille helps protect the condenser area from debris and keeps airflow where it belongs. If the grille is loose or not fully snapped in, you can get extra noise, reduced efficiency, or faster dust buildup.
If your home is dusty, greasy, or you have pets, vacuum the grille and the open areas behind it. This helps the refrigerator run more efficiently and can reduce warm-temperature complaints.
Last updated: February 2026
What are the disadvantages of a bottom freezer refrigerator?
Bottom-freezer refrigerators like the KitchenAid KFIS25XVMS1 make fresh food easy to reach, but the tradeoffs are real: you bend more for frozen items, deep freezer drawers can hide food, and some designs add complexity around ice, drainage, and door sealing. For model-specific features and settings, use the owner's manual.
- More bending and lifting: frozen foods sit low, so heavy items (meat, bulk bags) are harder to access.
- Deep drawer organization: items stack and get buried unless you use bins or dividers.
- Freezer access feels slower: you often pull out a full drawer to reach items in back.
- Ice and water systems add maintenance (on models with dispensers): air in the line, filter restrictions, and door-open time can affect performance.
- Drain and defrost issues can be messier: when a drain clogs, water can end up where you notice it (floor, base grille area).
Bottom-freezer designs are usually best when you use the refrigerator section more than the freezer. If your household grabs frozen items frequently, the extra bending and drawer-pulling can feel inconvenient.
| Feature | Bottom freezer refrigerator | Top freezer refrigerator |
|---|---|---|
| Fresh food access | Easier (eye level) | More bending |
| Frozen food access | More bending | Easier |
| Freezer organization | Deep drawers, can bury items | Shelves, easier visibility |
| Typical cost | Often higher | Often lower |
- Keep everyday frozen items in the top basket or front of the drawer.
- Use small bins to group foods (breakfast, snacks, meats).
- Minimize door-open time; it helps temperature stability and ice production.
- If you see moisture at the door seal area, use the humidity control feature as described in the manual.
- If water flow at the dispenser slows after a filter change, flush the system per the manual instructions.
Most “bottom freezer” complaints are really about ergonomics and organization. A few simple habits (binning, loading strategy, and correct control settings) make the layout work better and help prevent temperature swings that can affect ice and food quality.
Last updated: February 2026
What's the life expectancy of a KitchenAid refrigerator?
Most KitchenAid refrigerators typically last 10 to 17 years. For your KitchenAid KFIS25XVMS1 bottom-mount refrigerator, regular maintenance (cleaning coils, keeping door gaskets sealing, and fixing cooling issues early) is what most directly determines whether you land closer to 10 years or closer to 17.
A refrigerator’s lifespan is usually limited by wear on the sealed system (compressor, condenser, dryer, tubing) and by airflow and defrost performance.
- Typical KitchenAid lifespan: 10 to 17 years
- Common “life-extenders”: clean condenser area, stable temperatures, good door sealing
- Common “life-shorteners”: dirty condenser, torn gaskets, restricted airflow, frequent warm-ups
These steps reduce compressor run time and help prevent temperature swings.
- Vacuum dust from the condenser area and surrounding vents regularly.
- Keep the doors closing squarely; avoid overloading door bins.
- Check for air leaks and clean the sealing surfaces on the gaskets.
- Keep freezer drawers fully shut so the evaporator fan can move air correctly.
- Address unusual noises, warming, or heavy frost early instead of “waiting it out.”
| What you notice | What it usually means | What to do first |
|---|---|---|
| Food soft in freezer | Cooling system working too hard or airflow issue | Clean condenser area; confirm vents are not blocked |
| Moisture on door edges | Warm air leaking in | Inspect and clean gaskets; confirm doors align |
| Loud humming, long run times | High load on compressor | Clean condenser; verify temps are set correctly |
| Frost buildup in freezer | Defrost or airflow problem | Check door sealing; clear blocked vents |
A refrigerator that runs hotter or longer than normal puts extra stress on the compressor and sealed refrigeration system. Keeping airflow and door sealing in good shape is the simplest way to protect the most expensive components.
- Warranty coverage details for the sealed refrigeration system are listed in the owner's manual.
Last updated: February 2026