Owner’s manual



What is the capacity of the LG wm8000hva?
The LG WM8000HVA washer has a 5.2 cu. ft. capacity, which is considered a mega-capacity front-load washer size for handling larger loads like bedding and towels. For cycle and load-size guidance specific to this model, use the WM8000HVA owner's manual.
What 5.2 cu. ft. means in everyday use
A 5.2 cu. ft. drum is designed to wash bulky items and larger family loads more efficiently.
- Fits larger loads (fewer cycles per week for many households)
- Handles bulky items like comforters more easily than smaller-capacity washers
- Helps reduce overloading when you sort by fabric type (towels, denim, delicates)
- Works best when you load loosely so items can tumble and rinse thoroughly
Loading tips (to get the best cleaning and spinning)
Overloading is one of the most common reasons for poor cleaning, vibration, or out-of-balance spinning.
| Load type | How full to load | Quick tip |
|---|---|---|
| Everyday mixed load | About 3/4 full | Leave space at the top for tumbling |
| Towels/denim | About 2/3 full | Avoid packing tightly |
| Bulky items (bedding) | About 1/2 to 2/3 full | Wash 1 large item plus a few small items |
Why it matters
Capacity affects how you load the washer, which directly impacts wash performance, rinse quality, and spin balance. Using the right fill level helps protect key components like the door lock and drain system over time.
Last updated: February 2026
How do I tell what model LG washer I have?
To tell what LG washer model you have, we look for the rating label on the washer itself. On LG front-load models like the WM8000HVA, the model number is most often printed on a sticker around the door opening (door jamb) or on the back panel; match that full model number when ordering parts.
Where to find the model number on an LG washer
Check these common label locations (use a flashlight and read the full string, including any letters):
- Inside the door opening on the cabinet frame (door jamb or inner rim)
- On the back of the washer cabinet
- Along the side panel near the bottom edge
- Sometimes behind or near the detergent dispenser area
What to write down (so parts fit)
Record the details exactly as shown on the label:
- Model number (example: WM8000HVA)
- Serial number (helps confirm production version)
- Any suffix letters or extra characters after the model number
- Your washer type (front-load vs. top-load)
Quick check: model number vs. part number
Use this as a simple guide when you are shopping or troubleshooting.
| Item | What it identifies | Example format |
|---|---|---|
| Model number | The exact washer you own | WM8000HVA |
| Part number / part ID | The replacement component | EBF61315802 |
Why it matters
LG often uses similar-looking cabinets across multiple washers, but internal parts (like the door lock, drain pump, or water inlet valve) can vary by model and revision. Using the exact model number helps us show the correct diagrams and compatible parts for your washer.
Helpful next step
Once you find the model number, confirm it against the identification section in the WM8000HVA owner’s manual.
Last updated: February 2026
What is the most common problem with LG washers?
The most common problems we see with LG washers (including model WM8000HVA) are drain and spin-related issues: slow or no draining from a clogged drain path, and heavy vibration from an unbalanced load. Odor and mildew around the door seal are also very common on front-load designs.
Most common issues (and what they look like)
- Drainage problems: water left in the tub, long drain times, or the cycle stopping mid-wash.
- Unbalanced load / vibration: banging, walking, or repeated attempts to spin.
- Door won’t lock or unlock: cycle won’t start, or clothes trapped after the cycle.
- Fill problems: slow fill, no fill, or temperature issues when valves stick or screens clog.
- Odor or mildew: musty smell, residue, or visible buildup around the door boot.
Quick checks you can do first
- Unplug the washer; then check the drain hose for kinks and confirm the standpipe is not clogged.
- Clean the drain pump filter area and remove coins, lint, and small items.
- Rebalance the load (mix sizes, avoid single heavy items) and run a Spin/Drain cycle.
- Wipe the door boot dry after use and leave the door slightly open between loads.
- Use the troubleshooting and maintenance steps in the WM8000HVA owner’s manual.
Common parts involved on WM8000HVA
| Symptom | Often involved part | What it affects |
|---|---|---|
| Won’t drain / drains slowly | Washer drain pump filter 383EER2001A | Restricts water flow to the pump when clogged |
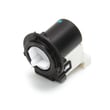
| Won’t drain / humming pump | Drain pump motor (4681EA2001T) - washer part by LG electronics 4681EA2001T | Moves water out of the tub |
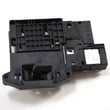
| Door won’t lock/unlock | LG washer door lock EBF61315802 | Prevents operation if the door is not secured |
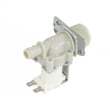
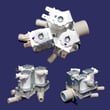
| Slow/no fill | Washer water inlet valve 5221ER1003A | Controls water entering the washer |
Why it matters
Drain and balance problems can stop cycles, leave clothes soaking wet, and strain the pump, suspension, and tub components. Catching clogs early and loading correctly helps prevent repeat failures and reduces leaks and odor.
Related help for LG washers
If the washer is shaking or not spinning up, use our LG front load washer ue error code guidance to narrow down load, leveling, and suspension causes.
Last updated: February 2026
Can you replace the drain hose on an LG washer?
Yes. On the LG WM8000HVA washer, we can replace the drain hose as a DIY repair if you’re comfortable moving the washer and removing panels to reach the pump and hose routing. Use the WM8000HVA owner’s manual for safety steps and access guidance before you start.
What to expect during the repair
Replacing a washer drain hose is straightforward once you can reach the pump area, but it usually involves some disassembly and careful re-routing so the hose does not kink or rub.
- Unplug the washer; turn off both water supplies.
- Pull the washer forward and protect the floor from water.
- Drain remaining water (expect spills when hoses are removed).
- Remove the needed panels to access the pump and hose path.
- Release hose clamps, swap the hose, and re-secure clamps.
- Route the hose exactly like the original to prevent leaks and vibration wear.
Parts that are commonly involved
If the hose is leaking at the pump connection or you find damage nearby, these related parts are often checked at the same time:
| What you’re fixing | What to inspect | Example part for WM8000HVA |
|---|---|---|
| Slow or no draining | Pump and filter area for clogs | Washer drain pump filter 383EER2001A |
| Leaks near pump | Hose-to-pump connection and clamps | (Reuse clamps if solid; replace if rusted) |
| Drain problems after hose swap | Pump operation and debris | Drain pump motor, pump housing |
Quick checks before you replace the hose
A “bad hose” symptom is often caused by a blockage or installation issue. We recommend these checks first:
- Verify the standpipe or sink drain is not backing up.
- Confirm the drain hose is not kinked or crushed behind the washer.
- Make sure the hose is not shoved too far down the standpipe (can siphon or overflow).
- Clean the pump filter if draining is slow.
- Look for pinholes or rub-through where the hose contacts the cabinet.
Why it matters
A correctly installed drain hose prevents leaks, siphoning, and drain errors. Proper routing also reduces vibration wear that can cause repeat failures.
Last updated: February 2026
What is the average lifespan of an LG washing machine?
Most LG washing machines, including the LG WM8000HVA, typically last 10 to 15 years with normal household use. Consistent maintenance, correct loading, and quick fixes for small leaks or drain issues are what most often determine whether you land closer to 10 years or closer to 15.
What affects lifespan the most
- Load size and balance: frequent overloading or unbalanced loads increase wear on shocks, bearings, and the drive system.
- Drain health: coins, lint, and debris strain the pump and can cause slow drains.
- Door seal care: residue and moisture shorten the life of the door boot and can lead to leaks.
- Water quality: hard water accelerates scale buildup on internal components.
- Ventilation between loads: leaving the door ajar helps prevent odor and mildew.
Maintenance that adds years (simple routine)
Use the cycle and care guidance in the WM8000HVA owner's manual.
- Run a monthly tub-clean routine (or the closest equivalent cycle).
- Clean the drain pump filter regularly; slow draining is a common early warning.
- Wipe the door glass and gasket folds after wash day.
- Use HE detergent and avoid overdosing.
- Level the washer and re-check if it starts walking or vibrating.
Common “wear-out” parts and what they look like
| Symptom | Likely area | Example part for WM8000HVA |
|---|---|---|
| Won’t drain, humming, or intermittent draining | Drain pump / filter | Drain pump motor (4681EA2001T) - washer part by LG electronics 4681EA2001T |
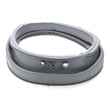
| Leaks at the door, musty smell, visible tears | Door boot (gasket) | LG washer door boot MDS47123608 |
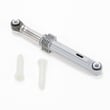
| Loud banging, excessive vibration on spin | Suspension | Washer shock absorber 383EER3001V |
Why it matters
A front-load washer can run for years past the average when we prevent the two biggest lifespan killers: chronic vibration (mechanical wear) and standing moisture/residue (seal and odor problems). Small maintenance steps reduce major repairs later.
Last updated: February 2026