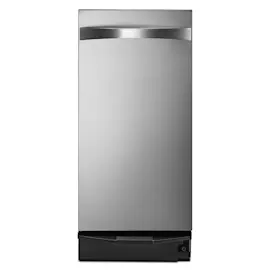
Installation guide
 Owner’s manual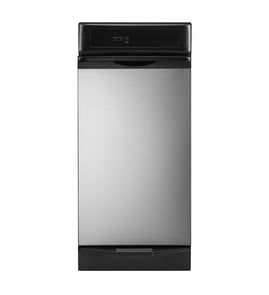



What is a common problem with trash compactors?
A common problem with the GE UCG1510N0II trash compactor is that it will not run because a safety or power condition is not met, such as the drawer not being fully closed, the ON/OFF knob being OFF or removed, or a tripped breaker. See the owner's manual for model-specific troubleshooting.
Most common issues we see (and what they look like)
- Won’t start or won’t operate: drawer not fully closed, knob switch OFF, outlet or breaker issue
- Stops after repeated cycles: thermal motor protector opens, then resets after a short cool-down
- Little or no compaction: drawer is under 1/2 full, so the ram does not travel far enough to show results
- Drawer hard to close or won’t open: trash fell behind the drawer, or the ram is not fully up
- Odors: residue in the drawer or bag area (needs cleaning and better loading habits)
Quick checks for “won’t operate” on UCG1510N0II
- Confirm the ON/OFF knob is installed and set to ON (removing the knob is a child lockout).
- Push the drawer fully closed; this model uses drawer safety switches and will not cycle unless the drawer is fully closed.
- Check power at the outlet and reset the home breaker or replace a blown fuse.
- If you compacted repeatedly, wait a few minutes for the automatic thermal motor reset to reclose.
Symptom-to-cause guide
| Symptom | Most likely cause | What to do first |
|---|---|---|
| Compactor won’t operate | Drawer not fully closed | Close drawer firmly until fully seated |
| Compactor won’t operate | Knob switch OFF or removed | Install knob; turn to ON |
| Stops after many cycles | Thermal motor protector open | Let it cool; retry |
| Little compaction | Drawer not at least 1/2 full | Add more trash; run another cycle |
Why it matters
Trash compactors are built with safety interlocks (drawer switches and a removable ON/OFF knob) to prevent operation when the drawer is open or when child lockout is enabled. Fixing these basics first prevents unnecessary parts replacement and reduces downtime.
Last updated: February 2026
Where do I find the model number on my GE trash compactor?
On your GE trash compactor (including model UCG1510N0II), the model and serial number are printed on a label on the front of the frame. You typically see it when you open the drawer or door and look at the frame opening. See the owner's manual for the exact label location illustration.
Quick ways to spot the label
- Open the compactor drawer fully and look along the front frame (the metal frame around the drawer opening).
- Check the front frame area near the top corners where labels are commonly placed.
- Use a flashlight; the label is often small and can blend into the frame.
- Wipe the frame with a damp cloth first; grease and dust can hide the print.
- Write down both the model number and serial number; you will need both for parts lookup and service.
What the model number helps with (and why it matters)
The model number ensures we match the correct GE trash compactor parts and documentation for your exact build. Even within the same series, small design changes can affect fit, wiring, and mounting.
Model number vs. serial number
| Item | What it identifies | When you use it |
|---|---|---|
| Model number | The exact product design and parts list | Ordering parts, checking diagrams, using the correct manual |
| Serial number | The specific unit and production run | Service history, warranty paperwork, production date reference |
If the label is missing or unreadable
- Look for a second rating label on the frame area just inside the opening.
- Take a clear photo and zoom in; angled lighting often makes faded text readable.
- If you still cannot read it, use our guide: how to find your appliance model number (and what it means for parts).
Last updated: February 2026
How to reset GE trash compactor?
On the GE UCG1510N0II trash compactor, the “reset” is usually the automatic thermal motor reset. If the motor overheats after repeated cycles, wait a few minutes for it to reset, then start a new cycle by lifting and releasing the foot pedal (with the drawer fully closed). See the UCG1510N0II owner's manual for the exact operating steps.
Quick reset checklist (most common fixes)
- Turn the ON/OFF knob to ON.
- Confirm the drawer is fully closed (the drawer safety switch prevents operation if it is not).
- If it was run repeatedly, wait a few minutes for the thermal motor reset to reclose.
- Lift the foot pedal up until the cycle starts, then release it.
- If the drawer will not open because the ram is down, lift and release the foot pedal to let the ram complete the cycle.
What “reset” means on this model
This compactor protects the motor with an automatic thermal reset. When the motor gets too hot, the protector opens the motor circuit; after a short cool-down, it closes automatically and the compactor can run again.
Typical symptoms and what to do
| Symptom | Likely cause | What we do next |
|---|---|---|
| Compactor won’t run at all | Overheat reset open, drawer not fully closed, or knob OFF | Wait a few minutes; close drawer firmly; set knob to ON |
| Cycle won’t start | Foot pedal not lifted long enough | Lift pedal until you hear the cycle start |
| Drawer won’t open | Ram not fully up | Lift and release foot pedal to finish the cycle |
Why it matters
Resetting the right way prevents repeated overheating, protects the drive motor, and avoids forcing the drawer or ram mechanism (which can lead to broken switches or misalignment).
Last updated: February 2026
Why can't I press the trash compactor button?
If you can’t start your GE trash compactor model UCG1510N0II, the most common cause is a safety interlock not being satisfied: the ON/OFF knob is OFF or removed, the drawer is not fully closed, or debris behind the drawer is preventing the door switch from engaging. See the UCG1510N0II owner's manual.
Quick checks that usually fix it
- Make sure the ON/OFF knob is installed and turned to ON (the compactor will not run with the knob OFF or removed).
- Push the drawer fully closed; the compactor will not start unless the drawer is firmly shut.
- Pull the drawer out and look for trash that fell behind the drawer; remove anything blocking closure.
- Start the cycle correctly: lift the foot pedal up until you hear the cycle start, then release.
- If you ran several cycles back-to-back, wait a few minutes for the thermal motor reset to automatically reclose.
What to do step-by-step
- Turn the knob to OFF and keep hands clear of the ram area.
- Open the drawer and remove it if needed to clear items behind the drawer.
- Reinstall the drawer and close it firmly.
- Turn the knob to ON.
- Lift the foot pedal up momentarily until the cycle starts.
Symptoms and likely causes
| What you notice | Most likely cause | What we do next |
|---|---|---|
| Nothing happens when you try to start | Knob is OFF or removed (child lockout) | Install knob, turn to ON |
| Drawer won’t close all the way | Trash fell behind drawer | Remove drawer, clear debris |
| Starts sometimes, then won’t | Thermal motor reset opened | Wait a few minutes, retry |
| You’re pressing controls but no cycle | Start method not followed | Use foot pedal start sequence |
Why it matters
The UCG1510N0II uses safety switches to prevent operation when the drawer is open or not fully latched. Clearing obstructions and confirming the knob and start sequence protects the motor and prevents the ram from moving unexpectedly.
Last updated: February 2026
What does UCG1510N0II stand for?
UCG1510N0II is the GE model number for your trash compactor. It is the identifier we use to pull the correct parts diagrams, installation dimensions, and operating instructions for that exact unit, so repairs and fit are matched correctly.
What the model number means (in practical terms)
GE model numbers like UCG1510N0II are primarily used for identification, not as a phrase you “translate.” When you use the full model number, you get the right information for your specific compactor.
We use it to:
- Match the correct trash compactor parts list and diagrams
- Confirm the correct installation cutout and clearances
- Reference the right operating and safety instructions
- Reduce the risk of ordering a part that does not fit
Where to find UCG1510N0II on the appliance
The model and serial tag is located on the compactor frame.
Typical location details:
- Open the drawer to view the front of the frame
- Look for a label that lists both model and serial numbers
- Write the numbers down for future parts lookups
The label location is shown in the owner's manual.
Model number vs. serial number
| Item | What it’s used for | Why you need it |
|---|---|---|
| Model number (UCG1510N0II) | Parts fit, diagrams, installation specs | Ensures compatibility for repairs and installation |
| Serial number | Unit identification and production info | Helps distinguish units with similar model families |
Why it matters
Trash compactors often share similar styling across a series, but small differences in wiring, switches, drawer components, and mounting hardware can change by model. Using UCG1510N0II keeps your troubleshooting and installation steps aligned with the correct documentation.
If you are planning a cabinet opening or reinstalling the unit, follow the cutout and clearance requirements in the installation guide.
Last updated: February 2026