- Kenmore refrigerator water filters
- Whirlpool refrigerator water filters
- Samsung refrigerator water filters
- GE refrigerator water filters
- LG refrigerator water filters
- Frigidaire refrigerator water filters
- KitchenAid refrigerator water filters
- Maytag refrigerator water filters
- Kenmore Elite refrigerator water filters
- Estate refrigerator water filters
- GE Profile refrigerator water filters
- Amana refrigerator water filters
- Bosch refrigerator water filters
- Dacor refrigerator water filters
- Electrolux refrigerator water filters
Top DIY repair help
View All Repair Categories
Appliances
Lawn & Garden
Power Tools
Home Improvement
Sports & Leisure
Heating & Cooling
Quick Links
How to replace a trash compactor power switch
less than a minute readAug 02Lyle Weischwill
Repair time and Difficulty
30 minutes or less
Tools Required
- Phillips screwdriver
- Pliers
- Work gloves

This DIY repair guide explains how to replace the power switch on a trash compactor. Located in the control panel, the power switch turns on the trash compactor when you turn the knob. If the power switch breaks, the trash compactor won't start at all. Replace a broken power switch with the manufacturer-approved replacement part.
This repair procedure shows how to replace the power switch on Kenmore, Whirlpool, KitchenAid, JennAir and Maytag trash compactors.
Instructions
- 1. Disconnect electrical power
Shut off the house circuit breaker or unplug the trash compactor to disconnect electrical power.
- 2. Release the front control panel
Open the drawer fully.
Turn the power switch to Off position and pull the control knob off the power switch.
Remove the mounting screws at the top of the control panel.
Pull the control panel out and set it on its face. The wires are still attached to the back of the control switches on the control panel.

PHOTO: Open the drawer. 
PHOTO: Remove the control knob. 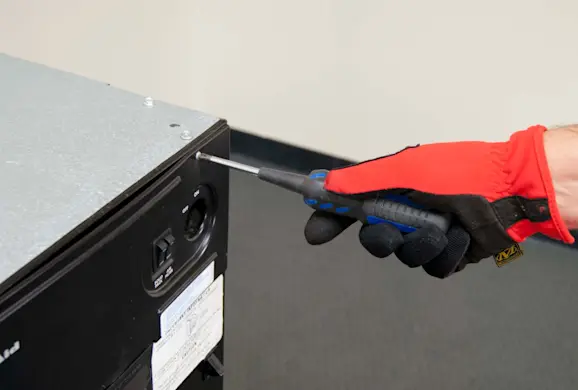
PHOTO: Remove the control panel screws. 
PHOTO: Fold the control panel down.
- 3. Remove the power switch
Note the location of the wires connected to the back of the power switch or take a digital photo.
Pull the wires off the power switch.
Remove the circular mounting nut on the front of the power switch.
Pull the power switch from the back of the control panel.

PHOTO: Disconnect the power switch wires. 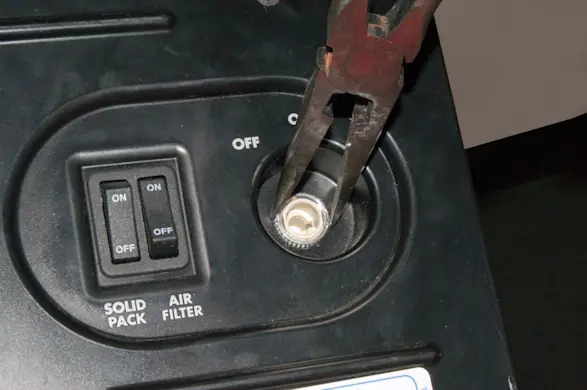
PHOTO: Loosen the switch mounting nut. 
PHOTO: Remove the mounting nut. 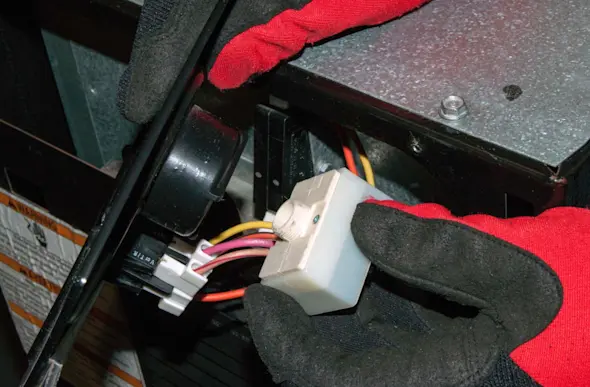
PHOTO: Remove the power switch.
- 4. Install the new power switch
Position the new power switch in the control panel and secure it using the circular mounting nut.
Connect the wires on the back of the power switch, using the digital photo or your notes for reference.

PHOTO: Install the new power switch. 
PHOTO: Reinstall the power switch mounting nut. 
PHOTO: Connect the power switch wires.
- 5. Reinstall the control panel
Position the control panel on the front of the trash compactor.
Secure the control panel with the mounting screws.
Reinstall the control knob on the front of the power switch.
Shut the drawer.

PHOTO: Reinstall the control panel. 
PHOTO: Reinstall the control knob.
- 6. Restore power
Reset the house circuit breaker or plug the trash compactor back into the wall outlet.