Trash Compactor: Why is the trash compactor's ram stuck in the down position?
A broken drive gear and sprocket chain, stripped power nuts or a faulty top limit and directional switch can cause the compactor ram to stick in the downward position, and you won't be able to open the trash compactor drawer.
Wearing gloves to protect your hands, pull the trash compactor out of the cabinet and unplug the power cord so you can examine components and find the cause of the failure. If the container is full of trash, try to remove the container from the drawer to prevent spilling trash and liquids on the floor while you troubleshoot the problem. (Remember to protect the flooring under the compactor or move it to an appropriate work area first.) Remove the top cover and try to lift the compactor ram manually.
If you can lift the ram, hold it up so you can pull open the drawer and remove the trash container. Use a helper if necessary. Check the power nuts to see if they're stripped. If the power nuts grip the power screw threads, the power screws will rotate as you lift the ram. If the power screws don't rotate, then the power nuts are stripped or damaged and should be replaced. If the power nuts are okay, remove the drawer and tilt the trash compactor onto its front panel. Remove the bottom cover and examine the drive sprockets, drive gears and chain. Replace the chain or any gear or sprocket parts that are broken.
If all drive components are okay, then a faulty switch likely caused the ram to stick in the downward position. The motor stalls when the ram reaches the bottom of its travel. Because the ram stayed down, a faulty top limit and directional switch or bad motor centrifugal likely prevented the motor from restarting to raise the ram.
First, use a multimeter to check for continuity through the internal contacts in the top limit and directional switch. When the ram is in the downward position, internal switches in the top limit and directional switch send current from the violet wire to the brown wire and from the yellow wire to the gray wire connected to the top limit and directional switch. Check for continuity between the top limit and directional switch spades for the brown and violet wires then check for continuity between the spades for the yellow and gray wires. If the meter measures infinite resistance through either of those internal switch contacts, replace the top limit and directional switch. If the top limit and directional switch in your trash compactor differs from the one described here, refer to the tech sheet for your compactor to determine how to check the top limit and directional switch. You can typically find the tech sheet taped to the inside of the front panel or taped to the back panel of the trash compactor.
If the top limit and directional switch is okay, check the motor centrifugal switch. The motor centrifugal switch closes its internal contact to allow current flow between the blue and brown wires when the motor isn't running. The motor won't restart in the upward direction if the internal motor centrifugal switch is broken. Check for continuity between the motor centrifugal switch spades for the blue and brown wires. If the meter measures infinite resistance, replace the motor centrifugal switch. If the motor centrifugal switch in your trash compactor differs than the one described here, refer to the tech sheet for your compactor to determine how to check the motor centrifugal switch. Reassemble the trash compactor after finding and fixing the failure that caused the ram to stick in the down position. Plug the trash compactor back in and reinstall the compactor in the cabinet.
If you can't manually lift the ram and the container is full of trash, carefully tilt the trash compactor forward and remove the bottom panel. Avoid spilling liquids if possible. Use a helper to steady the trash compactor while removing the bottom panel.
With the compactor still tilted forward, remove the drive mount assembly screws and push the drive mount forward to release the chain from the power screw sprockets. Set the compactor upright and manually lift the ram up so you can pull out the drawer and remove the trash container. Next, remove the drawer, tilt the trash compactor over on its front panel and examine the gear and sprocket components at the bottom of the compactor. Replace any gear or sprocket parts that are broken.
If you still can't pull the ram up after releasing the chain, then a seized power screw is likely preventing the ram from moving. Lay the trash compactor on its side; be aware that any liquids in the trash container will spill out when you do this. Remove the power screw nut, sprocket, washers, bearings and support bracket from each power screw. This will release the power screws from the bottom of the drawer housing so you can lift the ram and open the drawer. Set the trash compactor upright, lift the ram, open the drawer and remove the trash container. Clean up any spilled liquid.
Remove the drawer and examine the power screw parts. Replace any worn, bent or damaged power screw parts. Lubricate replacement parts with grease to prevent the power screws from seizing up. Reassemble the trash compactor, plug it back in and reinstall it in the counter.

THESE REPAIRS MAY HELP SOLVE YOUR TRASH COMPACTOR PROBLEM
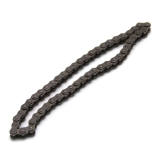
Replace the trash compactor drive gear and sprocket drive chain
The drive gear and sprocket drive chain assembly is to transfers the motor's energy to the power screws. Replace the drive gear and sprocket drive chain if the ram won't move when the motor runs and the chain is broken.
Trash compactor drive gear and sprocket drive chain
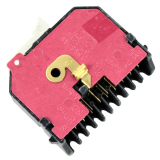
Replace the trash compactor motor centrifugal switch
The motor centrifugal switch determines the direction of the motor, which controls the direction of the trash compactor's ram. When the ram reaches its lowest position, the motor pauses, the motor centrifugal switch changes position, the motor reverses, and the ram moves upward. Replace the centrifugal switch if the motor stops running when the ram reaches its lowest position. If your compactor has an extra pack/solid pack switch, the ram stays down until you start the compactor or turn off the extra pack. Turn off the extra pack switch and start the trash compactor. If the motor won't run, replace the motor centrifugal switch.
Trash compactor motor centrifugal switch
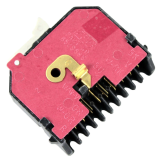
How to replace a trash compactor motor centrifugal switch
If your trash compactor's ram moves down but won't go back up, the motor centrifugal switch could be the problem. This easy-to-follow repair guide shows how to replace a trash compactor motor centrifugal switch.
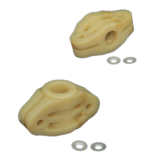
Replace the trash compactor power nuts
The power nuts are fixed to the sides of the ram. The power screws rotate inside the power nuts to move the ram down and up. The ram will not move if the power nuts are damaged or stripped. If the power screws rotate and the ram does not move, replace the power nuts.
Trash compactor power nuts
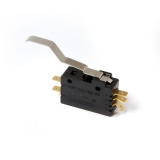
Replace the trash compactor top limit and directional switch
The top limit and directional switch stops the drive motor when the ram reaches its top travel limit. This switch also controls supply current going to the motor start windings to turn the motor clockwise to lower the ram and counter clockwise to lift the ram. Replace the top limit and directional switch if you hear rapid tamping when the ram returns to the top and the motor continues to run. You may also need to replace the top limit and directional switch if the motor won't start or the motor won't reverse directions when the reaches its bottom travel limit.
Trash compactor top limit and directional switch
Most common symptoms to help you fix your trash compactors
Choose a symptom to see related trash compactor repairs.
Main cause: faulty drawer tilt switch …
Main causes: lack of power, faulty drawer safety switch, bad power switch, momentary start switch failure, bad drive mot…
Main causes: bent drawer support rollers, damaged trash container…
Main cause: broken top limit and directional switch…
Main causes: stuck foot pedal, bad momentary start switch, power switch failure…
Main causes: stripped or broken power nuts, broken or disconnected drive gear and sprocket chain, damaged drive parts…
Main causes: broken drive gear and sprocket chain, stripped power nuts, faulty top limit and directional switch…
Most common repair guides to help fix your trash compactors
These step-by-step repair guides will help you safely fix what’s broken on your trash compactor.
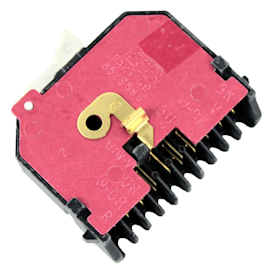
How to replace a trash compactor motor centrifugal switch
If the trash compactor ram won’t return to the top position, replace the motor centrifugal switch by following the instr…
How to replace a trash compactor momentary start switch
The momentary start switch starts the motor when you lift the foot pedal. This repair guide shows how to replace the swi…
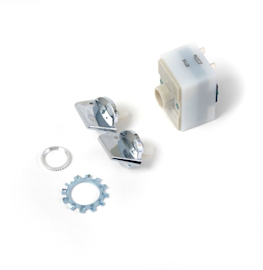
How to replace a trash compactor power switch
If the trash compactor won’t power up, use the steps in this repair guide to replace the power switch.…
Effective articles & videos to help repair your trash compactors
Use the advice and tips in these articles and videos to get the most out of your trash compactor.

Learn about all the convenient features on our Sears PartsDirect website that make your parts purchases easier.…

Get answers to frequently asked questions about Sears and Sears PartsDirect.…
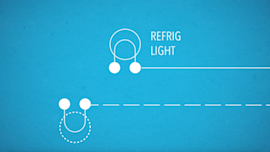
Learn some of the most common symbols found in a wiring diagram and what they mean.…