Installation guide
 Owner’s manual
Where can I find my Frigidaire dryer model number?
On your Frigidaire dryer model GLEQ642AS2, the model number is printed on the serial plate located on the left side of the door opening. Open the dryer door and look along the inside edge of the cabinet opening to find the model and serial information.
- Open the dryer door fully.
- Look on the left inside door opening (the cabinet frame, not the door itself).
- Find the serial plate or label with multiple lines of text.
- Record both the model number and serial number for parts lookup and service.
- Match the model exactly (for example, GLEQ642AS2) when ordering parts.
| Label item | What it’s used for |
|---|---|
| Model number | Ensures you get the correct Frigidaire dryer parts and diagrams |
| Serial number | Helps identify production details for service and compatibility |
| Electrical ratings | Useful when checking power requirements and troubleshooting |
We use the model number to pull the correct parts list and diagrams for your exact dryer configuration. Even small model-number differences can change which belt, heating components, or thermostats fit.
If you’re ordering common wear items, confirm the model number first, then compare the part description to your symptom:
- Squealing or thumping: drum support parts such as a bearing or glide
- Dryer won’t tumble: a worn or broken belt
- No heat or overheating: heating circuit parts such as a thermal limiter or thermostat
For more details on where Frigidaire places the identification plate, see the GLEQ642AS2 owner’s manual.
Last updated: February 2026
How much does it cost to replace a heating element in a Frigidaire dryer?
For a Frigidaire GLEQ642AS2 dryer, the total cost to replace the heating element is usually $150 to $350 (part plus labor). If you do it yourself, the part cost is typically the main expense; labor is what drives the total higher.
Costs vary by location and service rates, but this is a realistic range for an electric dryer heating repair.
- Heating element part: commonly $80 to $180
- Service call / diagnostic: commonly $75 to $125
- Labor (if not included in service call): commonly $75 to $175
- Total installed (most common): $150 to $350
| Scenario | What you pay for | Typical total |
|---|---|---|
| DIY replacement | Part only | $80 to $180 |
| Pro repair (best case) | Service call includes labor + part | $150 to $250 |
| Pro repair (higher end) | Service call + labor + part | $250 to $350 |
On the GLEQ642AS2, “runs but won’t heat” is not always a bad element. We recommend these quick checks first (they often save money):
- Confirm the dryer has full power; many electric dryers use two fuses/breakers, and one can trip while the drum still turns.
- Clean the lint screen and check for airflow restrictions.
- Verify the exhaust duct is 4-inch metal ducting and not crushed or clogged.
- If the dryer overheated, a thermal limiter can trip and must be replaced after the underlying airflow problem is corrected.
If you’re already opening the cabinet, these are common related parts to consider based on symptoms:
- Frigidaire dryer heating element assembly 131553900 (no heat, element visibly broken)
- Dryer thermal limiter 134120900 (overheat condition, dryer shuts down or won’t heat)
- Kelvinator dryer high-limit thermostat 3204267 (overheating, cycling heat problems)
A restricted vent can cause overheating, longer dry times, and repeated failures of heat-related parts. Following the venting limits and safety guidance in the GLEQ642AS2 installation guide helps the dryer heat correctly and protects the new part.
Last updated: February 2026
What does code e64 mean on a Frigidaire dryer?
On a Frigidaire GLEQ642AS2 dryer, error code E64 points to a heating circuit problem, most commonly the heating element not heating correctly (open element, wiring issue, or a related safety device opening the circuit). Use the GLEQ642AS2 owner’s manual to confirm the exact code behavior for your control.
- Unplug the dryer (or switch off the breaker) before opening any panels.
- Clean the lint screen and make sure airflow is strong at the outside vent.
- Inspect the exhaust duct for kinks, crushing, or heavy lint buildup.
- If the drum turns but there is no heat, focus on the heater circuit components.
- If the dryer overheats or shuts down, check safety thermostats and the thermal limiter.
E64 is usually triggered when the control senses the heater is not operating as expected.
| Likely cause | What you typically notice | Parts that often relate |
|---|---|---|
| Failed heating element | Runs but no heat | Frigidaire dryer heating element assembly 131553900 |
| Open thermal limiter | No heat, may appear after overheating event | Dryer thermal limiter 134120900 |
| High-limit thermostat opening | Heat cuts in and out, overheating symptoms | High-limit thermostat (model-specific) |
| Vent restriction | Long dry times, hot cabinet, repeated heat faults | Venting and lint buildup |
Restricted venting can overheat the heater housing and cause safety devices (like a thermal limiter or high-limit thermostat) to open. Fixing airflow issues first prevents repeat failures after replacing a heating part.
If airflow is good and the dryer still will not heat, testing the heater circuit with a meter is the next step. Many repairs involve replacing the heater assembly or a one-time thermal safety device. For grounding and safe service practices, follow the installation guide.
Last updated: February 2026
Why does my Frigidaire dryer make a grinding sound?
A grinding sound in your Frigidaire GLEQ642AS2 dryer almost always comes from the drum support system wearing out, most commonly the rear drum bearing or the front drum glides/felt. As the drum turns, worn parts let metal rub or the drum scrape the cabinet.
- Rear drum bearing worn: steady grind or rumble that gets louder as the drum warms up
- Front drum glides worn: scraping or grinding at the front lip of the drum
- Felt seal worn or bunched: rubbing, thumping, or a “sandpaper” sound
- Foreign object in drum (coin, zipper, fastener): intermittent scraping that changes with load
- Blower wheel issue: grinding or rattling that can happen even with little clothing in the drum
- Stop the dryer and spin the drum by hand. A rough, gritty feel points to bearing or glide wear.
- Run a short cycle empty. If the noise remains, it is usually not the load.
- Inspect the drum for scuffs and check pockets for coins and clips (the manual calls out foreign objects as a common cause of drum noise).
- Listen for location:
- Front area: glides/felt
- Rear area: bearing/bracket
- Lower front: blower housing area
| Symptom | Likely wear part | Example part for GLEQ642AS2 |
|---|---|---|
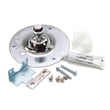
| Grinding/rumbling from rear | Drum bearing or bearing kit | Dryer drum bearing 131825900 or dryer drum bearing kit 5303281153 |
| Scraping at front rim | Drum glide or felt seal | Dryer drum glide 137513300 or lower felt 5303937183 |
Grinding is friction. If you keep running the dryer, the drum can wear through glides/felt, damage the drum surface, and increase strain on the motor and belt.
- Use the GLEQ642AS2 owner's manual for operating and care guidance, including avoiding common causes of drum noise.
Last updated: February 2026