Installation guide
 Owner’s manual



What is the average life of a Kenmore dryer?
A Kenmore dryer typically lasts 10 to 13 years. With consistent care (good airflow, clean lint system, and correct installation), many Kenmore gas dryers like model 11072812101 run 15 years or longer before major repairs become common.
What affects dryer lifespan the most
- Airflow and venting: A restricted vent makes the dryer run hotter and longer.
- Lint control: Cleaning the lint screen every load reduces heat stress.
- Leveling and installation: An unlevel dryer can affect tumbling and sensor cycles.
- Operating environment: Very cold spaces can extend run times and increase wear.
- Wear items: Belts, rollers, idler pulleys, and thermostats are normal maintenance parts.
Maintenance checklist we recommend
- Clean the lint screen after every load.
- Inspect and clean the exhaust duct regularly; use 4-inch heavy metal venting, not plastic or foil.
- Keep the area around the dryer clear of flammables.
- Confirm the dryer sits level on a solid floor.
- Follow the care and troubleshooting steps in the 11072812101 owner's manual.
Common “life-extending” repairs (typical on older dryers)
| Symptom | Likely wear item | Example part for this model |
|---|---|---|
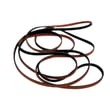
| Drum won’t turn or slips | Belt or idler pulley | Dryer drum belt 341241 |
| Runs but heat cuts out | Operating thermostat or thermal cut-off | WP3387134 or W11050897 |
| Starts only with door pressure | Door switch | WP3406107 |
Why it matters
A dryer that takes longer to dry is not just inconvenient; it usually means poor airflow or a failing component, which increases heat stress on the burner system, thermostats, and motor. Keeping venting correct and replacing wear parts on time is the simplest way to reach the full expected lifespan.
Last updated: February 2026
What are common problems with Kenmore dryers?
Common problems on the Kenmore gas dryer model 11072812101 include: the dryer will not start, no heat, long dry times from poor airflow, unusual noises from worn drum support parts, and door issues. Our 11072812101 owner's manual troubleshooting section covers the quickest checks first.
Most common symptoms and what usually causes them
- Dryer will not run: power supply issue, door not fully closed, failed door switch, or timer/control problem
- No heat (gas dryer): gas supply valve closed, weak gas valve coils, failed igniter, or a safety device opened
- Takes too long to dry: clogged lint screen, crushed/blocked venting, restricted outside exhaust hood
- Loud squealing/thumping: worn belt, idler pulley, drum rollers (often serviced together)
- Door won’t start cycle or stops mid-cycle: misaligned latch/strike or a failing door switch
Quick checks we recommend (in order)
- Confirm the dryer is plugged into a grounded outlet and the breaker is on (a dedicated circuit is recommended).
- Make sure the door closes firmly; a weak switch can prevent starting.
- Clean the lint screen and verify strong airflow at the outside vent.
- For “no heat,” confirm the gas shutoff valve is open on the supply line.
- If the drum turns but heat cuts in and out, suspect burner ignition components.
Parts that commonly fix these problems (for model 11072812101)
| Symptom | Common part to check | Example part for this model |
|---|---|---|
| Won’t start | Door switch | Dryer door switch WP3406107 |
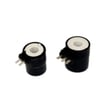
| No heat or heat drops out | Gas valve coils | Dryer valve coil kit 279834 |
| Squealing or drum not turning | Belt/idler wear | Dryer drum belt 341241 |
Why it matters
Catching airflow restrictions and worn drive parts early helps prevent overheating, repeat shutdowns, and premature wear on the motor and burner system.
Last updated: February 2026
How do I tell what model my Kenmore dryer is?
Your Kenmore dryer’s model number is printed on the model and serial number label; on model 11072812101, it’s located at the top inside the dryer door well. Once you have that full number, we can match the correct parts, diagrams, and specifications.
Where to look on Kenmore model 11072812101
Check these spots in this order:
- Top inside the dryer door well (most common for this model)
- Along the door opening frame (near the latch side)
- On the rear panel (less common, but possible)
Use the location diagram and wording in the 11072812101 owner’s manual to confirm you are reading the correct label.
What the model number looks like (and why it matters)
Kenmore model numbers are usually a long string of digits. For many Kenmore dryers, the first three digits (often 110) identify the manufacturing source, and the full model number identifies the exact design and parts list.
| What you find | What to do with it | Why it helps |
|---|---|---|
| Model number (example: 11072812101) | Use it to search parts | Ensures exact-fit parts like belts, thermostats, and switches |
| Serial number | Keep it for records | Helps with production details and service history |
| Purchase date | Record it | Useful for maintenance planning |
Tips to avoid mix-ups
- Copy the model number exactly as printed (no spaces, no extra characters).
- Take a clear photo of the label before ordering parts.
- If the label is worn, wipe it gently with a damp cloth and re-check the digits.
Why it matters
Kenmore dryers can look similar across series, but parts like the dryer door switch, idler pulley, or dryer operating thermostat can vary by model. Using the exact model number prevents ordering the wrong replacement.
Last updated: February 2026
What does PF stand for on a Kenmore dryer?
PF on a Kenmore dryer means power failure. On Kenmore model 11072812101, it indicates the dryer briefly lost electrical power during a cycle (or the control sensed an unstable power supply), so the cycle was interrupted.
What to do when you see PF
- Press Start to resume the cycle if the dryer is safe to run and the load is still damp.
- If PF returns, reset the dryer by turning it off, then restoring power at the breaker for 1 minute.
- Check that the dryer is plugged firmly into a properly grounded outlet (no loose plug).
- Avoid using an extension cord or power strip; plug the dryer directly into the wall outlet.
- If the display shows PF after storms or flickering lights, check the home circuit for a loose breaker or failing outlet.
Quick checks (most common causes)
| What you notice | Likely cause | What we recommend |
|---|---|---|
| PF appears once, then dryer runs normally | Brief outage or voltage dip | Resume cycle; no repair needed |
| PF appears repeatedly during heat cycles | Intermittent power to dryer | Check outlet, cord, breaker, and house wiring |
| Dryer stops and won’t restart reliably | Power issue or control interruption | Reset power; then follow the manual’s troubleshooting steps |
Why it matters
A PF code is usually not a failed dryer part; it is the dryer protecting the cycle when power drops. Repeated PF events can lead to longer dry times and incomplete drying because the timer and heat sequence get interrupted.
Where to find model-specific guidance
For operating and troubleshooting steps specific to Kenmore 11072812101, use the 11072812101 owner’s manual.
Last updated: February 2026
What size dryer is a Kenmore 80 series?
For Kenmore 80 Series gas dryers like model 11072812101, the “size” most people mean is the cabinet width; this model is a 29-inch (73.7 cm) wide gas dryer. Capacity (cubic feet) varies by exact 80 Series model and is best confirmed in the 11072812101 owner's manual.
What “size” can mean (and what we can confirm for 11072812101)
When customers ask about dryer size, it usually refers to one of these:
- Width (fits the laundry space): confirmed in the installation instructions
- Capacity (cu. ft., how much it holds): varies by model and series year
- Overall dimensions and clearances (depth, height, vent space): depends on door style and venting
For this Kenmore model, we can directly confirm it is a 29-inch gas dryer from the 11072812101 installation guide.
Quick reference: common dryer “size” specs
| Spec | What it affects | Typical for Kenmore/Whirlpool-built dryers | Best place to verify |
|---|---|---|---|
| Width | Fit between walls/cabinets | 27 in. or 29 in. | Installation guide |
| Capacity | Load size | Often ~6.0 to 7.5 cu. ft. for full-size | Owner’s manual/model plate |
| Rear clearance | Vent elbow space | Often ~5 1/2 in. minimum | Installation guide |
Why it matters
Getting the “size” right prevents install problems like a dryer that will not fit the alcove, a door that cannot open fully, or crushed venting that causes long dry times and overheating.
Tips before you buy parts or plan an install
- Measure the opening width and compare to a 29-inch cabinet.
- Plan for rear vent clearance (many installs need space for the vent elbow).
- Confirm whether you have a closet install; ventilation openings may be required.
- If you are troubleshooting performance, start with airflow and lint buildup; see how to keep a dryer clean and economical.
Last updated: February 2026
How to remove the front panel on a Kenmore dryer?
On Kenmore gas dryer model 11072812101, front panel removal typically starts by disconnecting power, lifting the top (after releasing the spring clips), then removing the front-panel mounting screws and lifting the panel up and off the lower retaining tabs. Use the 11072812101 installation guide for the exact fastener locations on your cabinet style.
Before you start (safety and prep)
- Unplug the dryer (or switch off the breaker) before opening the cabinet.
- If you need to move the dryer, keep the vent from getting crushed or kinked.
- Protect the finish; place a towel on top if you will rest the door or panel there.
- For gas models, avoid disturbing the gas line unless the job requires it.
Steps to remove the front panel (common Kenmore 110-style cabinet)
- Disconnect power.
- Remove the lint screen, then remove the screws that secure the lint screen housing to the top (if your version uses them).
- Release the top panel clips: slide a putty knife under the front corners of the top and push in to release the spring clips; lift the top.
- Remove front panel screws: look for screws at the inside top corners (near the front panel) and, on some versions, screws inside the door opening.
- Disconnect wiring as needed (door switch harness is common). If your dryer will not run with the door closed, inspect the dryer door switch WP3406107.
- Lift the front panel up and off the lower tabs, then pull it forward.
What you can access once the front is off
| Area you’re servicing | Common symptom | Related part (if applicable) |
|---|---|---|
| Drum drive | Drum not turning, squealing | Dryer drum belt 341241, idler pulley, rollers (often in a kit) |
| Door circuit | Dryer won’t start when door closes | Dryer door switch WP3406107 |
| Air movement | Poor drying, rumbling | Blower wheel |
Why it matters
Removing the front panel the right way prevents bent cabinet edges, broken plastic clips, and pinched wiring. It also gives you safe access to wear items like the drum belt and door switch without damaging the console or door alignment.
Last updated: February 2026
How much does it cost to replace a heating element in a Kenmore dryer?
For a Kenmore dryer, replacing a heating element typically runs $20 to $120 for the part and about $100 to $350 total when a technician does the work (parts plus labor). For your Kenmore gas dryer model 11072812101, “no heat” problems are more often tied to gas-heat components than an electric heating element; use the 11072812101 installation guide to confirm the correct heat and venting setup.
What you’ll usually pay (parts vs. service)
- DIY part-only: $20 to $120 (element or burner-related part, depending on design)
- DIY kit-style repairs: often $25 to $55 when thermostats or fuses are bundled
- Professional repair (typical): $100 to $350 total (labor is the biggest variable)
- Higher totals happen when: multiple safety parts trip, venting is restricted, or the burner assembly needs work
| Scenario | What you pay for | Typical cost range |
|---|---|---|
| DIY replacement | Part only | $20 to $120 |
| DIY “no heat” tune-up | 2 to 3 small parts | $25 to $80 |
| Technician repair | Trip charge + labor + parts | $100 to $350 |
Model 11072812101: parts that commonly affect heat (gas dryer)
If your dryer tumbles but doesn’t heat, these model-matched parts are common suspects:
- Dryer valve coil kit 279834 (weak coils can stop gas flow after the dryer warms up)
- Dryer radiant sensor WP338906 (flame sensing issues can prevent burner operation)
- Dryer operating thermostat WP3387134 (temperature control and cycling)
- Dryer thermal cut-off kit W11050897 (opens if overheating occurs, often tied to vent restriction)
- Gas burner W10823508 (burner and gas valve assembly when multiple burner parts are involved)
Why it matters (and what changes the price)
A “heating element” quote can be misleading on a gas dryer; the real fix is often a sensor, thermostat, thermal cut-off, or valve coils. Correct venting also matters because restricted airflow can overheat the dryer and trip safety devices; the 11072812101 owner’s manual covers routine lint and vent cleaning intervals.
Quick checks before buying parts
- Clean the lint screen; do not wash it with water (wet lint sticks and blocks airflow).
- Confirm the dryer is vented outdoors and the vent path is clear.
- Verify power supply and that the door closes firmly (a dryer can run poorly with power issues).
- If heat starts then stops, prioritize valve coils and flame sensing parts.
Last updated: February 2026
What does E1 mean on a Kenmore Elite dryer?
On Kenmore gas dryer model 11072812101, an E1 message is not a standard, model-defined code in the user documentation; when customers see “E1” on a Kenmore Elite dryer, it typically points to a control sensing problem (often temperature-sensing or airflow related) on models that have an electronic display. Use the model’s diagnostics and troubleshooting steps in the 11072812101 owner’s manual to confirm what your dryer is actually reporting.
First, confirm what you are seeing
Many “E1” reports come from a misread display, a different model series, or a control that is flashing a pattern.
- Verify the full model number from the label inside the door opening (it must match 11072812101).
- Note whether the display literally shows E1, or if lights are blinking in a pattern.
- Write down what the dryer was doing when it happened (start-up, heating, mid-cycle, end of cycle).
- Check whether the dryer is in a very cold location; this model should not be operated below 45°F (7°C).
What to check next (most common causes of “error-like” symptoms)
Even when the code meaning varies by series, these checks fix the most common heat and performance complaints that trigger fault indications on electronic Kenmore dryers.
| Symptom you have | Most common cause | What to do |
|---|---|---|
| Long dry times | Restricted venting | Clean lint screen, vent pipe, and outside hood; confirm strong airflow |
| Overheating or burning smell | Blocked airflow or cycling issue | Stop using dryer; correct venting before further testing |
| No heat or weak heat | Gas ignition or safety device opened | Check gas supply; inspect heat circuit components |
Parts that often relate to heat and temperature complaints
If airflow is good and the problem continues, these model-matched parts are commonly involved in heat control issues:
- Dryer operating thermostat WP3387134 (controls normal temperature cycling)
- Dryer thermal cut-off kit W11050897 (opens if temperatures get unsafe; correct venting first)
- Dryer valve coil kit 279834 (can cause burner to light then drop out)
Why it matters
Heat and airflow problems increase drying time and can overheat the dryer. Correct venting and restoring proper temperature control protects the burner system and prevents repeat shutdowns.
For venting rules and required outdoor exhaust for a gas dryer, follow the 11072812101 installation guide.
Last updated: February 2026