

How do I tell what model my Kenmore dryer is?
Your Kenmore dryer’s model number is printed on the appliance’s ID label; for Kenmore electric dryers like model 11086568110, it’s most often found around the door opening or on the cabinet frame. Once you have the full model number, we can match the correct parts and diagrams.
Where to look for the model number label
Check these common spots on Kenmore dryers:
- Inside the dryer door opening on the front frame (most common)
- On the back panel of the dryer cabinet
- Along the door opening edge near the latch area
- On the side panel near the bottom front (less common)
- Behind the lower access panel (if your dryer has one)
What the model number looks like (and what to write down)
Kenmore model numbers are usually all digits and are often 10 to 11 characters long.
| What to capture | Example | Why it matters |
|---|---|---|
| Full model number | 11086568110 | Ensures parts fit your exact dryer |
| Serial number | (varies) | Helps identify production run for some parts |
| Prefix digits | 110 | Helps narrow the platform and parts family |
Tips to avoid ordering the wrong part
Use these quick checks before you shop:
- Copy the model number exactly; do not add spaces or punctuation
- Photograph the label so you can zoom in later
- If a digit is hard to read, compare it to other numbers on the label
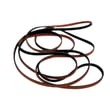
- Match parts to your exact model list; for example, a common wear item is the belt 341241
Why it matters
Kenmore used multiple manufacturers and platforms over the years, so two dryers that look similar can use different heating, drum, and drive components. The exact model number is the fastest way to get the right belt, motor, thermal fuse, or door switch the first time.
Last updated: February 2026
Is it worth repairing an old Kenmore dryer?
Yes, repairing an older Kenmore electric dryer like model 11086568110 is usually worth it when the fix is a common wear item (belt, idler pulley, thermal fuse, door switch) and the cabinet and drum are still in good shape. If the dryer needs multiple major drive or electrical repairs at once, replacement makes more sense.
Quick way we decide: repair vs replace
- Repair it when the problem is a single, straightforward failure (no heat, won’t start, squealing, drum not turning).
- Repair it when the drum turns freely by hand and the dryer is not badly rusted or damaged.
- Replace it when repair needs stack up (motor plus drum issues plus wiring damage).
- Replace it when you see repeated overheating symptoms (burning smell, frequent thermal fuse trips) after the venting is confirmed clear.
- Repair it when parts are readily available for your model, such as the belt 341241 or fuse WP3392519.
Typical repair costs (parts only) for this model
| Symptom | Common fix | Example part for 11086568110 |
|---|---|---|
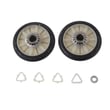
| Drum won’t turn, motor runs | Worn/broken belt or idler issue | Belt 341241, dryer idler pulley WP691366 |
| Dryer won’t start | Door switch or thermal fuse | Dryer door switch W10820036, fuse WP3392519 |
| Loud rumble/scrape | Drum support or drum damage | Drum inspection; drum 3396775 if needed |
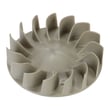
| Poor airflow, noisy air sound | Blower wheel issue or lint restriction | Dryer blower wheel WP694089 |
Why it matters
A solid older Kenmore electric dryer often has a long service life because the core design is simple: a motor, belt-driven drum, heater circuit, and airflow system. Fixing one failed component can restore full performance for years, but multiple major failures at the same time usually signal diminishing returns.
Before you buy parts: 5 checks that prevent repeat failures
- Clean the lint screen and confirm strong airflow at the outside vent hood.
- Inspect and clear the vent duct for lint buildup or crushing.
- Spin the drum by hand; it should move smoothly without grinding.
- Listen for squealing or thumping (often belt or idler pulley related).
- If a thermal fuse blew, correct airflow restrictions before replacing the fuse.
Last updated: February 2026
What are common problems with Kenmore dryers?
Common problems we see on Kenmore electric dryers like model 11086568110 include no heat, long dry times, the drum not turning, and unusual noises. Most issues trace back to restricted airflow (lint buildup), a failed safety device (thermal fuse), or normal wear parts such as the drive belt and idler pulley.
Most common symptoms and what usually causes them
- Dryer won’t heat: failed heating circuit component, loose/burned wiring, or a blown thermal fuse
- Takes too long to dry: clogged lint screen, blocked venting, or a weak blower wheel
- Drum won’t turn: broken belt, worn idler pulley, or a failing drive motor
- Loud squealing or thumping: worn belt, idler pulley wear, or drum support wear
- Won’t start: door switch not closing, drive motor issue, or power supply problem
Quick checks we recommend first (fast, no parts)
- Clean the lint screen every load and confirm strong airflow at the outside vent hood.
- Check that the dryer is on a dedicated 240V circuit and the breaker is fully reset.
- Listen for the motor: hum/no spin often points to a belt jam or motor problem.
- If the drum turns by hand but not under power, inspect the belt path and idler.
- If dry times are long, inspect the vent run for kinks, crushed flex duct, or lint blockage.
Parts that commonly fix these problems on 11086568110
| Symptom | Likely part to inspect/replace | What it does |
|---|---|---|
| Drum not turning | Belt 341241 | Drives the drum from the motor pulley |
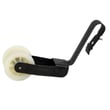
| Squealing, belt slipping | Dryer idler pulley WP691366 | Maintains belt tension |
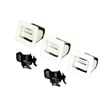
| No start when door closes | Dryer door switch W10820036 | Confirms the door is shut |
| No heat or shuts off | Fuse WP3392519 | Safety device that opens on overheating |
Why it matters
A Kenmore dryer that runs with poor airflow can overheat, blow the thermal fuse, and cause repeated no-heat or no-start problems. Fixing venting and replacing worn drive parts restores normal drying performance and helps protect the motor and heating system.
Last updated: February 2026
What size is a Kenmore Model 11086568110 dryer?
Most Kenmore electric dryers like model 11086568110 are full-size units that measure about 27 inches wide, 27 to 30 inches deep, and 38 to 44 inches tall (height varies most with the control console and leveling legs). For exact fit, measure your dryer and the installation space.
How to measure your dryer (so the numbers match your space)
- Measure width across the front at the widest point (usually the cabinet sides).
- Measure height from floor to the top; include the control panel and set the leveling legs to your normal position.
- Measure depth from the back panel to the front; then re-check depth with the door closed.
- Add clearance for the power cord and vent duct behind the dryer.
- If the dryer sits in a closet, confirm you can still open the door fully.
Typical space planning clearances
These clearances help prevent crushed venting, overheating, and vibration noise.
| Location | What to allow | Typical target |
|---|---|---|
| Behind dryer | Vent and cord space | 4 to 6 in. |
| Each side | Airflow and vibration | 1 in. |
| Above | Easier service access | 1 to 2 in. |
| Front | Door swing and loading | 20+ in. |
Why it matters
A dryer that is even 1 inch too deep can kink the vent, which slows airflow and increases dry time. Confirming the real cabinet depth also helps when you are replacing wear parts that affect movement and noise, such as the belt 341241 or dryer idler pulley WP691366.
Last updated: February 2026