Owner’s manual


Are dryer thermal fuses universal?
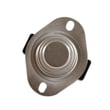
No. Dryer thermal fuses are not universal; the correct replacement must match your Kenmore electric dryer model 11060722990’s temperature rating, electrical rating, and mounting style so the dryer shuts down safely if it overheats. Use the model-based parts list and the 11060722990 owner's manual to confirm the right fuse.
What “universal” really means
Some fuses are sold as “universal” because they fit multiple brands, but thermal protection parts are still application-specific.
- A thermal fuse is a one-time safety device; once it opens, it must be replaced.
- Different dryers use different cut-off temperatures.
- Terminals and mounting holes vary by design.
- Using the wrong fuse can cause nuisance shutdowns or unsafe overheating.
- A blown fuse usually points to an airflow or heating problem that must be corrected.
How to choose the correct thermal fuse for 11060722990
We match by model first, then confirm the physical and electrical details.
| What to match | Why it matters | What you check |
|---|---|---|
| Cut-off temperature | Prevents overheating at the intended limit | Fuse spec and model lookup |
| Electrical rating | Prevents overheating at the terminals | Fuse spec and wiring type |
| Mounting/shape | Ensures proper contact and placement | Bracket style, hole spacing |
| Harness connection | Prevents loose connections and arcing | Terminal type and fit |
If the thermal fuse keeps blowing
A thermal fuse typically opens because the dryer is running too hot, most often from restricted airflow.
- Clean the lint screen before every load.
- Check for strong airflow at the outside exhaust hood.
- Clear lint buildup from the vent duct and hood.
- Replace crushed, kinked, or overly long venting with rigid or heavy metal vent.
- Confirm the dryer is not installed where room temperature is below about 45°F.
Why it matters
The thermal fuse is a key safety control. Replacing it with the correct model-matched part and fixing the underlying airflow restriction helps your Kenmore 11060722990 dry properly and prevents repeat failures.
Last updated: February 2026
How do I know if my Kenmore dryer thermal fuse is blown?
If your Kenmore electric dryer model 11060722990 runs but won’t heat, or it won’t run at all, a blown thermal fuse or thermal cut-off is a top suspect. The sure way to know is a continuity test with a multimeter after unplugging the dryer and accessing the safety device.
Quick symptoms to look for
- Dryer tumbles but produces no heat (often looks like it’s working, but clothes stay damp)
- Dryer won’t start even with the door closed
- Cycle seems normal, but drying performance is suddenly poor
- You recently had a restricted vent (kinked, crushed, or lint-clogged)
How we test it (basic continuity check)
- Unplug the dryer (electric shock risk if power is on).
- Access the thermal fuse or thermal cut-off area (location varies by design); use the 11060722990 owner’s manual for access guidance and safety notes.
- Pull at least one wire off the fuse terminal.
- Set a multimeter to continuity or lowest ohms.
- Test across the fuse terminals.
What the meter reading means
| Meter result | What it indicates | Next step |
|---|---|---|
| Near 0 ohms or continuity tone | Fuse is good | Keep troubleshooting airflow, heat circuit, or controls |
| No continuity (open circuit) | Fuse is blown | Replace the safety device and correct the venting issue |
Parts that commonly relate to this problem
On this Kenmore model, overheating from poor airflow can also damage other heat-safety parts. These are common related replacements when diagnosing a no-heat condition:
- Cut-off kit 279816 (thermal cut-off kit)
- Dryer element 279838 (heating element)
- Dryer operating thermostat WP3387134 (cycling thermostat)
- Dryer thermostat WP3977767 (high-limit thermostat)
Why it matters
A thermal fuse or thermal cut-off usually opens because the dryer overheated. If you replace the fuse but do not fix the airflow restriction, the new part can fail again quickly. The manual’s troubleshooting guidance also points to checking for crushed or kinked venting and verifying strong exhaust airflow.
Last updated: February 2026
How do I tell what model my Kenmore dryer is?
Your Kenmore dryer’s model number is printed on the model and serial number plate; on model 11060722990, it’s the same plate you use to record the model and serial for service and parts matching. Check the door opening first, then other common label locations.
Where to look on a Kenmore dryer
Most Kenmore electric dryers place the model and serial number plate in one of these spots:
- Inside the dryer door opening (most common)
- On the back panel of the cabinet
- On the cabinet frame just inside the front panel
- Near the lint screen housing (some designs)
If you have the paperwork, the model number is also listed in the 11060722990 owner's manual.
How to read the number (and why it matters)
Kenmore model numbers are long because they identify the exact design version. For parts and diagrams, we use the full model number exactly as printed.
Quick guide
| What you see | What it tells us | What to do next |
|---|---|---|
| Full model number (example: 11060722990) | Exact dryer configuration | Use it to match parts like a belt, thermostat, or heating element |
| Serial number | Production run details | Keep it for service history and warranty records |
Tips to avoid common mix-ups
- Write the model number exactly, including all digits.
- Don’t use only the first 3 digits (for example, “110”); that’s not enough to guarantee a correct parts match.
- If the label is worn, take a clear photo with the door open and a flashlight.
Why it matters
Using the exact model number prevents ordering the wrong Kenmore dryer parts (such as a drum belt 341241 or a dryer door switch WP3406107) and helps confirm correct fit, wiring style, and mounting details.
Last updated: February 2026
How do I tell if my dryer heating element is bad?
If your Kenmore electric dryer model 11060722990 runs but produces little or no heat, takes much longer to dry, or leaves clothes damp, the heating element is a top suspect. We confirm it by safely disconnecting power and testing the element for continuity with a multimeter.
Quick symptoms to look for
- Dryer tumbles normally but there is no heat in a heated cycle
- Dry times increase noticeably with the same size loads
- Clothes come out warm but still damp (weak heat)
- A cycle set to heat behaves like air dry
- Heat is intermittent (can also point to thermostats or wiring)
The fastest functional check (no tools)
The manual’s heat-check is simple: start a heated cycle (not Air Dry), let it run about 5 minutes, then open the door and feel for heat inside the drum. If you do not feel heat, move on to electrical checks and troubleshooting steps in the 11060722990 owner's manual.
Definitive test: multimeter continuity check
- Unplug the dryer (or switch off the breaker).
- Access the heater terminals (location varies by design; follow the disassembly guidance in the 11060722990 owner's manual).
- Remove at least one wire from the element terminal.
- Measure resistance across the element terminals.
Typical readings for many electric dryer elements:
| Test result | What it usually means | Next step |
|---|---|---|
| ~10 to 50 ohms | Element is likely intact | Check airflow, thermostats, cut-off, wiring |
| OL / no continuity | Element is broken | Replace the element |
| Continuity to metal housing | Element is shorted | Replace the element |
For this model, the correct replacement is the dryer element 279838.
Related parts that commonly fail with “no heat”
- Cut-off kit 279816 (thermal cut-off and related safety parts)
- Operating thermostat (cycling control)
- High-limit thermostat
- Loose or heat-damaged wire connections (especially at the heater)
Why it matters
A failed element stops heat completely, but restricted venting can also cause overheating that trips safety cut-offs and shortens element life. Confirming the element with a meter prevents replacing the wrong part and helps restore normal dry times.
Last updated: February 2026
How to hard reset a Kenmore dryer?
For Kenmore model 11060722990, a hard reset is a simple power reset: unplug the dryer (or switch the breaker off) for about 1 minute, restore power, then set a cycle and press PUSH TO START with the door fully closed. See the 11060722990 owner's manual for normal start and stop behavior.
Hard reset steps (safe, works for most no-start issues)
- Turn the Cycle selector to OFF.
- Unplug the dryer (or turn both dryer breakers off if it is hardwired).
- Wait 60 seconds.
- Restore power.
- Close the door firmly (opening the door stops the dryer; it will not run again until the door is closed and you press PUSH TO START).
- Select a Timed dry or Auto dry setting and press PUSH TO START.
If it still will not start after the reset
Quick checks we recommend
- Confirm the dryer has full power (electric dryers typically need 240V; a tripped half-breaker can leave the drum light on but prevent heating or starting).
- Make sure the door is latching; a failed door switch can prevent starting (common replacement is the dryer door switch WP3406107).
- Verify the timer is on a drying setting, not OFF.
- If the motor only hums or the drum will not turn, inspect the belt and idler (common wear items are the drum belt 341241 and dryer idler pulley WP691366).
What the symptoms usually point to
| Symptom | Most common cause | What to check next |
|---|---|---|
| Nothing happens when you press start | Door not closed, door switch, power issue | Door latch, breaker, dryer door switch WP3406107 |
| Runs but no heat | Heating circuit problem, airflow restriction | Venting, dryer element 279838, thermostats |
| Drum will not tumble | Broken belt or seized pulley | Drum belt 341241, dryer idler pulley WP691366 |
Why it matters
A hard reset clears a temporary control or power condition, but it will not fix a mechanical failure (belt, idler, motor) or a safety shutdown caused by overheating. Keeping the lint screen and vent clear helps prevent heat-related shutdowns and long dry times.
Last updated: February 2026
How much does it cost to replace a heating element in a Kenmore dryer?
For Kenmore electric dryer model 11060722990, replacing the heating element typically costs $50 to $120 for the part plus $0 to $200+ for labor, so most total repairs land around $100 to $350 depending on who does the work and what else is found during diagnosis.
Typical cost breakdown
- Heating element part: commonly $50 to $120 for this style of electric dryer element
- DIY labor: $0 (your time)
- Professional labor: often $100 to $250 (varies by region and service minimums)
- Possible add-ons: thermal cut-off or thermostat if overheating caused the failure
| Scenario | What you pay for | Typical total |
|---|---|---|
| DIY element replacement | Part only | $50 to $120 |
| Pro replaces element | Part + labor | $150 to $350 |
| Overheat repair | Element + safety parts + labor | $200 to $450 |
Parts that commonly apply to this repair
For this model, the heating circuit and airflow safety parts are common suspects when a dryer will not heat or keeps blowing a thermal device.
- Dryer element 279838 (main heat source)
- Cut-off kit 279816 (thermal safety devices often replaced as a set)
- Dryer operating thermostat WP3387134 (regulates operating temperature)
- Dryer thermostat WP3977767 (high-limit protection)
Why the total price varies
A heating element can fail on its own, but it also fails more often when airflow is restricted. The manual emphasizes making sure the vent is not crushed or kinked and describes periodic lint removal from the exhaust vent and inside the dryer. Following the venting and care guidance in the 11060722990 owner's manual helps prevent repeat failures.
Money-saving checks before you buy parts
- Clean the lint screen and confirm strong airflow at the outside vent hood
- Inspect the vent run for kinks, crushing, or heavy lint buildup
- Verify the dryer is on a heat cycle setting (not air dry)
- If the dryer runs but has no heat, test the element and thermal devices with a meter
- If overheating is suspected, address venting first, then replace failed safety parts
Last updated: February 2026
How to take off the front panel of a Kenmore dryer?
On Kenmore model 11060722990, we remove the front panel by disconnecting power, opening up the top (or removing end-cap screws, depending on console style), then removing the front-panel mounting screws and lifting the panel up and off while supporting the door switch wiring.
Before you start (safety and prep)
- Unplug the dryer (or switch off the breaker); this is an electric dryer.
- Pull the dryer forward enough to work comfortably.
- Have a container ready for screws.
- Wear cut-resistant gloves; cabinet edges can be sharp.
- If you smell overheating or see heavy lint buildup, stop and clean the venting before running the dryer again.
For model-specific diagrams and access points, follow the cabinet-opening steps in the 11060722990 owner's manual.
Front panel removal steps (typical for this Kenmore/Whirlpool-built style)
- Remove the lint screen from the top opening.
- Remove the lint screen housing screws (usually 2) that point down into the top.
- Release the top panel:
- Insert a putty knife a few inches in from each front corner to release the spring clips, then lift the top.
- Disconnect the door switch harness (note the connector orientation).
- Remove front panel screws (commonly at the upper inside corners of the front panel).
- Lift the front panel up to unhook it from the lower retaining clips, then pull it forward and off.
What you can service once the front is off
| Symptom | Common area to inspect | Example part for this model |
|---|---|---|
| Drum not turning, squealing | Belt and idler | Drum belt 341241 and dryer idler pulley WP691366 |
| Runs but no heat | Heater and thermal protection | Dryer element 279838 and cut-off kit 279816 |
| Loud rumble or vibration | Blower wheel, drum support | Dryer blower wheel WP694089 |
Why it matters
Removing the front panel correctly prevents broken plastic tabs, stripped screw holes, and damaged wiring. It also gives you safe access to high-wear parts like the drum belt, idler pulley, blower wheel, and heating circuit components.
Last updated: February 2026