 Installation guide
 Owner’s manual


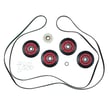
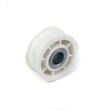
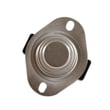
Can I replace a dryer heating element myself?
Yes, for Kenmore model 11063012101, replacing the electric dryer heating element is a common DIY repair if you’re comfortable working around wiring and panels. The key is disconnecting power first, documenting wire locations, and reassembling everything exactly as it was.
Before you start (safety and prep)
We follow the same safety approach the manual calls out: disconnect power before servicing, and only do repairs you understand and have the skills to carry out. Use the 11063012101 owner's manual for model-specific safety notes and access guidance.
- Unplug the dryer (or switch both dryer breakers off; many homes have 2)
- Let the dryer cool completely
- Take a photo of every wire connection before removing anything
- Work with gloves; sheet metal edges are sharp
- Keep the lint screen and venting clean while you’re in there (restricted airflow can cause overheating)
Typical replacement overview (electric dryer)
Most Kenmore 27-inch electric dryers replace the element from the rear by removing the back panel, then removing the heater housing/element assembly, transferring any mounted thermostats if required, and reinstalling.
Common parts involved on this model:
| What you’re replacing | What it does | When it’s suspect |
|---|---|---|
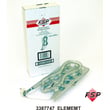
| Dryer heating element WP3387747 | Creates heat for drying | Dryer tumbles but has no heat |
| Dryer thermal fuse WP3390719 | Safety device that opens if overheating occurs | Dryer won’t heat (and sometimes won’t run) |
| Dryer operating thermostat WP3387134 | Regulates drum temperature | Overheating, underheating, cycling issues |
Quick checks that prevent repeat failures
A new element can fail early if airflow is restricted. The manual recommends checking airflow at the outside hood after running 5 to 10 minutes.
- Clean the lint screen before or after each load
- Confirm strong airflow at the exterior vent hood
- Replace crushed or kinked venting with heavy metal or flexible metal vent
- Avoid overloading; loads need room to tumble freely
Why it matters
The heating circuit runs at high temperature and high current. Correct wiring, tight terminals, and good venting protect the new heating element and help the dryer dry faster and more efficiently.
Last updated: February 2026
How do I find the part number for my dryer?
For your Kenmore dryer model 11063012101, we find the correct part number by matching the part you need to the model and serial label, then confirming it in the parts diagram and list. The model/serial label is located at the top inside the dryer door well (inside the door opening).
Step-by-step: find the right part number
- Open the dryer door and locate the model/serial label at the top inside the door well.
- Write down the full model number (11063012101) and the serial number.
- Identify the part you need by symptom and location (for example: no heat, won’t start, squealing).
- Use the exploded-view diagrams and parts list in the 11063012101 owner's manual to confirm the part name and where it fits.
- Cross-check the part by description and compatibility before ordering (some dryers have similar-looking parts that are not interchangeable).
Common parts people look up first (examples)
If you already know the symptom, these are frequent matches for this model:
| Symptom | Part to check | Example part for this model |
|---|---|---|
| Dryer won’t heat | Heating circuit components | Dryer heating element WP3387747 |
| Dryer won’t start | Door safety circuit | Dryer door switch WP3406107 |
| Dryer runs then stops or won’t run | Overheat protection | Dryer thermal fuse WP3390719 |
Tips to avoid ordering the wrong part
- Match by model number first, then by part name and location (not just by looks).
- If the dryer overheated, fix airflow issues before replacing heat-related parts.
- For installation-related parts and venting hardware, confirm clearances and vent routing in the 11063012101 installation guide.
Why it matters
Kenmore dryers often share designs across multiple model numbers, so the same-looking component can have different terminals, mounting points, or ratings. Using the model/serial label plus the diagram-based lookup prevents returns and repeat repairs.
Last updated: February 2026
How do I tell what model my Kenmore dryer is?
Your Kenmore dryer’s model number is printed on the model and serial number label; on Kenmore model 11063012101, that label is located at the top inside the dryer door well. Once you have the full model number, you can match the correct parts, diagrams, and specifications.
Where to look on Kenmore model 11063012101
Check these common label locations in this order:
- Top inside the dryer door well (most common on this style; open the door and look along the upper edge inside the opening)
- Inside the door opening on the cabinet frame (left or right side)
- Back panel of the dryer cabinet
- Near the lint screen housing (some designs place the label nearby)
What the model number looks like (and what to write down)
Record the model number exactly as shown, including all digits.
| What to capture | Example for this dryer | Why it matters |
|---|---|---|
| Model number | 11063012101 | Ensures parts fit and diagrams match |
| Serial number | (varies) | Helps identify production run details |
| Purchase date | (your date) | Useful for service history and planning |
Tips to avoid ordering the wrong parts
These quick checks prevent the most common mistakes:
- Copy the model number directly from the label, not from the control panel styling or marketing name
- Use the full number (for example, 11063012101, not just “110”)
- If the label is worn, take a clear photo and zoom in to confirm digits
- Match parts by model first, then confirm the part name and ID (example: dryer heating element WP3387747)
- Keep the model and serial info with your paperwork (the 11063012101 owner’s manual shows where to record it)
Why it matters
Kenmore dryers share similar looks across many series, but internal components like the heating circuit, timer, door switch, and drum support parts can vary by model. Using the exact model number keeps repairs accurate and avoids returns.
Last updated: February 2026
How to hard reset a Kenmore dryer?
A hard reset for your Kenmore dryer model 11063012101 is a power reset: unplug the dryer (or switch the breaker off) for about 1 minute, then restore power and start a cycle again. This clears many control glitches and is the first step in no-start or odd-behavior troubleshooting.
Reset steps (safe, works for most Kenmore dryers)
- Turn the cycle selector to OFF.
- Unplug the dryer (or turn both dryer breakers off if your home uses a 240V breaker pair).
- Wait 60 seconds.
- Plug back in (or turn breakers on).
- Close the door firmly and press PUSH TO START.
- If it still will not run, follow the checks in the 11063012101 owner’s manual.
If the dryer still will not start after a reset
These checks come straight from common no-run causes for this style of Kenmore dryer:
- Confirm the controls are set to a running position (not OFF).
- Push the Start button firmly.
- Verify the dryer is plugged into a grounded outlet.
- Check house power: many dryers use 2 fuses or 2 breakers; make sure both are on.
- Make sure the dryer door is fully closed; a failed door switch can prevent starting.
Quick symptom-to-part guide
| Symptom after reset | Most likely area to check | Common related part for this model |
|---|---|---|
| Nothing happens when you press Start | Door circuit, power supply | Dryer door switch WP3406107 |
| Runs but shuts off quickly | Airflow restriction, safety devices | Dryer thermal fuse WP3390719 |
| Runs but no heat | Heating circuit, airflow | Dryer heating element WP3387747 |
Why it matters
A power reset restores the dryer’s normal starting logic after a brief power interruption or control hiccup. If the problem returns immediately, the issue is usually power supply, door switch operation, or an airflow-related safety shutdown (lint buildup or a crushed/kinked vent).
After the reset: prevent repeat shutdowns
- Clean the lint screen before every load.
- Keep the vent from being crushed or kinked behind the dryer.
- Make sure the vent connection is secure and the vent path is clean.
- If the dryer runs 5 minutes but you do not feel heat, switch it off and re-check power and venting.
Last updated: February 2026
How to tell if a dryer heating element is bad?
A bad heating element in your Kenmore dryer model 11063012101 usually shows up as a dryer that tumbles normally but produces little to no heat, so clothes stay damp or take much longer to dry. We confirm it by checking for heat during a timed high-heat cycle, then testing the heater circuit parts.
Quick checks first (no tools)
Follow the heat-check described in the installation guide: run a full heat cycle for about 5 minutes, then open the door and feel for heat.
- Make sure the dryer is set to a heated cycle (not Air/No Heat)
- Confirm the door fully closes and latches
- Check the house power supply; many electric dryers use two fuses or breakers
- Inspect the vent for crushing or kinks (restricted airflow can mimic “no heat”)
- Clean the lint screen and confirm strong airflow at the outside vent hood
Definitive test: multimeter checks (power off)
Unplug the dryer (or switch off both breakers) before testing.
- Heating element: test for continuity through the element; an open circuit indicates a failed element
- Thermal fuse: if blown, the dryer often will not heat (and on some designs may not run)
- Operating thermostat / thermal cut-off: if open, the heater may not energize
If the element is failed on this model, the correct replacement is the dryer heating element WP3387747. If the fuse is blown, replace the dryer thermal fuse WP3390719 and correct the airflow problem that caused overheating.
What readings mean (typical)
| Test result | What it usually indicates | What to do next |
|---|---|---|
| No continuity through element | Element coil is broken | Replace heating element |
| Continuity to metal housing (short) | Element is grounded | Replace heating element |
| Thermal fuse open | Overheat event, heater disabled | Replace fuse; fix venting |
Why it matters
A weak or failed heater circuit wastes energy and can overheat the dryer if airflow is restricted. Keeping the vent clear and the lint screen clean helps protect the heating element and thermostats; see the 11063012101 manual for dryer care guidance.
Last updated: February 2026
Is it worth replacing the heating element in a dryer?
Yes, it’s usually worth replacing the heating element in a Kenmore 11063012101 dryer because the part cost is typically far less than a new dryer, and this model’s troubleshooting steps focus first on power and airflow checks that commonly cause “no heat.” Use the 11063012101 installation guide to confirm the basic no-heat checks before replacing parts.
When replacement makes sense
Replacing the heating element is a strong choice when the dryer runs but produces no heat and you’ve ruled out simple causes.
- The drum tumbles normally but clothes stay cold or damp
- You have good airflow at the outside vent hood (not weak or blocked)
- Power supply is correct (many electric dryers use two fuses or breakers)
- The dryer has no other major issues (motor noise, drum not turning, severe rust)
- You plan to keep the dryer for a few more years
What to check first (prevents repeat failures)
The manual and install instructions for this style of Kenmore dryer call out quick checks that often solve “no heat” without replacing the element.
- After the dryer runs about 5 minutes, open the door and feel for heat
- Verify the dryer is plugged into a grounded outlet and the door is fully closed
- Check both house fuses or circuit breakers (electric dryers commonly have two)
- Confirm strong airflow outside; clean lint buildup in the vent if airflow is weak
- Make sure the exhaust vent is not crushed or kinked
Common “no heat” parts on this model
If the checks above pass and you still have no heat, these are the most common repair paths for the Kenmore 11063012101.
| Symptom | Most likely cause | Example part for this model |
|---|---|---|
| Runs but no heat | Failed heating element | Dryer heating element WP3387747 |
| Runs but no heat, then stops heating | Blown thermal fuse (often from poor venting) | Dryer thermal fuse WP3390719 |
| Overheats or cycles heat oddly | Thermostat issue | Dryer operating thermostat WP3387134 |
Why it matters
A restricted vent can overheat the heater housing and blow safety devices, so replacing only the heating element can lead to another failure. Fixing airflow and lint buildup first improves drying performance and protects the new part.
Last updated: February 2026
What are common problems with Kenmore dryers?
Common problems on Kenmore dryers like model 11063012101 include no heat, long dry times, not starting, the drum not turning, and unusual noises. Most issues trace back to airflow restrictions (lint and venting), power supply problems, or normal wear on drive and heating components; use the 11063012101 owner’s manual troubleshooting section to narrow it down fast.
Most common symptoms and what usually causes them
- Dryer will not run: power cord unplugged, one of two breakers tripped, door not fully closed, or a failed door switch
- No heat (drum turns but clothes stay wet): one breaker/fuse open on an electric dryer, wrong cycle (Air Dry), or a failed heating circuit component
- Long drying times: restricted venting, clogged lint screen, crushed/kinked vent, or blocked airflow around the dryer
- Drum not turning: worn belt, failed idler pulley, worn drum rollers, or a bad motor
- Loud thumping/squealing/grinding: worn drum support rollers, idler pulley wear, or blower wheel damage
Quick checks we recommend first (fast, no parts needed)
- Confirm the START button is pressed firmly and a cycle is selected.
- Verify the dryer is plugged into a grounded outlet.
- Check both household fuses/breakers (many electric dryers use two; you can lose heat with the drum still turning).
- Clean the lint screen; if it has residue, wash it with hot water and a nylon brush, then dry it fully.
- Inspect venting: use 4-inch heavy metal venting, avoid plastic or foil, and make sure the vent is not kinked or crushed.
Parts that commonly fix these problems on 11063012101
| Symptom | Common wear part | Example part for this model |
|---|---|---|
| No heat | Heating element or thermal fuse | Dryer heating element WP3387747, dryer thermal fuse WP3390719 |
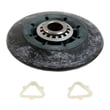
| Squealing or thumping | Drum rollers or idler pulley | Support kit WPW10314173, dryer idler pulley 279640 |
| Won’t start when door closes | Door switch | Dryer door switch WP3406107 |
Why it matters
Airflow and venting problems do more than slow drying; they also overheat the dryer and can repeatedly trip safety devices like thermal fuses. Keeping the vent clear and using proper metal ducting helps the heating system and drum drive parts last longer.
Last updated: February 2026
What size is a Kenmore Model 11063012101 dryer?
The Kenmore dryer model 11063012101 is a 27-inch (69 cm) wide electric dryer. For the exact cabinet depth, height, and clearance needs for your installation space, we recommend using the dimension diagram and clearance chart in the 11063012101 installation guide.
What “size” usually means for this model
Most customers mean one of these:
- Width class (this model is 27 in. wide)
- Overall dimensions (width, depth, height)
- Space needed (door swing and side/rear clearances)
- Electrical and venting space (cord/terminal access and vent routing)
Quick size reference
| Measurement type | What we can state for Kenmore 11063012101 | Where to confirm the exact number |
|---|---|---|
| Width | 27 in. (69 cm) | 11063012101 installation guide |
| Depth | Varies by configuration (rear vent, elbows, spacing) | 11063012101 installation guide |
| Height | Varies by leveling feet adjustment | 11063012101 installation guide |
| Clearance/space | Must allow full door opening and vent routing | 11063012101 installation guide |
How to measure your dryer the right way
- Measure width at the widest point of the cabinet (not the door handle).
- Measure depth from the back of the cabinet to the front; add extra space for the vent elbow.
- Measure height from floor to top; include any change from leveling feet.
- Confirm you have room for the door to open fully.
Why it matters
A 27-inch dryer like the Kenmore 11063012101 typically fits standard laundry alcoves, but depth and clearance are what cause most install problems. Correct spacing helps prevent crushed venting, long dry times, and overheating.
Last updated: February 2026










