Get free shipping on your order, with any water filter subscription. Find my filter

Open Hamburger Menu
Sears Parts Direct
Tips to find your model number

Maytag MDBH969AWB1 undercounter dishwasher Parts

Here are the diagrams and repair parts for Maytag MDBH969AWB1 undercounter dishwasher, as well as links to manuals and error code tables, if available.

Maytag MDBH969AWB1 undercounter dishwasher
By Schematic
By Part
SELECT DIAGRAM
?

This is the number corresponding to the part on the diagram / schematic

Browse Parts for MDBH969AWB1 Undercounter Dishwasher

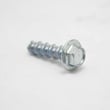
  • Dryer Screw for Maytag MDBH969AWB1 - Part WPW10109200

    Door and panel parts diagram

    Screw

    Part #489470

    Replaced by #WPW10109200

    Info Icon
    Manufacturer substitution
    This part replaces 489470. Substitute parts can look different from the original.
    This item is not returnable
    In Stock
    $4.91
    17% OFF Phone Price : $5.91Info Icon
    Minus Item
    Qty
    Plus Item
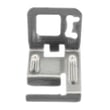
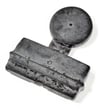
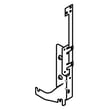
  • Dishwasher Heating Element Support Bracket for Maytag MDBH969AWB1 - Part W11027055

    Heater parts diagram

    Dishwasher Heater Support Bracket

    Part #8269262

    Replaced by #W11027055

    Info Icon
    Manufacturer substitution
    This part replaces 8269262. Substitute parts can look different from the original.
    This item is not returnable
    In Stock
    $22.44
    21% OFF Phone Price : $28.44Info Icon
    Minus Item
    Qty
    Plus Item
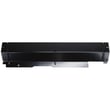
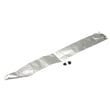
  • Dishwasher Access Panel Kit for Maytag MDBH969AWB1 - Part W10871196

    Door and panel parts diagram

    Dishwasher Toe Panel

    Part #W10205336

    Replaced by #W10871196

    Info Icon
    Manufacturer substitution
    This part replaces W10205336. Substitute parts can look different from the original.
    In Stock
    $100.08
    11% OFF Phone Price : $112.08Info Icon
    Minus Item
    Qty
    Plus Item
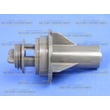
  • Dishwasher Lower Spray Arm Hub for Maytag MDBH969AWB1 - Part WPW10077898

    Lower washarm parts diagram

    Dishwasher Lower Spray Arm Hub

    Part #W10077898

    Replaced by #WPW10077898

    Info Icon
    Manufacturer substitution
    This part replaces W10077898. Substitute parts can look different from the original.
    In Stock
    $99.99
    11% OFF Phone Price : $111.99Info Icon
    Minus Item
    Qty
    Plus Item
  • Appliance Touch-up Paint, 0.6-oz (black) for Maytag MDBH969AWB1 - Part 72032

    Optional parts (not included) diagram

    Appliance Touch-up Paint, 0.6-oz (black)

    Part #72032
    This item is not returnable
    In Stock
    $11.08
    15% OFF Phone Price : $13.08Info Icon
    Minus Item
    Qty
    Plus Item
  • Dishwasher Sump Check Valve for Maytag MDBH969AWB1 - Part WP8268375

    Pump and motor parts diagram

    Dishwasher Sump Check Valve

    Part #8268375

    Replaced by #WP8268375

    Info Icon
    Manufacturer substitution
    This part replaces 8268375. Substitute parts can look different from the original.
    In Stock
    $45.94
    12% OFF Phone Price : $51.94Info Icon
    Minus Item
    Qty
    Plus Item
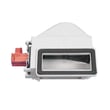
  • Dishwasher Vent Assembly for Maytag MDBH969AWB1 - Part WPW10164259

    Inner door parts diagram

    Dishwasher Vent Assembly

    Part #W10164259

    Replaced by #WPW10164259

    Info Icon
    Manufacturer substitution
    This part replaces W10164259. Substitute parts can look different from the original.
    In Stock
    $111.35
    10% OFF Phone Price : $123.35Info Icon
    Minus Item
    Qty
    Plus Item
  • Dishwasher Heater Nut Shield for Maytag MDBH969AWB1 - Part WPW10343251

    Heater parts diagram

    Dishwasher Heat Shield Nut

    Part #W10343251

    Replaced by #WPW10343251

    Info Icon
    Manufacturer substitution
    This part replaces W10343251. Substitute parts can look different from the original.
    This item is not returnable
    In Stock
    $7.43
    12% OFF Phone Price : $8.43Info Icon
    Minus Item
    Qty
    Plus Item
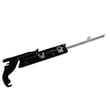
  • Dishwasher Door Hinge for Maytag MDBH969AWB1 - Part W11613572

    Door and panel parts diagram

    Dishwasher Door Hinge

    Part #W10143373

    Replaced by #W11613572

    Info Icon
    Manufacturer substitution
    This part replaces W10143373. Substitute parts can look different from the original.
    In Stock
    $94.26
    Minus Item
    Qty
    Plus Item
  • Dishwasher Door Hinge, Left for Maytag MDBH969AWB1 - Part W11613573

    Door and panel parts diagram

    Dishwasher Door Hinge

    Part #W10143374

    Replaced by #W11613573

    Info Icon
    Manufacturer substitution
    This part replaces W10143374. Substitute parts can look different from the original.
    In Stock
    $69.20
    Minus Item
    Qty
    Plus Item

Maytag Undercounter Dishwasher MDBH969AWB1 FAQs

On a Maytag MDBH969AWB1 dishwasher, the most effective “reset” for an F9 E1 (drain problem) is to cancel the cycle and restart it, then correct the drain path so the unit can pump water out normally. Use the steps in the MDBH969AWB1 user manual to confirm the proper Start/Resume and door-close timing.

Quick reset steps (control reset and restart)
  • Press Cancel/Drain (or the cancel function for your console) to stop the cycle and initiate draining.
  • Wait about 1 minute.
  • Select a cycle.
  • Press START/RESUME.
  • Close the door firmly within 3 seconds (top-control models will flash if the door is not closed in time).
  • If Control Lock is on, press and hold Heated Dry for 3 seconds to turn it off.
Fix the most common causes of F9 E1 (no-drain)

F9 E1 usually returns if the dishwasher still cannot drain. Check these items in order:

  • Air gap (if installed): remove the cap and clean out debris.
  • Garbage disposal inlet: make sure the knockout plug was removed when the dishwasher drain hose was connected.
  • Drain hose routing: verify a high loop under the counter and no kinks or crushing.
  • Sink/disposal clog: confirm the sink drains normally.
  • Pump area blockage: check for glass, labels, or food pieces that can jam the impeller.
Common drain-hose issues and what to look for
What you see What it usually means What to do
Water left in tub after cancel Drain path restricted Clean air gap, disposal inlet, and hose routing
Humming but little/no drain Pump jam or weak pump Inspect pump area; test drain pump if needed
Drains sometimes, not always Partial clog or intermittent pump Recheck hose loop and debris; test pump motor
When to test parts

If the drain path is clear and the code returns, we focus on the drain pump circuit.

  • Test the drain pump motor for continuity; a typical reading is about 40 to 80 ohms.
  • If the pump is noisy, seized, or fails the test, replace the drain pump.

Relevant model part:

Why it matters

F9 E1 is a protection response: if the dishwasher cannot evacuate water, it may stop mid-cycle, leave standing water, and reduce cleaning performance. Restoring proper draining prevents repeat errors and helps protect the pump and wiring.

Last updated: January 2026

Most Maytag dishwashers, including model MDBH969AWB1, typically last 10 to 12 years with normal household use; with consistent cleaning and correct installation, it’s common to reach the upper end of that range. For care and operating guidance that helps maximize service life, follow the MDBH969AWB1 user instructions manual.

What affects dishwasher lifespan the most

A dishwasher’s life is usually determined by heat, water quality, loading habits, and how well it drains.

  • Keep the interior and wash system clean (food soil buildup strains the pump and wash system)
  • Use the right detergent amount for your water hardness (too much can cause residue, too little reduces cleaning)
  • Make sure the door closes and latches firmly every time
  • Address slow draining quickly (standing water accelerates odor and component wear)
  • Avoid running cycles with heavily blocked spray arms or overloaded racks
Maintenance habits that help MDBH969AWB1 last longer

The manual calls out practical steps that prevent common problems, including checking a drain air gap if the dishwasher isn’t draining well and preparing the unit for seasonal storage. Use these as a simple routine.

Maintenance task Good interval Why it helps
Clean the filter area and remove debris Weekly to monthly Helps prevent poor wash performance and drain issues
Check spray arm holes for clogs Monthly Keeps water pressure strong for cleaning
Check the drain path (air gap or high loop) If draining slows Prevents backups that overwork the drain pump
Run a dishwasher cleaner cycle Monthly to quarterly Reduces mineral and grease buildup
Why it matters

A dishwasher that drains and heats correctly cleans better, dries better, and puts less stress on key components like the circulation system, heating circuit, and door latch. Small maintenance steps often prevent the “cycle runs too long” and “not drying” complaints that shorten overall lifespan.

Last updated: January 2026

For the Maytag MDBH969AWB1 dishwasher, the most common customer-reported problems are poor cleaning, not draining, and leaking. In many cases, the fix is basic maintenance (filters and spray arms), correct loading, and confirming the door is fully latched and the cycle is started correctly per the MDBH969AWB1 user manual.

Most common issues and what usually causes them
  • Poor cleaning: clogged filter area, blocked spray arm holes, overcrowded racks, or low water temperature
  • Not draining: clogged drain path, dirty air gap (if installed), kinked drain hose, or a weak drain pump
  • Leaking: worn door seal, misaligned door, or a cracked/loose hose connection
  • Detergent not dispensing: dispenser door blocked by dishes or a failing dispenser assembly
  • Cycle seems “stuck” or long: normal pauses can happen during the cycle; restarting correctly matters
Quick checks we recommend first (fast, no parts)
  1. Cancel the cycle and restart; if the START/RESUME light is blinking, press it and close the door firmly within 3 seconds.
  2. Check the bottom for standing water and clear any visible debris.
  3. If you have a drain air gap, clean it if the dishwasher is not draining well.
  4. Confirm the racks are not blocking the detergent dispenser door.
  5. Run hot water at the sink until it is hot, then start the dishwasher.
Common part-related fixes for MDBH969AWB1
Symptom Likely part area Example model-matched part
Not draining Drain system Dishwasher drain pump WPW10348269
Leaking at door Door sealing Dishwasher door seal and strike kit W10542314
Poor drying or water not heating Heating circuit Dishwasher heating element W10518394
Why it matters

These three symptoms (cleaning, draining, leaking) often share the same root causes: restricted water flow, restricted drain flow, or a compromised seal. Catching them early helps prevent repeat wash cycles, odors, and water damage.

Last updated: January 2026

Most common symptoms to help you fix your dishwashers

Choose a symptom to see related dishwasher repairs.

Main causes: light switch beside the sink turned off, lack of power, bad dishwasher door switch, control system failure,…

Main causes: damaged or stuck spray arm, leaking door seal, damaged door hinge, leaky heating element water seal, cracke…

Main causes: improper loading, low water temperature, improper detergent dosage, detergent dispenser failure, spray arm …

Main causes: glass or popcorn kernel stuck in the chopper blade, drain line vibrating against the cabinet, debris in was…

Main causes: broken door latch, tripped circuit breaker, broken heating element, faulty vent fan, sensor failure, contro…

Main causes: not using rinse aid, rinse aid dispenser failure, broken heating element, malfunctioning vent, drying fan f…

Main cause: damaged rack height adjuster…

Main causes: clogged kitchen sink drain, clogged drain hose, drain check valve damaged, drain pump failure, control syst…

Main causes: water supply problem, stuck overfill float, clogged water inlet valve screen, water inlet valve failure…

Most common repair guides to help fix your dishwashers

These step-by-step repair guides will help you safely fix what’s broken on your dishwasher.

How to replace a dishwasher door latch assembly

How to replace a dishwasher door latch assembly

If the dishwasher door doesn't click shut, a broken door latch is a likely cause. Follow these instructions to replace i…

Repair time and Difficulty

 30 minutes or less
How to replace a dishwasher thermal fuse

How to replace a dishwasher thermal fuse

A completely dead control panel often indicates that the thermal fuse on the electronic control board is blown; follow t…

Repair time and Difficulty

 15 minutes or less
How to replace a dishwasher control panel

How to replace a dishwasher control panel

Learn how to replace a dishwasher control panel. Learn which tools and parts you need and get step-by-step instructions.…

Repair time and Difficulty

 15 minutes or less

Effective articles & videos to help repair your dishwashers

Use the advice and tips in these articles and videos to get the most out of your dishwasher.

What's a turbidity sensor, and how does it affect wash quality?

What's a turbidity sensor, and how does it affect wash quality?

Your dishwasher’s secret weapon? A turbidity sensor. Find out what it does, how it boosts wash quality, and what to do i…

Dishwasher not drying dishes video

Dishwasher not drying dishes video

Find out why your dishes are still wet even after the dishwasher cycle has finished.…

Replacing dishrack rollers on Kenmore 587-series and Frigidaire dishwashers video

Replacing dishrack rollers on Kenmore 587-series and Frigidaire dishwashers video

It only takes a few minutes to get your dishrack sliding easily again.…

Parts & More

Built-In Microwave
Dishwasher
Elliptical Machine
Farming Equipment
Front-Engine Lawn Tractor
Gas Line Trimmer
Gas Walk-Behind Mower
Side-By-Side Refrigerator
Storm & Screen Doors
Table Saw
Treadmill
Washer
Water Softener