
Are welders 220?
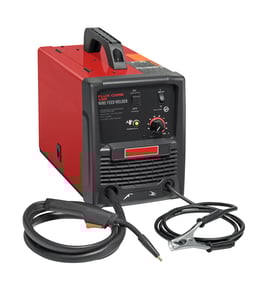
Many welders can run on 220 to 240 volts, but it depends on the specific machine. For the Century 117-052 130 wire feed welder, you should confirm the input-voltage requirement on the welder’s data plate and plug type before you wire a circuit or choose an outlet.
What “220V” means (and why you also see 230V or 240V)
In most U.S. homes, “220V,” “230V,” and “240V” are used interchangeably for the same class of split-phase power. The actual voltage at the outlet can vary under load, so manufacturers label equipment with slightly different nominal numbers.
How to tell what your Century 117-052 needs
Check these items on the welder itself (not the extension cord):
- Data plate rating: look for “Input” voltage (for example, 120V or 230V)
- Amperage draw: helps determine breaker size and wire gauge
- Plug configuration: 120V plugs look different than 240V plugs
- Internal selector switch (if equipped): some welders are dual-voltage
- Cord condition: damaged cords can cause voltage drop and overheating
Typical welder voltage options (quick comparison)
| Welder type | Common input voltage | What you’ll usually see at home |
|---|---|---|
| Small wire-feed (light duty) | 120V | Standard household outlet |
| Mid-size wire-feed / MIG | 240V | Dedicated 2-pole breaker |
| Stick/TIG (higher output) | 240V (sometimes 120/240) | Dedicated circuit recommended |
Why it matters
Using the wrong voltage (or an undersized circuit) causes weak arc starts, poor penetration, nuisance breaker trips, overheated wiring, and premature failure of electrical components like switches, rectifiers, and transformers.
Safe next steps before you plug in
- Match the welder’s rated input voltage to the outlet you plan to use
- Avoid long, undersized extension cords (they create voltage drop)
- If you suspect a wiring issue, test the outlet voltage and continuity with a meter
- Inspect for burned terminals, loose connections, or brittle insulation
For help with electrical testing basics, use our guide: how to use a multimeter to test electrical parts video.
Last updated: February 2026
How thick will a 200 amp welder weld?
A true 200-amp welder commonly welds 1/4 inch mild steel in a single pass with MIG, and can go thicker with beveling and multiple passes. Your Century model 117-052 is a smaller 130 wire feed welder, so its practical single-pass thickness is typically thinner than a 200-amp machine.
Typical thickness guidelines (200-amp class vs your Century 117-052)
Use these ranges to set expectations; joint prep and technique still matter.
| Machine type | Common single-pass mild steel range | With bevel + multi-pass |
|---|---|---|
| 200-amp MIG (short-circuit) | ~3/16 to 1/4 in | ~3/8 in |
| 200-amp stick (SMAW) | ~1/4 to 3/8 in | 1/2 in and thicker |
| Century 117-052 wire feed | ~18 ga to 3/16 in | Up to ~1/4 in |
What changes how thick you can weld
Even with the same amperage rating, these factors control penetration and fusion:
- Process and transfer mode (MIG short-circuit vs stick vs TIG)
- Joint design (butt vs lap vs fillet size and fit-up)
- Prep (clean metal, remove paint/rust, bevel on thicker plate)
- Weld position (flat is easiest for heat control)
- Consumables (wire/rod size and shielding gas if used)
- Duty cycle (long welds at high output require cool-down)
How we set up thicker welds (when you are near the limit)
If you are trying to weld at the top end of what a machine can do, these steps make the difference:
- Bevel both edges and leave a small root opening
- Run a root pass, then fill and cap with additional passes
- Slow travel speed slightly to maintain a stable puddle
- Practice on scrap of the same thickness before the real joint
Why it matters
Overestimating thickness leads to cold lap and lack of fusion, which can crack under load. If your Century 117-052 seems weak (poor arc, inconsistent feed), electrical checks can help; use how to use a multimeter to test electrical parts video.
Last updated: February 2026
What can a 120A welder do?
A 120A-class welder can handle light to medium welding jobs such as small repairs, brackets, and basic fabrication. For a Century 117-052 130 wire feed welder, typical capability includes welding common mild steel in thinner gauges with solid wire and shielding gas or flux-cored wire, depending on your setup.
What you can realistically weld with a 120A welder
Most 120A machines are best for thinner materials and short-to-moderate weld lengths (duty cycle limits continuous welding time).
- Auto and trailer repairs on light steel (tabs, mounts, small cracks)
- Angle iron, flat bar, and tubing for small projects
- Sheet metal work (with careful heat control)
- Tack welding and stitch welding to reduce warping
- Occasional heavier welds using multiple passes and proper joint prep
Typical material thickness range (practical guidance)
Exact results depend on wire type, joint design, and power input, but these ranges are common for 120A wire-feed welders.
| Material | Typical “sweet spot” | Possible with prep and multiple passes |
|---|---|---|
| Mild steel | 18 ga to 1/8 in | Up to about 3/16 in |
| Stainless steel | Thin sheet to ~1/8 in | Limited; depends on wire/gas |
| Aluminum | Not typical without a spool gun | Very limited |
Settings and setup that make the biggest difference
If welds look cold, tall, or ropey, the machine is usually underpowered for the joint or set too cool.
- Use the correct wire diameter (common: 0.030 in or 0.035 in)
- Match polarity to the wire (flux-core often uses DCEN; solid wire typically uses DCEP)
- Clean metal to bare steel (paint, rust, oil cause porosity)
- Use proper joint prep (bevel thicker pieces, leave a small root gap)
- Watch duty cycle; let the welder cool if it trips thermal protection
Why it matters
A 120A welder is a great fit for DIY repairs and small fabrication, but pushing it into thick steel without joint prep leads to weak penetration. Staying in its practical range gives stronger welds and fewer burn-through or cold-lap problems.
For safe electrical troubleshooting on a wire-feed welder, we recommend using a meter and basic diagnostics like in our how to use a multimeter to test electrical parts video.
Last updated: February 2026