Installation guide
 Owner’s manual
 Error Codes


Where is the model number on a Kenmore side by side refrigerator?
On Kenmore side-by-side refrigerator model 10651272200, the model number is printed on the model and serial number label located on the inside wall of the refrigerator (fresh food) compartment. You can confirm the exact label location and what it looks like in the owner's manual.
Where to look (fast checklist)
- Open the refrigerator (fresh food) door, not the freezer door
- Look along the inside side walls near the front edge
- Check near the crisper area and the meat pan area
- Look for a sticker that lists both model and serial information
- Use a flashlight; the label can be easy to miss on light-colored liners
What you should see on the label
The label typically includes the key details you need for parts and service.
| Label item | What it’s used for | Example format |
|---|---|---|
| Model number | Matching parts to your exact refrigerator | 10651272200 |
| Serial number | Identifying production run and date info | Letters + numbers |
| Purchase date (you record it) | Warranty and records | Your date |
Why it matters
We use the full model number to match the correct Kenmore parts for your exact configuration (ice maker, water filter system, door parts, and internal controls). Even small model differences can change which water filter, inlet valve, or ice maker fits.
Tip for ordering the right parts
- Write down the model number exactly as shown
- Take a clear photo of the label before you start a repair
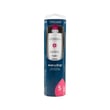
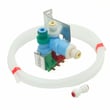
- Use the model number when selecting parts like the refrigerator water filter EDR5RXD1 or refrigerator inlet valve W10408179
Last updated: February 2026
How to tell how old a Kenmore refrigerator is by serial number?
You can date a Kenmore refrigerator by finding the model and serial number label (typically inside the fresh food compartment) and decoding the serial number format used on that label. For Kenmore model 10651272200, we use the identification details shown in the owner's manual to locate the label, then match the serial format to the correct date code.
Where to find the serial number on model 10651272200
The model and serial number label is usually on the inside wall of the refrigerator compartment.
- Open the fresh food (refrigerator) door
- Look along the side walls near the crisper area
- Check near the top side wall by the light housing
- Wipe the area clean so the full serial is readable
How Kenmore serial numbers usually encode the date
Kenmore serial number formats vary by manufacturer. Many Kenmore refrigerators (including many 106-prefix models) use a code where the first characters identify the production date.
Common patterns you may see:
- Two letters followed by numbers (letters often indicate month and year)
- One letter plus digits (letter often indicates year, digits indicate week)
- Digits-only serials (date is embedded in specific positions)
Quick decode checklist
- Write down the full serial number exactly as printed
- Note any letters at the beginning (these are often the date key)
- Compare the pattern to the serial-number decoding guidance in your documentation
- If your unit has a separate product record section filled in, use that purchase date as a cross-check
Serial number vs. purchase date (what each tells you)
| Item | What it indicates | Where to find it |
|---|---|---|
| Serial number | Manufacturing date (build date) | Model/serial label inside refrigerator compartment |
| Purchase date | When it was bought (can be later than build date) | Receipt or product record section |
Why it matters
Knowing the build date helps when you are matching compatible replacement parts (like a water filter, ice maker, or inlet valve) and when you are comparing age-related symptoms such as weak cooling, ice maker slow production, or water dispenser flow changes.
If you are also troubleshooting water or ice performance, the Kenmore 106 model refrigerator error codes guide can help you narrow down what the refrigerator is reporting.
Last updated: February 2026
How to replace an ice maker in a side by side refrigerator?
To replace the ice maker in your Kenmore 10651272200 side-by-side refrigerator, we shut off power, turn the ice maker OFF, remove the ice bin or bucket, swap the ice maker, then restore power and let it cycle. Follow the owner's manual for your exact bin style.
Before you start
- Unplug the refrigerator or switch OFF the circuit breaker.
- Turn the ice maker OFF:
- Style 1: lift the wire shutoff arm to OFF (up).
- Style 2: slide the ON/OFF switch to OFF (right).
- Keep the ice maker OFF if the water line is not connected.
- Clear the freezer area; place a towel under the work area.
Remove the ice bin or bucket
Use the steps that match your setup in the manual.
- Style 1 (shelf bin): slide the covering panel back, lift shutoff arm to OFF, lift the front of the bin and pull it out.
- Style 2 (door bucket): press the release button and lift the bucket up and out.
Replace the ice maker assembly (typical)
- Remove the mounting screws holding the ice maker to the freezer wall.
- Unplug the wiring harness connector.
- Install the new unit, reconnect the harness, and tighten screws.
- Reinstall the bin or bucket fully.
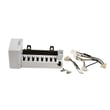
For the correct replacement part, use the ice maker assembly 4317943.
What to expect after replacement
| Item | Normal expectation |
|---|---|
| First ice | Allow 24 hours |
| Initial ice | Discard first 3 batches |
| Normal output | 7 to 9 batches per 24 hours |
Why it matters
Turning the ice maker OFF prevents unexpected cycling during service, and reinstalling the bin or bucket correctly is required for proper ice dispensing.
Last updated: February 2026
What are the most common problems with Kenmore refrigerators?
The most common issues we see on Kenmore refrigerators like model 10651272200 are not cooling or warm temps, ice maker and dispenser problems, water leaks, excess frost or moisture, and unusual noises. Many trace back to airflow, dirty condenser coils, door sealing, or water filter and supply issues; use the owner's manual for model-specific checks.
Most common symptoms and likely causes
- Not cooling or warm temperatures: blocked air vents, controls set incorrectly, frequent door openings, or the unit in a defrost cycle
- Runs too much: dirty condenser coils, doors not sealing, hot room temperature
- Ice maker not making ice or low production: freezer not cold enough, shutoff arm or switch off, or new install (needs time)
- Water or ice leaking at the dispenser: air in lines after filter change, ice stuck in chute, or container not held under chute long enough
- Interior moisture buildup: blocked vents, frequent door openings, humid room conditions
Quick checks we recommend first
- Confirm power is on; reset tripped breaker or replace a blown fuse.
- Keep air vents clear so cold air can circulate.
- Clean condenser coils to reduce compressor run time.
- Make sure doors close fully and gaskets seal all the way around.
- If the ice maker was just installed, allow up to 72 hours for full production.
Symptom-to-fix guide
| Symptom | What to do first | Common next step |
|---|---|---|
| Refrigerator warm | Check vents, door openings, control settings | Reset controls; allow several hours after loading food |
| Ice maker slow/no ice | Verify freezer temp; confirm shutoff arm/switch ON | Check water supply and filter condition |
| Dispenser drips/leaks | Flush water to clear air; clear ice chute | Inspect water line for kinks |
Parts often involved in water and ice issues
- Refrigerator water filter EDR5RXD1
- Refrigerator inlet valve W10408179
- Ice maker assembly - refrigerator ice maker by whirlpool 4317943
Why it matters
Cooling, ice, and leak complaints often share the same root causes: restricted airflow, poor door sealing, or inconsistent water supply. Fixing those basics first prevents food spoilage and helps avoid repeat clogs and dispenser drips.
Last updated: February 2026