Installation guide
 Owner’s manual


What is error 22 on Kenmore dishwasher?
On Kenmore dishwasher model 66515113K214, error 22 (often shown as E22) points to a blocked or dirty filter area that is restricting water flow. Cleaning the filter and checking for debris in the sump typically clears the condition and restores normal washing.
What to do first (quick fix)
- Turn the dishwasher off at the breaker for safety.
- Remove the lower rack and look for standing water or heavy debris.
- Remove and clean the filter components; rinse under hot water and scrub with a soft brush.
- Check the sump area for glass, labels, bones, or seeds.
- Reinstall the filter securely, then run a short cycle to confirm the error is gone.
For model-specific filter removal and cleaning steps, follow the 66515113K214 owner's manual.
If the error comes back
A recurring E22 usually means water is not circulating or draining correctly because something is still restricted or a related part is failing.
Common causes to check
- Filter not seated or locked in place
- Clogged spray arm holes (poor circulation can mimic a filter restriction)
- Drain path restriction (food debris in sump, hose, or pump inlet)
- Heavy grease buildup from frequent short cycles
Parts that are commonly involved
| Symptom you notice | What it often points to | Example part for this model |
|---|---|---|
| Dishes still dirty, weak spray | Restricted wash flow | Dishwasher spray arm WPW10491331 |
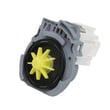
| Water not draining well | Drain restriction or pump issue | Dishwasher drain pump WPW10348269 |
| Filter won’t clean up or is damaged | Worn or broken filter | Dishwasher filter WPW10463906 |
Why it matters
A blocked filter can reduce cleaning performance, leave gritty residue on dishes, and strain the circulation and drain system. Keeping the filter and sump clear helps the heater, pump, and spray arms work the way they should.
Last updated: January 2026
How do I get rid of standing water in my Kenmore dishwasher?
Standing water in your Kenmore dishwasher model 66515113K214 usually clears by running the built-in Cancel/Drain function first; if water remains, remove it manually and then correct the most common drain-blockage causes (air gap, disposer plug, drain hose kinks, or clogs). See the 66515113K214 owner's manual for the exact Cancel/Drain steps.
Fastest way to remove the water
- Open the door slightly and wait for spraying to stop.
- Press CANCEL/DRAIN once.
- Close the door within 3 seconds so the drain cycle starts.
- Let it drain completely (the Cancel/Drain light typically turns off after about 2 minutes).
- If you need a full reset before retrying a cycle, press CANCEL/DRAIN twice, then select a new cycle and press START/RESUME.
If water still won’t drain: what to check next
Standing water is almost always a restriction in the drain path. Check these in order:
- Drain air gap (if your setup has one): remove the cover/cap and clean out soil buildup.
- Garbage disposer connection: confirm the disposer inlet knockout plug was removed.
- Drain hose routing: look for kinks, pinches, or a sag that traps water.
- Clogs: check for food obstructions in the dishwasher drain path or disposer.
- Pump issue: if the drain path is clear but it still won’t evacuate, the drain pump can be the failure point.
Common symptoms and likely causes
| What you see | Most likely cause | What to do |
|---|---|---|
| Water stays after Cancel/Drain | Clog or kink | Clear blockage; straighten hose |
| Slow drain, gurgling | Dirty air gap | Clean air gap |
| No drain into disposer | Disposer plug still in place | Remove knockout plug |
| Hums but no water movement | Drain pump problem | Inspect/replace pump |
Parts that commonly fix a no-drain problem
If your checks point to a failed pump or damaged hose, these are common replacements for this model:
Why it matters
Standing water can lead to odors, poor wash results, and cycle interruptions. Restoring proper drainage protects the sump area, helps prevent suds-related issues, and keeps cycles completing normally.
Last updated: January 2026
How to access a dishwasher pump?
To access the pump on your Kenmore dishwasher model 66515113K214, we typically remove the lower access panel, then reach the pump area from underneath the tub. For many pump styles, you release the locking tab and rotate the pump about a quarter-turn counterclockwise to remove it from the sump.
Safe access steps (from underneath)
- Turn off power at the breaker (and shut off the water supply if you will disconnect hoses).
- Remove the lower rack and clear the bottom of the tub.
- Protect the pump area so hardware cannot fall in.
- Remove the lower access panel to reach the pump and wiring.
What we recommend doing first
- Disconnect power at the breaker (dishwashers are a shock hazard when energized).
- Remove the lower dish rack.
- Place a towel over the pump assembly and lower spray arm to prevent dropped screws from landing in the pump area (a best practice called out during installation steps). See the installation guide.
- Have a shallow pan and towels ready for residual water.
Removing the access panel (typical for this model family)
The installation instructions for 66515113K214 show a common service access method:
- Carefully tip the dishwasher back (use 2+ people) if it is out of the cabinet.
- Use a flat-blade screwdriver to unlock the plastic fasteners (quarter-turn) and remove the lower panel.
- Keep the tech sheet with the access panel (do not discard it). Reference the 66515113K214 installation guide.
Pump removal basics (what “quarter-turn” means)
Many Kenmore (Whirlpool-built) dishwashers use a twist-lock pump mount.
- Press down the locking tab.
- Rotate the pump 1/4 turn counterclockwise.
- Pull the pump straight out of the sump.
Common parts you may be working around
| Area | What you may see | Example part for this model |
|---|---|---|
| Drain system | Drain pump, drain hose | Dishwasher drain pump WPW10348269 |
| Wash system | Sump, circulation path | Dishwasher sump and seal assembly WPW10482462 |
| Filtration | Filter cup/filter | Dishwasher filter W10872845 |
Why it matters
Accessing the pump correctly prevents stripped fasteners, broken tabs, and screws falling into the sump, which can cause poor draining, leaks, or noisy operation.
Last updated: January 2026
What does E15 mean on a Kenmore dishwasher?
On Kenmore dishwasher model 66515113K214, an E15 code means the leak protection system has detected water in the base pan and triggered a safety float or switch, so the dishwasher may stop filling or run the drain pump to prevent flooding. See the 66515113K214 owner's manual for model-specific reset and troubleshooting steps.
What to do right away
- Press Cancel/Drain (if your control panel has it) and let the unit drain.
- Turn power off at the breaker, then turn water supply off under the sink.
- Pull the dishwasher forward slightly and check for standing water under or around it.
- If safe to do so, dry the base area and look for the source of the leak before restarting.
- If the code returns, focus on finding the leak rather than repeatedly resetting.
Common causes of E15 on this dishwasher
Most E15 events come from a real leak or overflow condition. Typical culprits include:
- Loose or cracked drain line (see dishwasher drain hose 8269144A)
- Leaking fill components or overfilling (see dishwasher water inlet valve W11175771)
- Drain restrictions that cause water to back up
- Suds from the wrong detergent (hand soap or non-dishwasher detergent)
- Door seal or tub sealing issues (see dishwasher sump and seal assembly WPW10482462)
Quick checks: leak vs. drain problem
| Symptom | More likely cause | What to check |
|---|---|---|
| Water on floor in front | Door leak | Door alignment, gasket condition, loading blocking spray |
| Water under unit, no floor puddle | Base pan leak | Hoses, pump area, sump seals |
| Unit keeps draining or won’t fill | Float/switch triggered | Dry base pan, then re-test |
| Dirty water left in tub | Drain issue | Drain hose routing, clogs, air gap/disposer inlet |
Why it matters
E15 is a safety shutdown designed to prevent cabinet damage and electrical hazards. Clearing the water without fixing the leak usually brings the code back and can lead to repeat draining, poor washing, or no-fill symptoms.
Last updated: January 2026