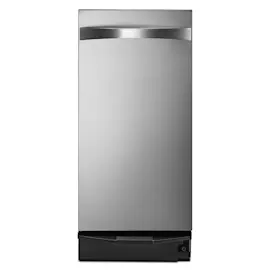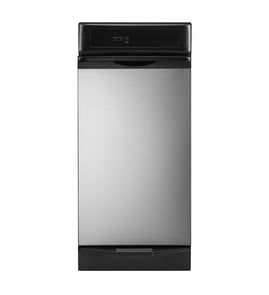

Where is the model number on a Kenmore trash compactor?
On Kenmore trash compactor model 6651350593, the model number is printed on a rating label that’s usually on the cabinet frame just inside the drawer opening, behind the drawer/door area, or low on a side panel near the front.
- Open the drawer and look along the front frame rails (left and right sides)
- Check the inside edge of the drawer opening where the drawer slides in
- Look behind the drawer front area (around the latch/strike zone)
- Inspect the lower side panel near the toe-kick area
- If built-in, check the cabinet frame visible when the drawer is pulled out
- Pull the drawer out as far as it safely goes.
- Use a flashlight and scan the frame from top to bottom on both sides.
- Wipe dust or residue off the label so the digits are readable.
- Write down the full model number exactly as shown (for this unit: 6651350593).
| Label item | What it’s used for |
|---|---|
| Model number | Matching parts and diagrams to your exact compactor |
| Serial number | Identifying production run for service history |
| Electrical rating | Confirming voltage/amp requirements |
We use the model number to match the correct Kenmore trash compactor parts and diagrams, since switches, latches, slides, and drive components can vary by revision even within the same product family.
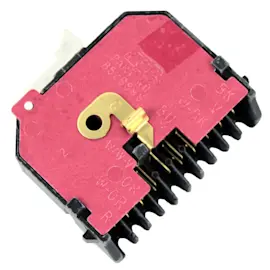
If you’re ordering a common electrical part for this compactor, the model number helps confirm compatibility with items like the trash compactor top limit and directional switch WP777811.
Last updated: February 2026
Why can't I press the trash compactor button?
On Kenmore trash compactor model 6651350593, the Start/Compact button usually will not work unless the drawer is fully closed and the safety interlock is satisfied. Clear any trash buildup, make sure nothing fell behind the drawer, and confirm the drawer latch and door switch area are engaging.
- Pull the drawer out and remove anything wedged behind it or under the cabinet lip.
- Reseat the bag and bag carrier so the drawer closes squarely.
- Close the drawer firmly until it latches; the compactor will not start if it is even slightly open.
- Check the key/lock position (if equipped) and make sure the unit is not locked out.
- Verify the household outlet has power (try a small lamp or phone charger).
If the drawer closes normally and the button still will not respond, a failed switch or latch is the next likely cause.
- Drawer latch not engaging: Inspect the latch for damage or looseness.
- Safety/limit switch issue: A bad interlock or limit switch can prevent the control from starting a cycle.
- On/off switch problem: If the unit will not power on at all, the on/off switch can be the culprit.
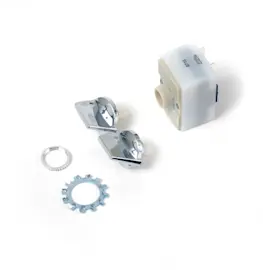
Helpful parts for this model include the Kenmore elite trash compactor drawer latch assembly 775665 and the trash compactor top limit and directional switch WP777811.
| What you see | Most likely cause | What we do first |
|---|---|---|
| Button won’t press or feels blocked | Drawer not fully seated, debris interference | Clear obstruction; re-close drawer firmly |
| Button presses but nothing happens | Interlock/limit switch not closing | Inspect latch alignment; test switch continuity |
| Unit seems dead (no response) | On/off switch or power issue | Confirm outlet power; inspect switch wiring |
Trash compactors use a drawer interlock to prevent the ram from moving when the drawer is open. If the drawer is not fully closed, the compactor protects you by ignoring the Start/Compact command.
Last updated: February 2026
What is a common problem with trash compactors?
A common problem with the Kenmore 6651350593 trash compactor is that it will not start or will stop mid-cycle, usually because a safety switch, direction/limit switch, or door/drawer latch is not closing properly. Loud grinding noises and a stuck drawer are also frequent issues.
- Won’t start at all: power issue, on/off switch, drawer/door interlock, or a failed limit switch
- Stops before completing a cycle: top limit/directional switch not switching, jammed mechanism
- Loud clicking or grinding: worn drive gear/chain, damaged bearings, or a binding ram
- Drawer stuck or hard to open: jammed trash, bent rails, worn slides, or latch problems
- Bad odors: dirty drawer, residue in the bottom pan, or old bags
- Make sure the drawer is fully closed and latched; the compactor will not run if the interlock is open.
- Check the household breaker or GFCI outlet; reset if tripped.
- Remove the drawer and look for a jam (glass, metal, or a bag caught in the ram path).
- Listen for the motor: hum with no movement often indicates a jam or drive issue.
- If you have a multimeter, test switches and wiring connections using a proven method like how to use a multimeter to test electrical parts video.
These are frequent culprits on many Kenmore compactors, including model 6651350593:
| Symptom | Likely area | Example part to inspect/replace |
|---|---|---|
| Won’t start | Direction/limit sensing | Trash compactor top limit and directional switch WP777811 |
| Won’t run when drawer is closed | Latch/interlock alignment | Drawer latch and switch mounting (inspect for looseness) |
| Runs noisy | Drive train wear | Drive gear/chain, bearings, ram slides |
Trash compactors rely on multiple safety switches and a tight drive system. A slightly misaligned latch or a failing limit switch can prevent operation, and continuing to run a noisy unit can accelerate wear on gears, bearings, and the ram mechanism.
Last updated: February 2026
What is the life expectancy of a trash compactor?
A Kenmore trash compactor like model 6651350593 typically lasts 10 to 15 years with normal household use. Lifespan depends most on how often you run cycles, how heavily you load the drawer, and whether wear items (switches, slides, drive parts) are replaced when symptoms start.
Most residential compactors fall into a fairly consistent range:
- Light use (few cycles per week): often 12 to 15 years
- Average use (daily or near-daily): often 10 to 12 years
- Heavy use (multiple cycles per day): often 7 to 10 years
If you see these issues repeatedly, the unit is usually wearing in the drive system, drawer system, or safety switches:
- Ram stalls, reverses unexpectedly, or will not complete a cycle
- Drawer will not close, latch, or stay aligned
- Loud grinding, popping, or chain/gear noise during the downstroke
- Unit only runs when you wiggle the switch or door
- Frequent bag tears from misalignment or a damaged carrier
Replacing a failed wear part early often prevents bigger damage.
| Symptom | Common area | Example part for this model |
|---|---|---|
| Won’t start or stops mid-cycle | Safety/limit switching | Trash compactor top limit and directional switch WP777811 |
| Drawer won’t latch or pops open | Drawer latch/lock | Kenmore elite trash compactor drawer latch assembly 775665 |
| Drawer hard to open/close | Slides/rollers | Slide WP9870975 |
| Ram travel issues, binding | Ram/drive components | Trash compactor ram assembly W11696573 |
A trash compactor is a high-load appliance; when a switch, slide, or drive component starts failing, the motor and gear train can be forced to work harder. Addressing early symptoms helps you avoid repeat jams, incomplete cycles, and secondary damage.
Last updated: February 2026
How much does it cost to fix a trash compactor?
Trash compactor repair cost depends on what failed and how hard it is to access on your Kenmore model 6651350593. Most fixes land in the $150 to $500 range (parts plus labor), while major drive-system repairs can run higher.
These ranges are common for household trash compactors; your total changes based on service-call minimums, local labor rates, and whether the unit is built-in.
- Diagnostic/service call: $75 to $150
- Switch or latch repair: $150 to $300
- Drawer slide or handle repair: $200 to $450
- Drive chain or gear repair: $250 to $600
- Motor or ram-related repair: $400 to $900+
If the compactor will not start, stops mid-cycle, or will not compact fully, these model-matched parts are common suspects:
- Trash compactor top limit and directional switch WP777811
- Off switch 675382
- Kenmore elite trash compactor drawer latch assembly 775665
- Kenmore elite trash compactor drive chain 780477
- Trash compactor ram assembly W11696573
| Symptom | Common cause area | Typical total cost |
|---|---|---|
| Will not start | On/off switch, interlock, limit switch | $150 to $300 |
| Starts then stops | Limit switch, wiring, drive load | $200 to $500 |
| Drawer will not close/lock | Latch, slides, handle | $200 to $450 |
| Loud grinding/clicking | Chain/gear wear | $250 to $600 |
| Weak or no compaction | Ram/drive components | $400 to $900+ |
Trash compactors are simple machines, so the repair price is usually driven by labor time and whether the failure is in the drive system (chain, gear, ram) versus a control/safety switch. Catching a noisy drive early often prevents bigger damage.
- Unplug the compactor before inspecting anything.
- Confirm the drawer is fully closed and latched.
- Listen for motor hum (power present) vs. no sound (switch/power issue).
- Check for obvious obstructions in the drawer and around the ram path.
- If you are comfortable testing, use a meter to check switches and wiring with guidance from how to use a multimeter to test electrical parts video.
Last updated: February 2026