Get free shipping on your order, with any water filter subscription. Find my filter

Open Hamburger Menu
Sears Parts Direct
Tips to find your model number

Whirlpool WRF736SDAM14 refrigerator Parts

Here are the diagrams and repair parts for Whirlpool WRF736SDAM14 refrigerator, as well as links to manuals and error code tables, if available.

Whirlpool WRF736SDAM14 refrigerator
By Schematic
By Part
SELECT DIAGRAM
?

This is the number corresponding to the part on the diagram / schematic

Browse Parts for WRF736SDAM14 Refrigerators

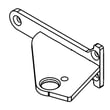
  • Refrigerator Hinge Center Assembly for Whirlpool WRF736SDAM14 - Part W10407275

    Cabinet parts diagram

    Refrigerator Door Hinge

    Part #W10248702

    Replaced by #W10407275

    Info Icon
    Manufacturer substitution
    This part replaces W10248702. Substitute parts can look different from the original.
    In Stock
    $99.21
    Minus Item
    Qty
    Plus Item
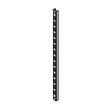
  • Refrigerator Ladder for Whirlpool WRF736SDAM14 - Part WPW10248516

    Shelf parts diagram

    Refrigerator Ladder

    Part #W10248516

    Replaced by #WPW10248516

    Info Icon
    Manufacturer substitution
    This part replaces W10248516. Substitute parts can look different from the original.
    This item is not returnable
    In Stock
    $20.34
    23% OFF Phone Price : $26.34Info Icon
    Minus Item
    Qty
    Plus Item
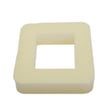
  • Refrigerator Return Air Duct Gasket for Whirlpool WRF736SDAM14 - Part WPW10320706

    Refrigerator liner parts diagram

    Refrigerator Gasket

    Part #W10320706

    Replaced by #WPW10320706

    Info Icon
    Manufacturer substitution
    This part replaces W10320706. Substitute parts can look different from the original.
    This item is not returnable
    In Stock
    $18.95
    10% OFF Phone Price : $20.95Info Icon
    Minus Item
    Qty
    Plus Item
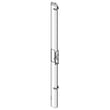
  • Refrigerator Flipper Assembly for Whirlpool WRF736SDAM14 - Part W10806457

    Refrigerator door parts diagram

    Refrigerator Mullion Assembly (gray)

    Part #W10698199

    Replaced by #W10806457

    Info Icon
    Manufacturer substitution
    This part replaces W10698199. Substitute parts can look different from the original.
    In Stock
    $134.21
    8% OFF Phone Price : $146.21Info Icon
    Minus Item
    Qty
    Plus Item
  • Whirlpool Refrigerator Crisper Drawer Front for Whirlpool WRF736SDAM14 - Part WPW10688114

    Shelf parts diagram

    Refrigerator Crisper Drawer Front

    Part #W10688114

    Replaced by #WPW10688114

    Info Icon
    Manufacturer substitution
    This part replaces W10688114. Substitute parts can look different from the original.
    In Stock
    $86.86
    6% OFF Phone Price : $92.86Info Icon
    Minus Item
    Qty
    Plus Item
  • Refrigerator Divider for Whirlpool WRF736SDAM14 - Part WPW10485654

    Freezer door parts diagram

    Refrigerator Divider

    Part #W10485654

    Replaced by #WPW10485654

    Info Icon
    Manufacturer substitution
    This part replaces W10485654. Substitute parts can look different from the original.
    In Stock
    $113.33
    Minus Item
    Qty
    Plus Item
  • Appliance Spray Paint (biscuit) for Whirlpool WRF736SDAM14 - Part 4392901

    Optional parts diagram

    Bisq Paint

    Part #4392901

    Replaced by #4392901

    Info Icon
    Manufacturer substitution
    This part replaces 4392901. Substitute parts can look different from the original.
    This item is not returnable
    In Stock
    $20.72
    37% OFF Was : $32.75Info Icon
    Minus Item
    Qty
    Plus Item
  • Appliance Spray Paint (white) for Whirlpool WRF736SDAM14 - Part 350930

    Optional parts diagram

    Spray Paint (white)

    Part #350930

    Replaced by #350930

    Info Icon
    Manufacturer substitution
    This part replaces 350930. Substitute parts can look different from the original.
    This item is not returnable
    In Stock
    $26.78
    18% OFF Phone Price : $32.78Info Icon
    Minus Item
    Qty
    Plus Item
  • Whirlpool Refrigerator Run Capacitor for Whirlpool WRF736SDAM14 - Part WPW10350564

    Unit parts diagram

    Refrigerator Run Capacitor

    Part #W10350564

    Replaced by #WPW10350564

    Info Icon
    Manufacturer substitution
    This part replaces W10350564. Substitute parts can look different from the original.
    In Stock
    $61.08
    9% OFF Phone Price : $67.08Info Icon
    Minus Item
    Qty
    Plus Item
  • Refrigerator Door Handle (stainless) for Whirlpool WRF736SDAM14 - Part W10899551

    Refrigerator door parts diagram

    Refrigerator Handle Assembly

    Part #W10713676

    Replaced by #W10899551

    Info Icon
    Manufacturer substitution
    This part replaces W10713676. Substitute parts can look different from the original.
    In Stock
    $95.30
    11% OFF Phone Price : $107.30Info Icon
    Minus Item
    Qty
    Plus Item

Whirlpool Refrigerator WRF736SDAM14 FAQs

On the Whirlpool WRF736SDAM14, you typically remove the freezer drawer front (not the entire slide rail system) by fully opening the drawer, removing the two top inside screws, then lifting the drawer front up to release the plastic studs from the glide brackets. See the WRF736SDAM14 user manual for the exact steps.

Before you start

Disconnect power if you will be working around wiring or the ice maker area, and remove food so the drawer is lighter.

  • Use two people if possible; the drawer front is awkward to handle
  • Empty the freezer drawer to prevent spills and reduce weight
  • Open the drawer fully so you can access the top inside screws
  • Use the correct tool (commonly a 1/4-inch hex driver)

Step-by-step: remove the freezer drawer front

  1. Open the freezer drawer to full extension.
  2. Remove the two screws at the top, inside the drawer front (one left, one right) that secure the drawer front to the drawer glides.
  3. Lift up on the drawer front to release the plastic studs from the drawer glide bracket slots.
  4. Set the drawer front aside on a protected surface.

Reinstalling the drawer front

Align the bottom plastic studs with the glide bracket slots, seat the studs, then reinstall and tighten the two top screws.

Task What you do What to watch for
Remove drawer front Remove 2 top inside screws, lift up to release studs Do not pry hard; lift straight up
Reinstall drawer front Align studs to slots, then reinstall screws Keep glides steady so studs seat correctly

Why it matters

Removing the drawer front is often needed for moving the refrigerator through a doorway, cleaning, or accessing lower components. Doing it the correct way helps prevent broken glide brackets, stripped screws, and drawer alignment issues.

Last updated: January 2026

Ice on the bottom of the freezer in your Whirlpool WRF736SDAM14 is most often caused by a partially blocked defrost drain, which lets defrost water overflow and refreeze on the freezer floor. A door seal leak or frequent door openings can also add moisture that turns into ice.

What to check first (quick triage)

  • Look for a sheet of ice on the freezer floor or under the lower basket; that strongly points to a drain issue.
  • Check the freezer drawer seal for gaps, tears, or areas that do not contact the cabinet evenly.
  • Confirm the freezer is closing fully (food packages or a misaligned drawer can hold it open).
  • Note when it happens: after a power outage, after leaving the door open, or after heavy use.

How to clear a likely clogged defrost drain

  1. Unplug the refrigerator (or turn cooling off, then disconnect power).
  2. Remove food and bins from the freezer drawer.
  3. Melt the ice on the freezer floor (towels plus a bowl of hot water in the freezer works well).
  4. Clear the drain opening (typically behind the rear freezer panel area) using hot water and a flexible plastic tube or pipe cleaner.
  5. Verify drainage: pour a small amount of hot water into the drain area and confirm it flows to the drain pan.

For model-specific safety and access guidance, follow the steps in the WRF736SDAM14 user manual.

When a part may be involved

If the drain keeps freezing back up, the defrost system may not be melting frost fast enough, or airflow and moisture control may be off. On this model, a failed defrost heater can contribute to defrost problems.

Symptoms vs. likely cause

What you see Most likely cause What to do
Solid ice sheet on freezer floor Defrost drain restricted Defrost fully and clear drain
Frost on packages and walls Door seal leak or door ajar Clean/inspect gasket, confirm closure
Heavy frost behind rear panel Defrost system issue Check heater and related defrost components

Why it matters

When defrost water cannot drain, it refreezes and can block the freezer drawer, reduce airflow, and lead to warmer temperatures and poor ice production.

Last updated: January 2026

On Whirlpool model WRF736SDAM14, a bottom leak is most often caused by a clogged or frozen defrost drain that makes meltwater overflow and run onto the floor. It can also be caused by a slow leak in the water supply system for the ice maker or dispenser.

Quick checks (start here)

  • Note where the water shows up: under the freezer drawer, under the fresh-food section, or behind the unit.
  • If puddles appear after defrost cycles (intermittent), suspect the defrost drain.
  • If leaking happens during ice or water dispensing, suspect the water supply system.
  • Check the water filter area for drips after a filter change.
  • Look behind the refrigerator for wet tubing or fittings.

Most common cause: clogged or frozen defrost drain

When the drain is blocked, defrost water cannot reach the drain pan and backs up until it spills out at the bottom.

Safe DIY steps

  • Unplug the refrigerator.
  • Remove the freezer drawer contents as needed.
  • Melt visible ice with warm (not boiling) water.
  • Flush the drain with warm water until it flows freely.
  • Confirm the drain pan is seated correctly if you can access it.

For model-specific access and safety notes, follow the WRF736SDAM14 use & care manual.

Water supply leaks: filter, tubing, or inlet valve

If WRF736SDAM14 is connected to a water line, leaks can come from loose fittings, a cracked tube, or a valve that seeps.

  • Re-seat the filter and flush the system after installing a new filter.
  • Tighten fittings gently (do not overtighten).
  • Replace damaged tubing.
  • If you see dripping at the valve area, consider replacing the refrigerator water inlet valve assembly WPW10341329.

Symptom-to-cause guide

What you notice Most likely cause Where to focus
Puddle every few days Defrost drain restriction Freezer drain path
Leak only during ice/water use Water line or valve leak Back of unit, valve area
Drips after filter change Filter not seated or air in system Filter housing, flushing

Why it matters

Bottom leaks can damage flooring and can also signal ice buildup in the drain system that may worsen over time. Fixing the source early helps prevent repeat puddles and hidden moisture.

Last updated: January 2026
Most common symptoms to help you fix your refrigerators

Choose a symptom to see related refrigerator repairs.

Main causes: leaky door gasket, defrost system failure, evaporator fan not running, dirty condenser coils, condenser fan…

Main causes: control board or cold control failure, broken compressor start relay, compressor motor failure, defrost tim…

Main causes: blocked vents, defrost system problems, evaporator fan failure, dirty condenser coils, bad sensors, condens…

Main causes: blocked air vents, compressor problems, condenser or evaporator fan not working, control system failure, se…

Main causes: water valve leaking, frozen or broken defrost drain tube, overflowing drain pan, cracked water system tubin…

Main causes: damaged door seal, faulty defrost sensor or bi-metal thermostat, broken defrost heater, bad defrost timer o…

Things to do: clean condenser coils, replace the water filter, clean the interior, adjust doors to prevent air leaks, cl…

Main causes: jammed ice cubes, broken ice maker assembly, dirty water filter, kinked water line, bad water valve, freeze…

Most common repair guides to help fix your refrigerators

These step-by-step repair guides will help you safely fix what’s broken on your refrigerator.

How to replace a refrigerator temperature control board

How to replace a refrigerator temperature control board

If the temperature in your refrigerator doesn't match the temperature you set, the problem could be the temperature cont…

Repair time and Difficulty

 30 minutes or less
How to replace a refrigerator water valve

How to replace a refrigerator water valve

Replace the water valve that feeds water to the ice maker and water dispenser if it no longer controls the flow of water…

Repair time and Difficulty

 15 minutes or less
How to clean refrigerator condenser coils

How to clean refrigerator condenser coils

Help your refrigerator run more efficiently by cleaning the condenser coils. It's easy and takes just a few minutes.…

Repair time and Difficulty

 15 minutes or less

Effective articles & videos to help repair your refrigerators

Use the advice and tips in these articles and videos to get the most out of your refrigerator.

How to Replace the Water Filter in a Universal/Multiflex Refrigerator

How to Replace the Water Filter in a Universal/Multiflex Refrigerator

Learn how easy replacing the water filter in a Universal/Multiflex refrigerator is.…

How to Replace the Water Filter in a KitchenAid Refrigerator

How to Replace the Water Filter in a KitchenAid Refrigerator

Discover how easy it is to replace the water filter in your KitchenAid refrigerator.…

How to get rid of refrigerator smells

How to get rid of refrigerator smells

Learn how to get rid of refrigerator odors…

Parts & More

Bottom-Mount Refrigerator
Dishwasher
Electric Range
Front-Engine Lawn Tractor
Furnace
Garage Door Opener
Gas Line Trimmer
Gas Walk-Behind Mower
Others
Outdoor Smoker
Parts
Power Screwdriver
Range
Refrigerator
Room Air Conditioner
Top-Mount Refrigerator
Washer