 Owner’s manual



How to reset a Fisher and Paykel dryer?
To reset your Fisher & Paykel dryer model DEIX2-96105A, disconnect power for a short time, then restore power and restart a cycle. This clears many temporary control glitches and lets the dryer reboot its electronics.
Reset steps (power reset)
- Press POWER to turn the dryer off.
- Unplug the dryer (or switch the dryer circuit breaker off).
- Wait 10 seconds.
- Restore power (plug back in or turn breaker on).
- Turn the dryer on and start a cycle.
- If the dryer is beeping, press POWER once to stop the beeping and note any progress lights that are flashing.
For button locations and normal indicator behavior, use the DEIX2-96105A user manual.
If it will not start after the reset
These quick checks solve the most common “won’t start” situations on this style of Fisher & Paykel dryer:
- Close the lid fully, then press START/PAUSE.
- If the lid was already closed, open and close it again, then press START/PAUSE.
- Make sure the lint bucket is in place and not overfull.
- Reduce load size if clothes sit higher than the top of the lint bucket.
- Check the exhaust duct for kinks, crushing, or blockage.
What the beeping and flashing lights mean
If the dryer keeps beeping and one or more progress lights are flashing, the dryer is signaling a fault that needs service. Pressing POWER once stops the beeping but keeps the fault code displayed, which helps a technician diagnose the problem.
Quick guide
| What you see | What to do next |
|---|---|
| Dryer acts “frozen” or unresponsive | Do the 10-second power reset and restart a cycle |
| Beeping continues with flashing progress lights | Stop the beeping with POWER, record the light pattern/code, arrange service |
| Lid closed but won’t run | Open and close lid again, then press START/PAUSE |
Why it matters
A proper reset restores normal operation after a power glitch or control hiccup, and it helps you separate a temporary issue from an airflow, load-size, or fault-code problem.
Last updated: February 2026
What are the main parts of a dryer?
The main parts of a dryer work together to tumble clothes, move air, and control heat and dryness. On the Fisher & Paykel DEIX2-96105A, the core systems are the drum and drive, airflow and lint handling, heating, and electronic controls; details and safety notes are in the DEIX2-96105A owner's manual.
Main dryer parts (what they do)
- Drum and support: holds laundry and turns during the cycle (drum, bearings, glides/rollers depending on design).
- Drive system: turns the drum (drive motor, belt, idler pulley).
- Airflow system: pulls air through the drum and pushes it out the exhaust (blower wheel/fan, ducts, outlet, venting).
- Heating system: warms the air (electric heater or gas burner components, plus safety thermostats).
- Lint handling: captures lint before it reaches the blower and vent (lint screen and lint duct).
- Controls and sensors: manage time, temperature, and dryness (control board, user interface, moisture sensing contacts).
- Door and safety interlocks: keep the dryer sealed and safe to run (door switch/latch, hinges/springs).
Parts you will commonly replace on DEIX2-96105A
These are examples of model-matched parts that relate directly to the “main parts” above:
| Dryer system | Example part for this model | What you would notice when it fails |
|---|---|---|
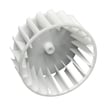
| Airflow (blower) | Dryer blower motor and fan kit 395222P | Poor airflow, long dry times, unusual noise |
| Drum support | Dryer drum bearing kit 479332 | Squealing, rumbling, drum play |
| Lint handling | Dryer lint duct 395074 | Lint buildup, restricted airflow, overheating symptoms |
| Controls | Fisher & Paykel dryer electronic control board | Dead dryer, erratic cycles, no heat commands |
Why it matters
Most “dryer problems” trace back to one of two systems: airflow (lint restriction or venting issues) or drum/drive (wear parts that affect tumbling). Your manual also stresses exhausting the dryer outdoors and preventing lint accumulation around the exhaust area for safe, efficient drying.
Quick checks that help you pinpoint the system
- Clean the lint area before/after loads (and keep lint from building up in ducts).
- Confirm the dryer is exhausted outdoors and the ducting is clean and properly connected.
- If dry times are long, suspect airflow first (lint duct, blower, vent run).
- If you hear squealing or rumbling, suspect drum support parts (bearing/rollers/glides).
- If the dryer will not start or behaves erratically, suspect the door interlock or controls.
Last updated: February 2026
Why is my Fisher and Paykel dryer leaking water?
Water leaking from your Fisher & Paykel dryer model DEIX2-96105A almost always comes from a drainage or condensation issue: a kinked or loose drain hose, a blocked lint path that causes moisture to back up, or a container or duct area that is not seated correctly. Use the checks below to pinpoint the source.
Quick checks that fix most leaks
- Unplug the dryer, then pull it forward and straighten the drain hose; remove kinks and sharp bends.
- Confirm the hose connection is tight and routed downhill with no loops that trap water.
- Empty the lint bucket before lint reaches the top of the transparent section (overfilling can restrict airflow and contribute to moisture problems).
- Make sure the lint bucket is fully installed and seated.
- Run a short cycle and watch where the first drops appear: rear hose area, front cabinet, or underneath.
For model-specific care and loading guidance, follow the DEIX2-96105A owner’s manual.
What the leak location usually means
| Where you see water | Most likely cause | What to do next |
|---|---|---|
| Behind the dryer | Drain hose kinked, loose, or damaged | Re-route, tighten, replace hose if split |
| Front area near lint bucket | Lint bucket not seated, lint path restriction | Reseat bucket; inspect lint duct area |
| Under the cabinet | Internal duct seal or airflow restriction causing condensation | Inspect lint duct and seals; service if needed |
Parts that can be involved
If you find airflow restriction or lint buildup in the internal path, these model-matched parts are commonly involved in moisture and condensation complaints:
- Dryer lint duct 395074: carries lint-laden air; restrictions can trap moisture.
- Dryer lint screen cover 395133: helps keep the lint area sealed and aligned.
Why it matters
A dryer that cannot move air efficiently can hold humid air inside the cabinet longer, which increases condensation and can show up as water under or around the unit. Keeping the lint system clear and the drain path straight helps drying performance and reduces leak risk.
Last updated: February 2026
Why is my Fisher and Paykel dryer not spinning?
If your Fisher & Paykel dryer model DEIX2-96105A is not spinning, the most common causes are a door or lid not fully closed, an overloaded drum, or an airflow restriction that makes the cycle pause or stop. We also check for a displayed fault and confirm the drum can turn freely by hand.
Quick checks we do first (no tools)
- Make sure the lid or door is fully shut, then press START/PAUSE.
- Look for a fault or error on the display and follow the steps in the DEIX2-96105A owner's manual.
- Reduce the load size; the manual notes overloading can cause poor performance (keep the load below the lint bucket viewing area).
- Empty the lint bucket; a full lint bucket can reduce performance.
- Confirm the airflow path is clear (lint bucket seated correctly, no blockage in the airflow system).
- Remember: this dryer uses reverse action tumbling; a brief pause when it changes direction is normal.
If it still will not tumble: what to inspect next
If the dryer powers on but the drum will not move, we focus on mechanical drag and drive components.
- Drum hard to turn by hand (unplugged): suspect a drum support issue; a worn bearing can bind the drum.
- Drum turns easily but will not run: suspect a drive or control issue (belt, motor circuit, or control).
- Intermittent tumbling: check for load imbalance, overloading, or airflow restrictions that cause the cycle to stop.
Parts that commonly relate to “won’t spin” symptoms
| Symptom | What it points to | Example part for this model |
|---|---|---|
| Drum binds, scraping, heavy resistance | Drum support wear | Dryer drum bearing kit 479332 |
| Dryer runs but airflow seems weak, long dry times | Lint duct restriction | Dryer lint duct 395074 |
| Dryer stops or behaves erratically | Control or sensor inputs | Dryer sensor control board 395628P |
Why it matters
A dryer that will not spin is often protecting itself from overload, restricted airflow, or a fault condition. Fixing the root cause prevents repeat shutdowns, reduces dry times, and helps avoid overheating and premature wear on the drum and motor.
Last updated: February 2026





