Installation guide
 Owner’s manual
 Error Codes


How do you reset a Kenmore 79094032702 oven?
To reset your Kenmore 79094032702 electric range oven, turn the oven off, then reset power by switching the range circuit breaker off for about 1 minute and turning it back on. After power returns, reset the clock and any oven settings as needed (see the owner's manual).
- Press Cancel/Off to stop any active bake, broil, or timed cycle.
- Turn OFF the range breaker (or unplug the range if accessible).
- Wait about 60 seconds.
- Turn the breaker back ON (or plug back in).
- Set the clock and re-enter any cooking settings.
Your oven may be in Lockout mode, which can look like the oven is “stuck.” To toggle Lockout:
- Press and hold the Oven Lockout pad for 3 seconds.
- Wait about 15 seconds for the door lock motor to finish.
- Try the oven again.
If the oven door is locked, do not force it open while the lock indicator is flashing.
A reset will not change calibration, but if baking seems too hot or too cool, you can adjust the oven temperature offset.
| Symptom | What to do next |
|---|---|
| Food overbrowns or burns | Check temperature calibration and reduce offset |
| Food undercooks | Check calibration and increase offset |
| Temps vary a lot | Test with an oven thermometer, then calibrate |
For the exact calibration steps and button sequence, follow the owner's manual.
Resetting clears many temporary control glitches after a power interruption. Your manual also notes that you should not operate the range during a power failure; when power resumes, the clock and oven functions need to be reset.
Last updated: February 2026
Where can I find my Kenmore electric range model number?
On Kenmore electric range model 79094032702, the model and serial number are printed on an identification (serial) plate located on the right side of the oven front frame, inside the storage drawer or warmer drawer compartment. The exact spot is shown in the owner's manual.
- Turn the range off and let it cool.
- Pull the storage drawer or warmer drawer straight out.
- Look along the right side of the oven front frame (the frame opening behind the drawer).
- Record both the model number and serial number for parts lookup and service.
- A sticker or metal plate labeled Model No. and Serial No.
- Located behind the drawer, not on the cooktop surface
- Usually on the right-hand side of the frame
- May be easier to read with a flashlight
- Write the numbers down exactly as printed
| Range configuration | Most common label location | What you do |
|---|---|---|
| Storage drawer model | Right side of oven front frame, inside drawer opening | Remove/pull out drawer and look right |
| Warmer drawer model | Right side of oven front frame, inside drawer opening | Open warmer drawer and look right |
| Lower panel model | Behind the lower panel area | Open/remove lower panel and look right |
We use the full model number (like 79094032702) to match the correct Kenmore range parts, such as a bake element, oven temperature sensor, or surface element switch. One digit off can pull the wrong part list.
Last updated: February 2026
How to read Kenmore model numbers?
Kenmore model numbers are read left to right: the first 3 digits identify the manufacturer family, and the remaining digits narrow down the exact appliance and its feature set. For your Kenmore electric range model 79094032702, the 790 prefix is the key identifier to match the correct parts and documentation in the owner's manual.
Most Kenmore model numbers follow a predictable pattern:
- Prefix (first 3 digits): manufacturer family (example: 790)
- Middle digits: base design series (helps group similar ranges)
- Ending digits: feature, color, or production variation (helps ensure exact part fit)
On Kenmore model 79094032702, the identification plate is located:
- On the right side of the oven front frame
- Inside the storage drawer or warmer drawer compartment
- Visible after you open the drawer
This location matters because you often need the full model number (and sometimes the serial number) to confirm the correct bake element, oven temperature sensor, or control overlay.
The prefix helps prevent ordering a look-alike part that does not fit your exact range.
| What you’re matching | What to use | Why it matters |
|---|---|---|
| Parts diagrams and part fit | Full model number (79094032702) | Ensures correct mounting, wiring, and ratings |
| Service and troubleshooting steps | Model prefix (790) plus full model | Points you to the right error code family and procedures |
| Production variations | Serial number (when needed) | Helps confirm revised parts on some builds |
If you are reading the model number because the oven is not heating or you are seeing a fault code, use the Kenmore 790-specific guide: Kenmore 790 self-cleaning range error codes.
A single digit difference can change which surface element, terminal block, or oven sensor fits. Using the full 79094032702 model number keeps your repair accurate and avoids returns.
Last updated: February 2026
What was the size of the Kenmore 79094032702 oven?
The Kenmore 79094032702 is a freestanding electric range; the exact oven capacity (cubic feet) and the full exterior dimensions depend on the specific 790.9402/9403 configuration and are listed in the product literature for your unit. For the most accurate size details, we use the specifications section in the owner's manual.
When customers ask for oven size, it usually refers to one of these:
- Oven capacity (cubic feet)
- Exterior dimensions (width, height, depth)
- Interior cavity dimensions (usable width, height, depth)
- Cutout/clearance needs (space behind and around the range)
- Rack positions and usable cooking levels
We recommend pulling the measurements from the documentation so they match your exact build.
- Check the specifications/dimensions pages in the owner's manual.
- Use the installation guide for clearances, leveling leg range, and anti-tip bracket placement.
- If you are measuring the appliance directly, measure:
- Width at the widest point (often the cooktop edge)
- Height from floor to top of backguard/control area
- Depth from back panel to front of door handle
Most Kenmore freestanding electric ranges in the 790 series are built around these common planning dimensions.
| Measurement | Typical range (freestanding electric range) | What to verify in your docs |
|---|---|---|
| Width | ~30 inches | Exact width at cooktop lip/trim |
| Height | ~36 to 47 inches | Whether your model has a taller backguard |
| Depth | ~25 to 28 inches | Depth including the door handle |
Using the correct dimensions prevents fit issues with countertops, anti-tip bracket alignment, and electrical cord clearance. It also helps you choose the right oven racks and cookware placement for even baking.
Last updated: February 2026
Why is my Kenmore electric oven not heating up properly?
If your Kenmore 79094032702 electric range oven is not heating correctly, the most common causes are a failed bake element, a bad oven temperature sensor, or control settings that are not set for proper preheat. We recommend checking the bake element first, then verifying temperature sensing and settings using the owner's manual.
- Confirm you are using Bake, not Broil.
- Allow a full 10 to 15 minutes of preheat for most baking.
- Try a different outlet circuit only if the entire range is acting up (clock, elements, oven).
- If the control is beeping and showing an F code, clear it with STOP/CLEAR and re-test.
- If baking results are inconsistent, use the oven temperature adjustment feature described in the manual.
| Symptom | Most likely cause | What to look for | Part to consider |
|---|---|---|---|
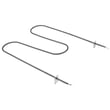
| Oven will not heat in Bake | Burned-out bake element | Blisters, cracks, holes, no glow | Range bake element 316075103 |
| Oven heats but temperature is off | Temperature sensor out of range | Erratic temps, long preheat, over/underbakes | Frigidaire range oven temperature sensor 316490000 |
| Broil works but Bake does not | Bake circuit issue | Broil heats normally, Bake stays cool | Start with bake element, then wiring |
- Turn off power at the breaker before touching wiring or removing panels.
- Inspect the bake element for visible damage; replace if damaged.
- If the element looks normal, test it for continuity with a multimeter.
- Check the sensor connection at the rear of the oven cavity; reseat the plug if loose.
- Review rack position and preheat guidance; many baking issues are caused by pan placement and not allowing full preheat.
When the bake element or temperature sensor is failing, the oven can cycle heat incorrectly. That leads to long preheat times, undercooked centers, or overbrowned edges. Correcting the heating or sensing problem restores stable temperature control and consistent baking performance.
Last updated: February 2026