- Kenmore refrigerator water filters
- Whirlpool refrigerator water filters
- Samsung refrigerator water filters
- GE refrigerator water filters
- LG refrigerator water filters
- Frigidaire refrigerator water filters
- KitchenAid refrigerator water filters
- Maytag refrigerator water filters
- Kenmore Elite refrigerator water filters
- Estate refrigerator water filters
- GE Profile refrigerator water filters
- Amana refrigerator water filters
- Bosch refrigerator water filters
- Dacor refrigerator water filters
- Electrolux refrigerator water filters
Top DIY repair help
View All Repair Categories
Appliances
Lawn & Garden
Power Tools
Home Improvement
Sports & Leisure
Heating & Cooling
Quick Links
How to replace a range oven door switch
less than a minute readMar 19Lyle Weischwill
Repair time and Difficulty
30 minutes or less
Tools Required
- Phillips screwdriver
- Slot screwdriver
- Work gloves
- Sturdy prop such as a heavy stick or piece of wood
- A help if necessary
This range repair guide shows how to replace the oven door switch. The oven door switch detects whether the oven door is closed and helps control the oven light. Unless you have the oven light control set to keep the oven light on constantly, the door switch shuts off the light when you close the door. The oven door switch also verifies that the oven door is shut during the self-clean cycle. If the oven light stays on when you close the door or the self-clean cycle won’t start or stops in the middle of the cycle because the door switch doesn’t properly detect the door being closed, replace the door switch with a manufacturer-approved range part.
This procedure shows how to replace the oven door switch on some Kenmore, Frigidaire, Whirlpool, Maytag, Amana, GE, Electrolux, LG and Samsung ranges.
Instructions
- 1. Turn off power to the range
Unplug the range or shut off the circuit breakers for the range.
Tip: Shutting off the house circuit breakers for the range works best for this repair because you don’t have to pull the range out to replace the switch. If you pull out the range to unplug it, set the range on cardboard prevent scratching the floor.
- 2. Open the cooktop
Open the oven door completely and remove the screws from the bottom front lip of the glass cooktop frame.
Carefully pull the cooktop assembly slightly forward to release the front lip of the glass cooktop frame from the front cabinet support bracket. Raise the front of the cooktop slightly to release the frame sides from the front support bracket then pull the cooktop forward to release the hinge tabs from the slots in the backguard.
Lift the front edge of the glass cooktop and prop it open.
Place the prop at the front of the range under the center of the cooktop’s front lip where it's steady, so the cooktop won't fall. Avoid damaging the oven cavity insulation when propping open the glass cooktop.
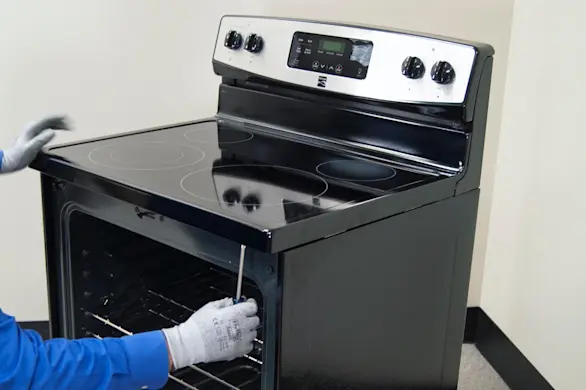
PHOTO: Remove the cooktop screws. 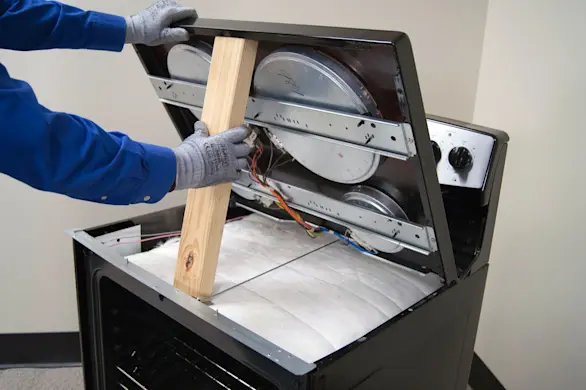
PHOTO: Prop open the cooktop.
- 3. Replace the door switch
Disconnect the wires from the oven door switch. Use a slot screwdriver to release the locking tabs and pull the oven door switch out of the range frame. Push the new oven door switch into the range frame. Connect the wires to the new oven door switch.
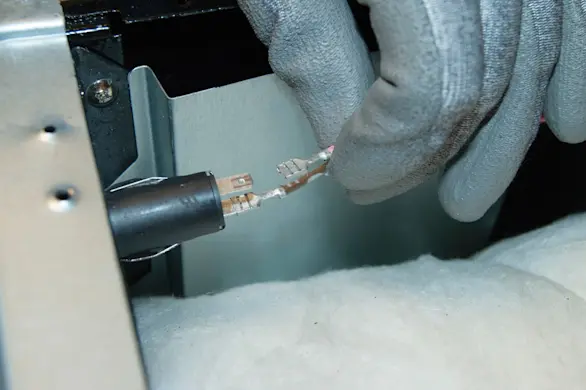
PHOTO: Disconnect the door switch wires. 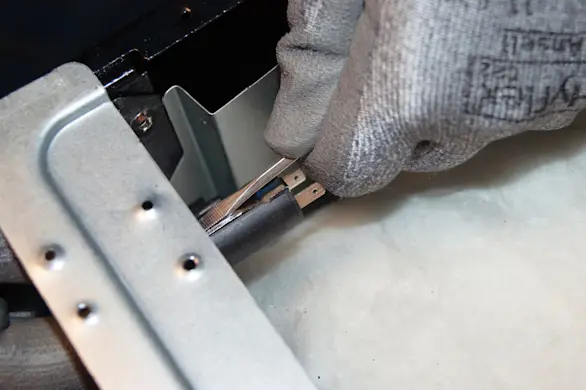
PHOTO: Release the locking tab. 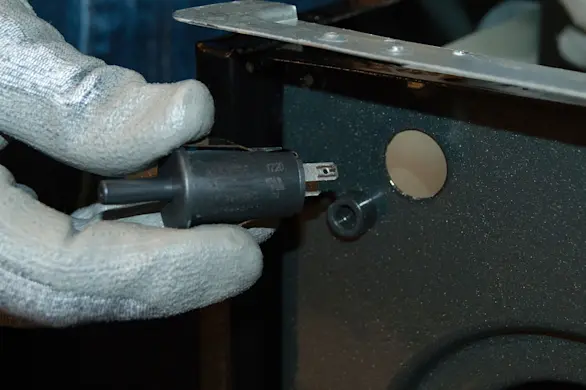
PHOTO: Remove the door switch.
- 4. Reattach the cooktop
Carefully remove the prop that's supporting the cooktop and lower the cooktop. Tuck the front lip of the cooktop frame under the front cabinet support bracket and lower the sides of the cooktop frame over the ends of the front support bracket. Push the cooktop back, inserting the hinge tabs into the backguard slots. Reinstall the mounting screws in the front lip of the cooktop frame. Close the oven door.
- 5. Restore power to the range
Plug the range back into the electrical wall outlet or turn on the house circuit breakers for the range.
If you pulled out the range to unplug it, push the range into position and ensure that the rear leveling foot properly engages with the anti-tip bracket so the range doesn’t fall forward when you open the oven door and pull out a loaded oven rack.