Get free shipping on your order, with any water filter subscription. Find my filter

Open Hamburger Menu
Sears Parts Direct
Tips to find your model number

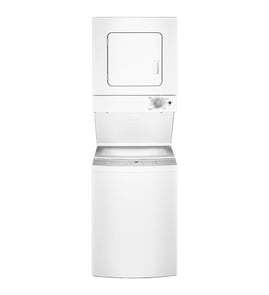
Whirlpool LTE6234DQ2 stacked laundry center Parts

Here are the diagrams and repair parts for Whirlpool LTE6234DQ2 stacked laundry center, as well as links to manuals and error code tables, if available.

Whirlpool LTE6234DQ2 stacked laundry center
By Schematic
By Part
SELECT DIAGRAM
?

This is the number corresponding to the part on the diagram / schematic

Browse Parts for LTE6234DQ2 Laundry Center

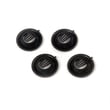
  • Washer Screw, #10-16 X 3/8-in for Whirlpool LTE6234DQ2 - Part WP3390631

    Screw

    Part #62863

    Replaced by #WP3390631

    Info Icon
    Manufacturer substitution
    This part replaces 62863. Substitute parts can look different from the original.
    This item is not returnable
    In Stock
    $4.91
    17% OFF Phone Price : $5.91Info Icon
    Minus Item
    Qty
    Plus Item
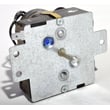
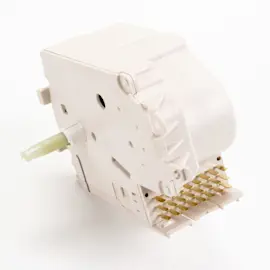
  • Dryer Timer for Whirlpool LTE6234DQ2 - Part WP3976569

    Washer/dryer control panel diagram

    Dryer Timer

    Part #3976569

    Replaced by #WP3976569

    Info Icon
    Manufacturer substitution
    This part replaces 3976569. Substitute parts can look different from the original.
    In Stock
    $187.06
    6% OFF Phone Price : $199.06Info Icon
    Minus Item
    Qty
    Plus Item
  • Appliance Screw, 6-20 X 1-in for Whirlpool LTE6234DQ2 - Part WP3395530

    Dryer front panel and door diagram

    Screw

    Part #697773

    Replaced by #WP3395530

    Info Icon
    Manufacturer substitution
    This part replaces 697773. Substitute parts can look different from the original.
    This item is not returnable
    In Stock
    $4.91
    17% OFF Phone Price : $5.91Info Icon
    Minus Item
    Qty
    Plus Item
  • Washer Suspension Plate for Whirlpool LTE6234DQ2 - Part WP3946509

    Machine base diagram

    Washer Skate Plate

    Part #3946509

    Replaced by #WP3946509

    Info Icon
    Manufacturer substitution
    This part replaces 3946509. Substitute parts can look different from the original.
    In Stock
    $74.66
    29% OFF Was : $105.77Info Icon
    Minus Item
    Qty
    Plus Item
  • Washing Machine Washer for Whirlpool LTE6234DQ2 - Part WP16123

    Miscellaneous diagram

    Washing Machine Washer

    Part #16123

    Replaced by #WP16123

    Info Icon
    Manufacturer substitution
    This part replaces 16123. Substitute parts can look different from the original.
    This item is not returnable
    In Stock
    $4.91
    17% OFF Phone Price : $5.91Info Icon
    Minus Item
    Qty
    Plus Item
  • Washer Screw, #10-16 X 3/8-in for Whirlpool LTE6234DQ2 - Part WP3390631

    Laundry Appliance Screw

    Part #3390631

    Replaced by #WP3390631

    Info Icon
    Manufacturer substitution
    This part replaces 3390631. Substitute parts can look different from the original.
    This item is not returnable
    In Stock
    $4.91
    17% OFF Phone Price : $5.91Info Icon
    Minus Item
    Qty
    Plus Item
  • Dryer Washer for Whirlpool LTE6234DQ2 - Part W11236646

    Dryer bulkhead diagram

    Washer

    Part #3387459

    Replaced by #W11236646

    Info Icon
    Manufacturer substitution
    This part replaces 3387459. Substitute parts can look different from the original.
    This item is not returnable
    In Stock
    $19.29
    9% OFF Phone Price : $21.29Info Icon
    Minus Item
    Qty
    Plus Item
  • Appliance Touch-up Paint, 0.6-oz (biscuit) for Whirlpool LTE6234DQ2 - Part 4392899

    #NI

    All parts diagram

    Appliance Touch-up Paint, 0.6-oz (biscuit)

    Part #4392899
    This item is not returnable
    In Stock
    $15.11
    12% OFF Phone Price : $17.11Info Icon
    Minus Item
    Qty
    Plus Item
  • Washer Motor Retainer for Whirlpool LTE6234DQ2 - Part WPW10086010

    Brake/clutch/gearcase/motor/pump diagram

    Motor Retainer

    Part #3349637

    Replaced by #WPW10086010

    Info Icon
    Manufacturer substitution
    This part replaces 3349637. Substitute parts can look different from the original.
    This item is not returnable
    In Stock
    $7.21
    12% OFF Phone Price : $8.21Info Icon
    Minus Item
    Qty
    Plus Item
  • Washer Door Strike for Whirlpool LTE6234DQ2 - Part WP358684

    Washer top and lid diagram

    Washer Door Strike

    Part #358684

    Replaced by #WP358684

    Info Icon
    Manufacturer substitution
    This part replaces 358684. Substitute parts can look different from the original.
    This item is not returnable
    In Stock
    $6.67
    13% OFF Phone Price : $7.67Info Icon
    Minus Item
    Qty
    Plus Item

Whirlpool Laundry Center LTE6234DQ2 FAQs

A Whirlpool dryer typically lasts 10 to 13 years with normal household use and basic maintenance. For the Whirlpool LTE6234DQ2 stacked laundry center, keeping airflow strong (lint screen and venting) is the biggest factor in reaching that lifespan; see the venting and care details in the LTE6234DQ2 owner's manual.

What affects dryer lifespan the most

  • Vent restriction (long runs, crushed duct, too many elbows) increases heat and wear
  • Lint buildup in the lint screen housing and blower area reduces airflow
  • Overloading strains the drum support system and drive components
  • High heat cycles used constantly can shorten heater and thermostat life
  • Skipping cleaning (vent, lint screen, exterior hood) leads to longer dry times and overheating

Quick maintenance checklist (best ROI)

  • Clean the lint screen every load.
  • Check the exterior vent hood for strong airflow while drying.
  • Use rigid metal venting where possible; it holds shape and flows better.
  • Keep vent length and turns within the limits in the LTE6234DQ2 installation guide.
  • If you hear thumping or squealing, inspect drum support and belt path parts early; small wear can become a bigger repair.

Typical lifespan expectations (what we see most often)

Usage pattern Typical dryer lifespan What changes it most
Light (1 to 3 loads/week) 12 to 15 years Clean venting, gentle loads
Average (4 to 7 loads/week) 10 to 13 years Airflow and not overloading
Heavy (multiple loads/day) 7 to 10 years Heat exposure and mechanical wear

Why it matters

A dryer that is taking longer to dry usually is not “just getting old”; it is often losing airflow. Strong airflow helps the dryer run cooler, dry faster, and reduces stress on key components like the operating thermostat and thermal cut-off.

Last updated: February 2026

A washer/dryer combo (all-in-one) trades convenience and space savings for smaller loads, longer wash-to-dry times, and less consistent drying than separate machines. With your Whirlpool LTE6234DQ2 stacked laundry center, you still get two separate functions, but you cannot run washer and dryer completely independently like full-size separate units.

Common downsides to expect

  • Smaller capacity: Combo units typically handle less laundry per cycle, especially for drying.
  • Longer total time: Wash plus dry can take several hours, particularly on sensor-dry cycles.
  • Drying performance varies: Heavier fabrics (towels, jeans) often finish damp.
  • No parallel loads: You cannot wash one load while drying another in a true all-in-one combo.
  • More complex repairs: More functions in one cabinet can mean longer troubleshooting and higher labor.
  • Ventilation limitations: Ventless combos can add heat and moisture indoors.

Combo vs. stacked laundry center (like LTE6234DQ2)

Feature All-in-one washer/dryer combo Stacked laundry center (LTE6234DQ2)
Wash and dry at the same time No Yes (washer and dryer are separate systems)
Typical cycle time Longer More typical washer and dryer times
Drying consistency Often less consistent Typically stronger, especially with proper venting
Service complexity Higher More traditional washer and dryer service approach

Why venting and airflow matter for drying

Even with a stacked laundry center, poor venting is a top reason clothes stay damp. For best performance, we recommend exhausting the dryer outdoors using a 4-inch heavy metal vent and avoiding plastic or foil venting. Confirm your venting setup and clearance requirements in the LTE6234DQ2 installation guide.

If your clothes are still damp (quick checks)

  • Clean the lint screen before every load.
  • Check for crushed, kinked, or overly long vent runs.
  • Make sure the outside vent hood opens freely.
  • Avoid overloading; bulky loads need room to tumble.
  • Use the right cycle (timed dry can help with heavy fabrics).

Last updated: February 2026

For Whirlpool washers like the washer section of our Whirlpool LTE6234DQ2 stacked laundry center, the most common service issues are “won’t start” and “won’t drain or spin.” In many cases, the fix is basic: confirm power, keep the lid closed, avoid extension cords, and make sure the drain setup is correct per the LTE6234DQ2 owner's manual.

Quick checks we recommend first (no parts needed)

  • Verify the outlet has power; reset the breaker or replace a blown fuse if needed.
  • Do not use an extension cord (it can cause low voltage and no-start symptoms).
  • Make sure the washer lid is fully closed; this model will not agitate or spin with the lid open.
  • Confirm both hot and cold water faucets are turned on and inlet hoses are not kinked.
  • If the washer seems to “pause,” allow the cycle to continue (some cycles pause about 2 minutes).
  • Check for excessive suds; measure detergent carefully, especially with soft water.

Most common symptom-to-cause map

Symptom Most common causes What to check first
Won’t start No power, lid not closed, cycle pause Outlet power, lid closure, wait 2 minutes
Won’t drain or spin Drain hose issue, lid open, oversudsing Drain height/clog, lid closure, detergent amount
Won’t agitate or spin Lid open, overloaded load Close lid, reduce load size

When a part is often involved

If the washer won’t agitate or spin even with the lid closed and the load size is reasonable, a worn drive system part is a common next suspect on many Whirlpool direct-drive designs.

  • If agitation is weak or intermittent, check the agitator dog 80040.
  • If the motor runs but the washer will not agitate or spin, check the coupling 285753A.
  • If the unit is noisy or has mechanical issues during spin, the drive train may need deeper inspection (for example, the gearcase).

Why it matters

“Won’t start” and “won’t drain/spin” problems often look like major failures, but they are frequently caused by power supply, lid position, drain hose installation (including height), or detergent oversudsing. Ruling those out first prevents unnecessary part replacement and repeat breakdowns.

Last updated: February 2026

Most common symptoms to help you fix your laundry centers

Choose a symptom to see related laundry center repairs.

Main causes: broken dryer drive belt, weak drive motor, binding drum seals…

Main causes: door not fully shut, bad door switch, faulty push-to-start switch, wiring failure, bad drive motor, blown f…

Main causes: blocked exhaust vent, clogged lint screen, bad timer, moisture sensing problems, weak gas valve coils, bad …

Main causes: broken lid switch or lid lock, faulty drive motor, drain system problem, broken drive system components…

Main causes: bad lid switch or lid lock, drive motor failure, broken motor coupler, bad timer, faulty electronic control…

Main causes: clogged drain system, blocked drain hose, bad drain pump…

Main causes: control system failure, broken heating element, bad gas valve coils, gas supply failure, voltage supply pro…

Main causes: unbalanced load, broken suspension springs or shocks, worn snubber ring…

Main causes: lack of water supply, failed lid switch or lid lock, bad water level pressure switch, control system failur…

Most common repair guides to help fix your laundry centers

These step-by-step repair guides will help you safely fix what’s broken on your laundry center.

How to replace a laundry center washer lid lock switch

How to replace a laundry center washer lid lock switch

If the washer fills but won’t start the agitation cycle, the lid lock switch could be defective. …

Repair time and Difficulty

 15 minutes or less
How to replace a laundry center washer timer

How to replace a laundry center washer timer

If the washer doesn't fill, spin or drain, the timer could be the problem. …

Repair time and Difficulty

 15 minutes or less
How to replace a laundry center washer snubber ring

How to replace a laundry center washer snubber ring

If the washer tub bangs the cabinet during the spin cycle even though the load is balanced, you might need to replace th…

Repair time and Difficulty

 15 minutes or less

Effective articles & videos to help repair your laundry centers

Use the advice and tips in these articles and videos to get the most out of your laundry center.

How to get cleaner clothes: 7 laundry tips for whiter whites and better results

How to get cleaner clothes: 7 laundry tips for whiter whites and better results

Tired of dull laundry? These 7 expert tips help you get cleaner clothes, brighten whites, and fix common washer mistakes…

Are DIY appliance repairs safe?

Are DIY appliance repairs safe?

Find out how to stay safe when repairing your appliances.…

Cleaning your appliances after a drinking water advisory

Cleaning your appliances after a drinking water advisory

Find out how to clean and flush household appliances once a boil water advisory is lifted.…

Parts & More

Dishwasher
Dryer
Front-Engine Lawn Tractor
Gas Grill
Gas Line Trimmer
Gas Range
Gas Snowblower
Parts
Side-By-Side Refrigerator
Vacuum Cleaner
Washer