- Kenmore refrigerator water filters
- Whirlpool refrigerator water filters
- Samsung refrigerator water filters
- GE refrigerator water filters
- LG refrigerator water filters
- Frigidaire refrigerator water filters
- KitchenAid refrigerator water filters
- Maytag refrigerator water filters
- Kenmore Elite refrigerator water filters
- Estate refrigerator water filters
- GE Profile refrigerator water filters
- Amana refrigerator water filters
- Bosch refrigerator water filters
- Dacor refrigerator water filters
- Electrolux refrigerator water filters
Top DIY repair help
View All Repair Categories
Appliances
Lawn & Garden
Power Tools
Home Improvement
Sports & Leisure
Heating & Cooling
Quick Links
How to replace a laundry center washer snubber ring
less than a minute readMar 18Lyle Weischwill
Repair time and Difficulty
15 minutes or less
Tools Required
- #2 Square-head screwdriver
- Wire hook
- Crow boar
- Block of wood
- Work gloves
This DIY repair guide explains how to replace a washer snubber ring in a laundry center. Located at the base of the washer, the snubber ring provides flexible support to the leg and dome assembly, which holds and supports the tub. If the snubber ring wears out, the leg and dome assembly loses support, causing the tub to bang against the cabinet sides during the spin cycle. Replace a worn snubber ring with the manufacturer-approved laundry center part.
This procedure shows how to replace the washer snubber ring in Kenmore, Frigidaire, White-Westinghouse, Crosley and Gibson laundry centers.
Instructions
- 1. Shut off the power
Unplug the laundry center. If the dryer uses gas, shut off the gas supply.
- 2. Remove the washer front panel
Remove the 2 screws at the bottom of the front panel.
Slide the front panel down to disengage the mounting tabs and pull off the front panel.
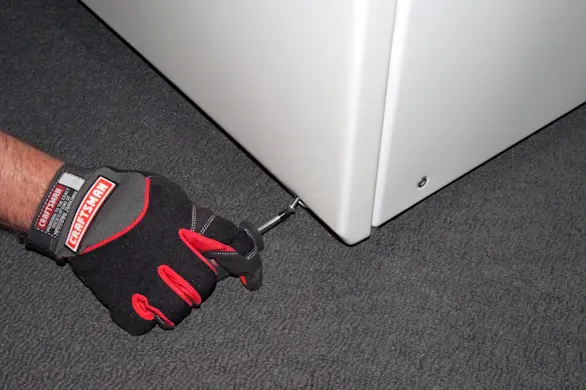
PHOTO: Remove the screws from the bottom of the front panel. 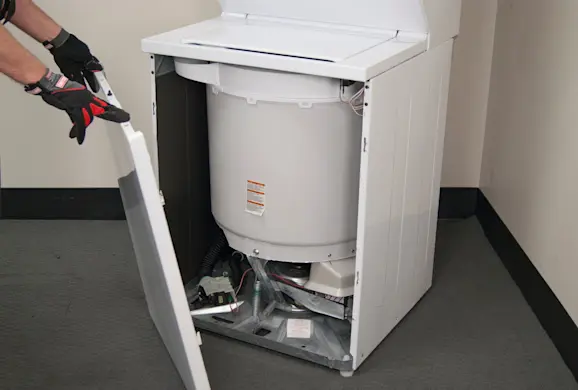
PHOTO: Remove the lower front panel from the laundry center.
- 3. Remove the front access panel
Remove the mounting screws from the front access panel and pull off the panel.
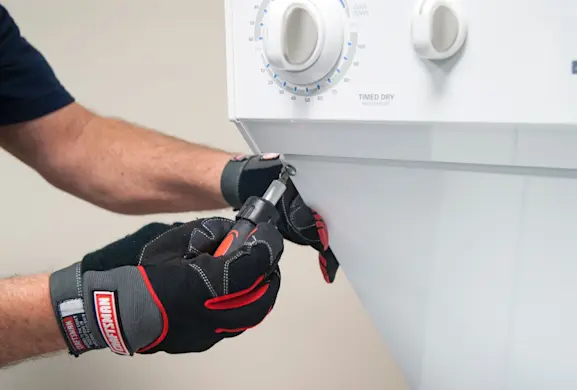
PHOTO: Remove the access panel mounting screws. 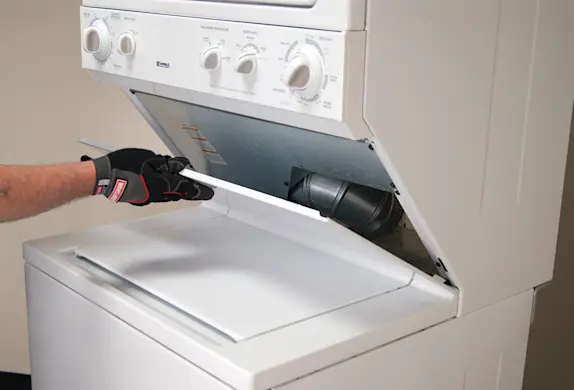
PHOTO: Remove the front access panel.
- 4. Remove the top washer panel
Remove the top panel screws.
Disconnect the lid switch wires.
Pull off the top washer panel.
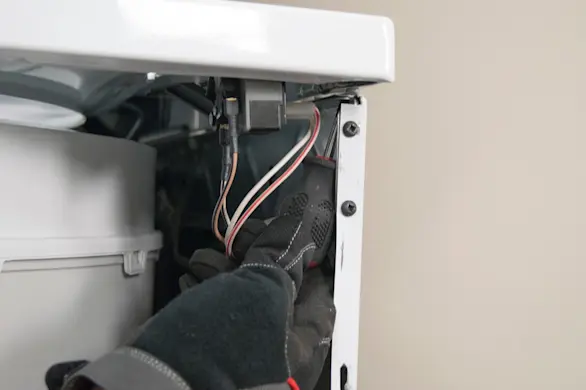
PHOTO: Remove the screw from under the right front corner of the top panel. 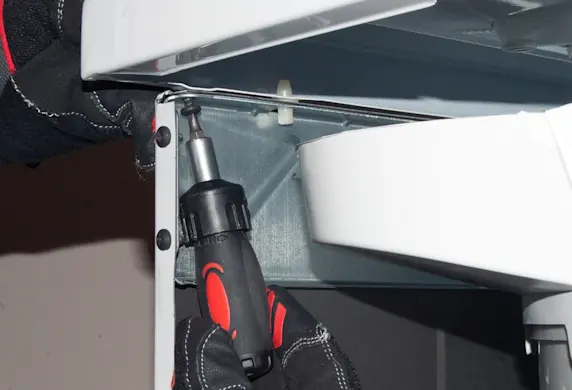
PHOTO: Remove the screw from under the left front corner of the top panel. 
PHOTO: Disconnect the lid lock switch wires. 
PHOTO: Remove the top washer panel.
- 5. Remove the front suspension springs
Tilt the top of the tub forward and remove the front vertical and horizontal suspension springs.

PHOTO: Remove the vertical spring. 
PHOTO: Remove the horizontal spring.
- 6. Remove the snubber ring
Use a crow bar and wood block to pry up the leg and dome.
Use a wire hook to pull out the snubber ring.
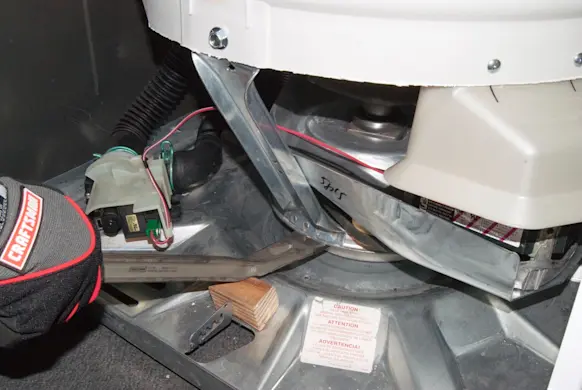
PHOTO: Pry up the leg and dome. 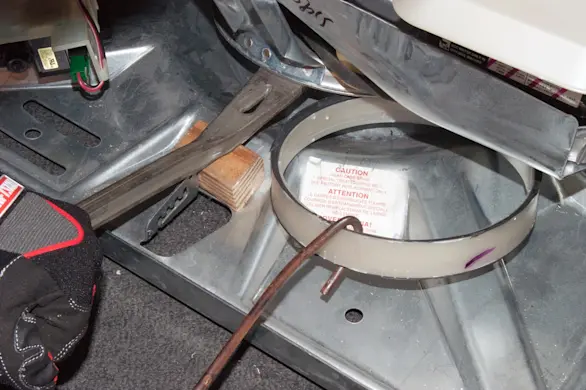
PHOTO: Pull out the snubber ring. Warning: Never place your hand under the leg and dome assembly while it's raised.
- 7. Install the new snubber ring
Position the new snubber ring with the arrow pointing up.
With the leg and dome assembly pried up, use the wire hook to slide the new snubber into position.
Lower the leg and dome assembly and pull the block of wood out of the cabinet.

PHOTO: Install the new snubber ring. Warning: Never place your hand under the leg and dome assembly while it's raised.
- 8. Reinstall the front suspension springs
Tilt the top of the tub forward and reconnect the horizontal and vertical suspension springs.
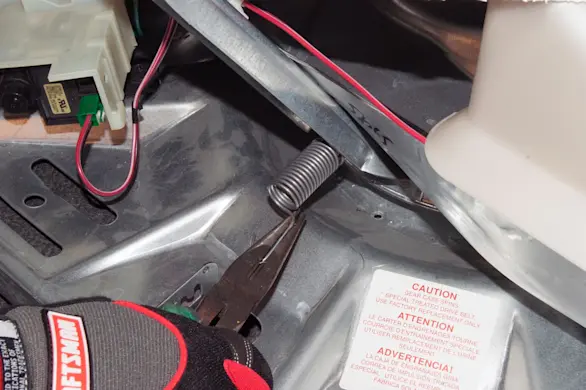
PHOTO: Reinstall the horizontal spring. 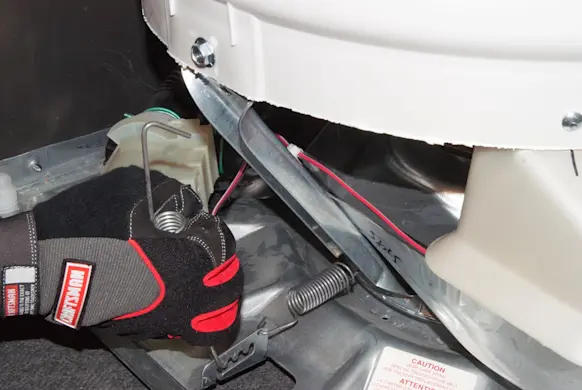
PHOTO: Reinstall the vertical spring.
- 9. Reinstall the top washer panel
Position the top washer panel on the washer cabinet and reinstall the mounting screws.
Reconnect the lid switch wires.
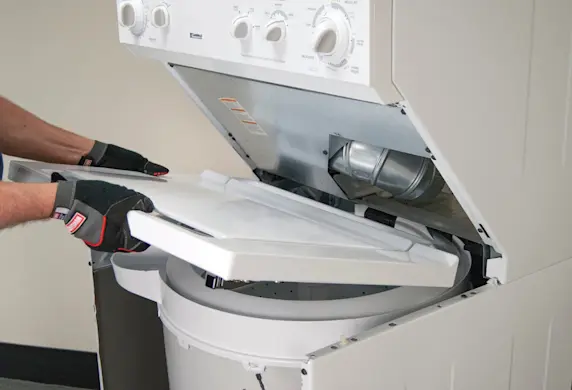
PHOTO: Reinstall the top washer panel. 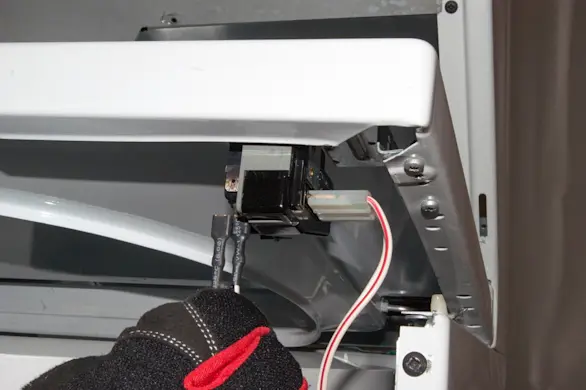
PHOTO: Reconnect the lid lock switch wires.
- 10. Reinstall the front access panel
Position the front access panel on the laundry center frame and reinstall the mounting screws.

PHOTO: Reinstall the front access panel. 
PHOTO: Reinstall the access panel mounting screws.
- 11. Reinstall the washer front panel
Push the front panel mounting tabs into the mounting slots on the frame.
Slide the front panel up slightly to engage the mounting tabs and reinstall the mounting screws.

PHOTO: Reinstall the washer front panel. 
PHOTO: Reinstall the screws at the bottom of the front panel.
- 12. Restore power to the laundry center
Plug the laundry center into the wall outlet. If the dryer uses gas, turn on the gas supply.